


-
Spread Windows Forms Product Documentation
- Getting Started
-
Developer's Guide
- Understanding the Product
- Working with the Component
- Spreadsheet Objects
- Ribbon Control
- Sheets
- Rows and Columns
- Headers
- Cells
-
Cell Types
- Understanding Cell Type Basics
- Understanding How Cell Types Work
- Understanding How Cell Types Display and Format Data
- Understanding How Cell Type Affects Model Data
- Working with Editable Cell Types
-
Working with Graphical Cell Types
- Setting a Barcode Cell
- Setting a Button Cell
- Setting a Check Box Cell
- Setting a Color Picker Cell
- Setting a Combo Box Cell
- Setting a Hyperlink Cell
- Setting an Image Cell
- Setting a List Box Cell
- Setting a Multiple-Column Combo Box Cell
- Setting a Multiple Option Cell
- Setting a Progress Indicator Cell
- Setting a Slider Cell
- Understanding Additional Features of Cell Types
- Data Binding
- Customizing the Sheet Appearance
- Customizing Interaction in Cells
- Tables
- Pivot Table
- Understanding the Underlying Models
- Customizing Row or Column Interaction
- Formulas in Cells
- Sparklines
- Keyboard Interaction
- Events from User Actions
- File Operations
- Storing Excel Summary and View
- Printing
- Chart Control
- Enhanced Chart
- Customizing Drawing
- Touch Support with the Component
- Spread Designer Guide
- Assembly Reference
- Import and Export Reference
- Version Comparison Reference
Setting a Barcode Cell
You can display a barcode graphic in a barcode cell. Various barcode types are available such as barcodes that are used in retail, for shipping, and so on. You can set height and width properties for the barcode display.
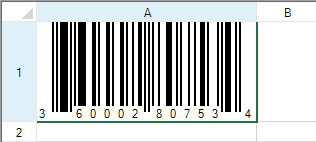
You use the BarCodeCellType class to set the barcode cell and its properties.
Customizing the Appearance
You can customize the barcode cell by using these properties:
Property | Description |
|---|---|
Sets whether to accept the check digit in the input. | |
Sets whether the barcode adjusts its size based on the barcode size. | |
Sets whether the size is based on the cell size. | |
Sets whether to fine tune the width of the barcode. | |
Sets the left side and right side padding of the barcode. | |
Sets the height and width of the barcode. | |
Sets whether the check digit is available for the barcode. | |
Sets whether the barcode draws a barcode image. | |
Sets the number of the fixed digits of the value of the barcode. | |
Determines whether the editor contains a formula. | |
Sets whether to display the custom message string below the barcode image (if the barcode type allows it). | |
Sets the alignment of the custom message below the barcode image. | |
Sets a custom message to display below the barcode image. | |
Sets the minimum height of entire barcode. | |
Sets the size of the barcode module. | |
Sets the resolution of the barcode. | |
Sets the rotation angle of the barcode. | |
Sets the bar type of the barcode. | |
Sets the unit of measure of the barcode. |
The FixedLength property only works with PostNet, ITF, or Code39 barcode types. The PostNet barcode option allows one less digit for the value than the setting for the FixedLength property.
Only the bar code types that have a line at the bottom to display the value can display a message (as set by the Message, MessagePosition, and MessageValue properties).
Barcode Types
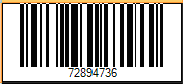
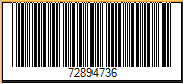
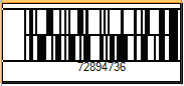
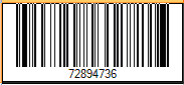
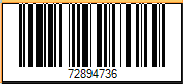
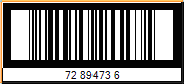
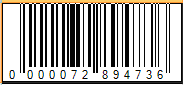
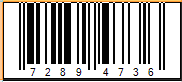
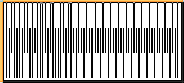
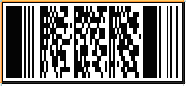
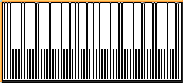
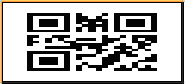
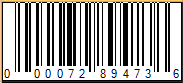
Here is a sample image of each of the supported barcode types that can be set with the Type property. The Jan8 type is similar to the EAN8 type. For more information about barcode types, refer to this article: https://www.gs1.org/standards/barcodes.
Barcode Type | Sample Barcode Image |
|---|---|
Code128 |
|
Code39 |
|
Code49 |
|
Code93 |
|
EAN128 |
|
ITF |
|
Jan13 |
|
Jan8 |
|
JapanesePostal |
|
NW7 |
|
PDF417 |
|
PostNet |
|
QRCode |
|
UPC |
|
Customizing the Message
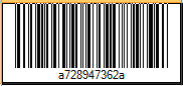
You can display a customizable text message at the bottom of the barcode cell for several barcode types. This is supported for those barcode types that display the number value below the barcode image. (For example, PostNet, PDF417, JapanesePostal, and QRCode do not display a message.) In the example here, the value has been replaced with a text message. The code that generated this barcode image is shown below. The message is set using these properties: Message, MessagePosition, and MessageValue.
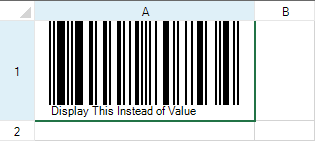
FarPoint.Win.Spread.CellType.BarCodeCellType barc = new FarPoint.Win.Spread.CellType.BarCodeCellType();
barc.DisplayMode = FarPoint.Win.Spread.CellType.BarCodeDisplayMode.Image;
barc.Message = true;
barc.MessagePosition = FarPoint.Win.Spread.CellType.BarCode.MessagePosition.Left;
barc.MessageValue = "Display This Instead of Value";
barc.Type = new FarPoint.Win.Spread.CellType.BarCode.UPC();
fpSpread1.ActiveSheet.Columns[0].Width = 220;
fpSpread1.ActiveSheet.Rows[0].Height = 100;
fpSpread1.ActiveSheet.Cells[0, 0].CellType = barc;
fpSpread1.ActiveSheet.Cells[0, 0].Value = 36000280753;
Dim barc As New FarPoint.Win.Spread.CellType.BarCodeCellType
barc.DisplayMode = FarPoint.Win.Spread.CellType.BarCodeDisplayMode.Image
barc.Message = True
barc.MessagePosition = FarPoint.Win.Spread.CellType.BarCode.MessagePosition.Left
barc.MessageValue = "Display This Instead of Value"
barc.Type = New FarPoint.Win.Spread.CellType.BarCode.UPC
fpSpread1.ActiveSheet.Columns(0).Width = 220
fpSpread1.ActiveSheet.Rows(0).Height = 100
fpSpread1.ActiveSheet.Cells(0, 0).CellType = barc
fpSpread1.ActiveSheet.Cells(0, 0).Value = 36000280753Note that some graphical elements in certain cell types are affected by XP themes (visual styles). Setting the VisualStyles property of the Spread component to "off" can allow visual customizations of those graphical cell types to work as expected. For more information, refer to Using XP Themes with the Component.
For more information on the properties and methods of this cell type, refer to the BarCodeCellType class.
Using the Properties Window
At design time, in the Properties window, select the Spread component.
Select the Sheets property.
Click the button to display the SheetView Collection Editor.
In the Members list, select the sheet in which the cells appear.
In the property list, select the Cells property and then click the button to display the Cell, Column, and Row Editor.
Select the cells for which you want to set the cell type.
In the property list, select the CellType property and choose the BarCode cell type.
Expand the list of properties under the CellType property. Select and set these specific properties as needed.
Click OK to close the Cell, Column, and Row Editor.
Click OK to close the SheetView Collection Editor.
Using Code
Define the barcode cell by creating an instance of the BarCodeCellType class.
Specify the properties of the barcode cell.
Assign the barcode cell to a cell or range of cells by setting the CellType property for a cell, column, row, or style to the BarCodeCellType object.
Example
This example creates a bar code cell.
FarPoint.Win.Spread.CellType.BarCodeCellType brcdcell = new FarPoint.Win.Spread.CellType.BarCodeCellType();
FpSpread1.Sheets[0].Cells[0, 0].CellType = brcdcell;
FpSpread1.Sheets[0].Cells[0, 0].Value = "12345";
Dim brcdcell As New FarPoint.Win.Spread.CellType.BarCodeCellType
FpSpread1.Sheets(0).Cells(0, 0).CellType = brcdcell
FpSpread1.Sheets(0).Cells(0, 0).Value = "12345"Using the Spread Designer
Select the cell or cells in the work area.
In the property list, in the Misc category, select CellType. From the drop-down list, choose the BarCode cell type. Now expand the CellType property and various properties are available that are specific to this cell type. Select and set those properties as needed.
Or right-click on the cell or cells and select Cell Type. From the list, select Barcode. In the CellType editor, set the properties you need. Click Apply.
From the File menu choose Apply and Exit to apply your changes to the component and exit Spread Designer.