


-
Spread Windows Forms Product Documentation
- Getting Started
-
Developer's Guide
- Understanding the Product
-
Working with the Component
- Adding NuGet Package in Spread Windows Forms
- Migrate .NET Framework Project to .NET 8 Platform
- Migrate .NET Framework Project to .NET 6 Platform
- Adding a Component to a Visual Studio 2019 or 2022 Project
- Adding a Component to a Visual Studio 2017 Project
- Adding a Component to a Visual Studio 2013 Project
- Setting the Properties
- Adding Support for High DPI Settings
- Spreadsheet Objects
- Ribbon Control
- Sheets
- Rows and Columns
- Headers
- Cells
- Cell Types
- Data Binding
- Customizing the Sheet Appearance
- Customizing Interaction in Cells
- Tables
- Pivot Table
- Understanding the Underlying Models
- Customizing Row or Column Interaction
- Formulas in Cells
- Sparklines
- Keyboard Interaction
- Events from User Actions
- File Operations
- Storing Excel Summary and View
- Printing
- Chart Control
- Enhanced Chart
- Customizing Drawing
- Touch Support with the Component
- Spread Designer Guide
- Assembly Reference
- Import and Export Reference
- Version Comparison Reference
Adding NuGet Package in Spread Windows Forms
The following section explains how to use Spread Windows Forms in a .NET Framework and .NET 6 platform by using GrapeCity.Spread.WinForms NuGet package.
.NET Framework
Follow the below steps to create a Windows Forms application in .NET Framework platform:
Click on 'Create a new project' and select 'Windows Forms App (.NET Framework)'.
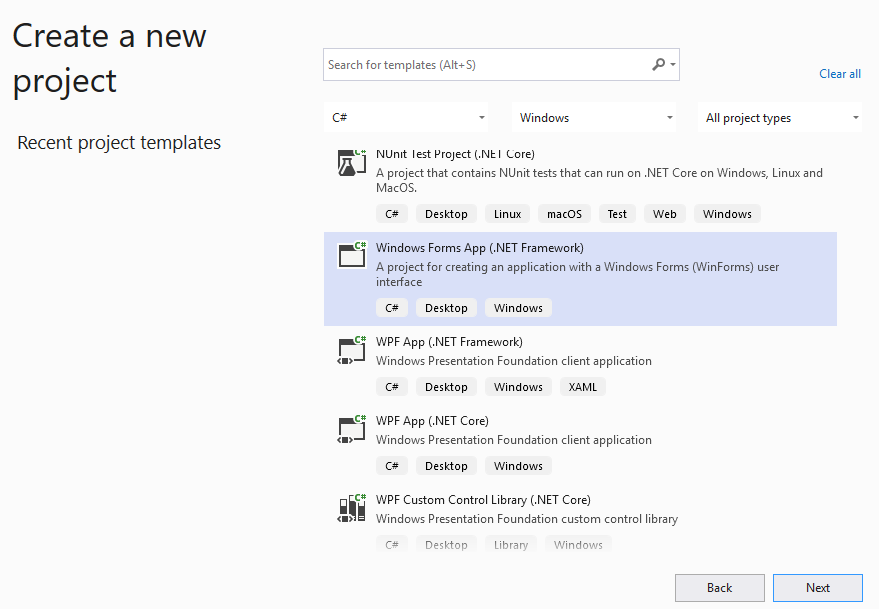
Name the project and click Create.
Right click on References and click 'Manage NuGet Packages'.
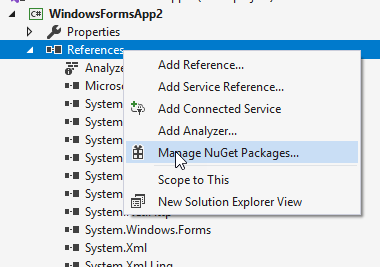
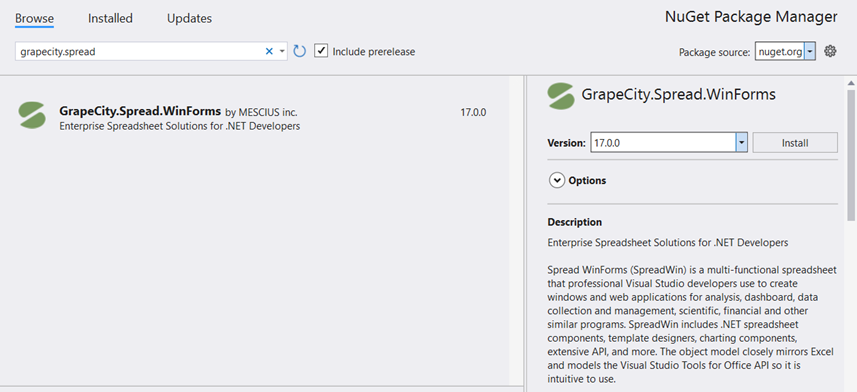
Search 'Grapecity.Spread' and install GrapeCity.Spread.WinForms NuGet package in your solution.
Right click Properties and add a new item.
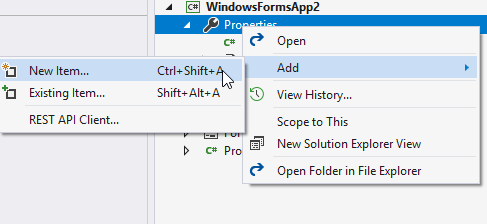
Add a text file from 'Add new item' dialog and name it as licenses.licx.
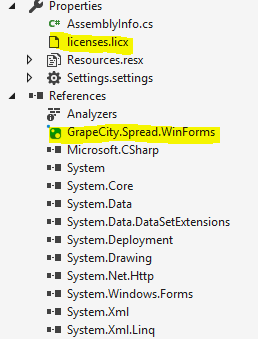
Add Spread's license string as follows:
FarPoint.Win.Spread.FpSpread, FarPoint.Win.Spread
Switch to the designer, and drag drop the fpSpread control on the form. Set the Name, Size, Sheet Count, and Cell Text properties from the Properties window.
OR
Double click Form1.cs and add the fpSpread control using the following code in its form load event.
FpSpread fpSpread1 = new FpSpread();
fpSpread1.Location = new System.Drawing.Point(52, 12);
fpSpread1.Name = "fpSpread1";
fpSpread1.Size = new System.Drawing.Size(653, 380);
fpSpread1.Sheets.Count = 2;
this.Controls.Add(fpSpread1);
fpSpread1.ActiveSheet.Cells[0, 0].Text = "Welcome";
Build the project and run to view fpSpread control on to the Form.
.NET 6
Follow the below steps to create a Windows Forms application in .NET 6 platform:
Click on 'Create a new project' and select 'Windows Forms App (.NET)'.
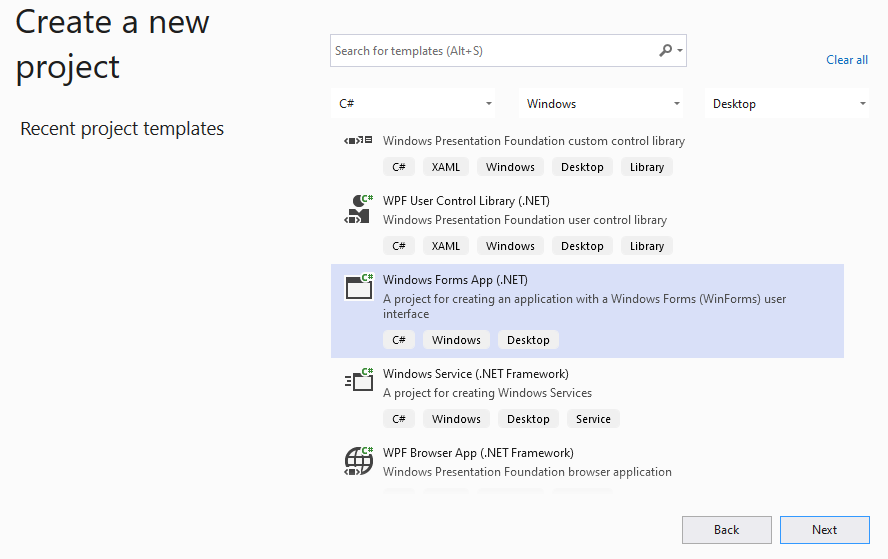
Name the project and click Create.
Right click on References and click 'Manage NuGet Packages'.
Search 'Grapecity.Spread' and install GrapeCity.Spread.WinForms NuGet package in your solution.
Switch to the designer, and drag drop the fpSpread control on the form. Set the Name, Size, Sheet Count, and Cell Text properties from the Properties window.
OR
Double click Form1.cs and add the fpSpread control using the following code in its form load event.
FpSpread fpSpread1 = new FpSpread();
fpSpread1.Location = new System.Drawing.Point(52, 12);
fpSpread1.Name = "fpSpread1";
fpSpread1.Size = new System.Drawing.Size(653, 380);
fpSpread1.Sheets.Count = 2;
this.Controls.Add(fpSpread1);
fpSpread1.ActiveSheet.Cells[0, 0].Text = "Welcome";
Build the project and run to view fpSpread control on to the Form.
!type=note
Note: Licenses.licx file with FpSpread license string isn't required in .NET 6 application.
To work with the Spread Designer in your project using NuGet packages, refer to the topic Using Spread Designer in Runtime.