
-
Spread Windows Forms Product Documentation
- Getting Started
-
Developer's Guide
- Understanding the Product
- Working with the Component
- Spreadsheet Objects
- Ribbon Control
- Sheets
- Rows and Columns
- Headers
- Cells
- Cell Types
- Data Binding
- Customizing the Sheet Appearance
- Customizing Interaction in Cells
- Tables
- Pivot Table
- Understanding the Underlying Models
- Customizing Row or Column Interaction
- Formulas in Cells
- Sparklines
- Keyboard Interaction
- Events from User Actions
- File Operations
- Storing Excel Summary and View
- Printing
- Chart Control
- Enhanced Chart
- Customizing Drawing
- Touch Support with the Component
- Spread Designer Guide
- Assembly Reference
- Import and Export Reference
- Version Comparison Reference
Working With Shapes (Enhanced Shape Engine)
Spread for Winforms provides support for adding and customizing shapes and group shapes in the worksheets. Shapes are compatible with Excel and with all built-in shapes. Users can copy shapes from Excel to Spread and vice a versa.
Enable Shape Engine
The new shape engine is not enabled by default. Users must use the following code to manually turn it on before working with shapes in the spreadsheets:
// Enable the shape engine
fpSpread1.Features.EnhancedShapeEngine = true;
' Enable the shape engine
FpSpread1.Features.EnhancedShapeEngine = True;Grouping and Ungrouping Shapes
Users can group or ungroup shapes and move or rotate the grouped shapes just like in Excel by using the Group() method of the IShapeRange interface and the Ungroup() method of the IShapeBase interface.
Group shapes are generated when multiple drawing objects are clustered together in a spreadsheet. It is beneficial to use group shapes in a scenario wherein the spreadsheet contains multiple shapes and users need to optimize the entire execution of similar kind of tasks executed on those shapes (like adding similar kind of style to two or more shapes, rotating or moving them together). This will ensure that the desired consistency is maintained in all the shapes. While working with shapes in Spread WinForms Designer, users can use the ribbon bar to change the text settings for the shape.
Example - For instance, let's say you want to rotate or move two or more shapes inserted in a worksheet. One way to do this would be to rotate each shape individually by setting its rotation angle. However, this task can become too cumbersome and time consuming to handle manually especially when there are multiple shapes in the worksheet. Instead, you can simply group two or more shapes in the worksheet and rotate the grouped shape as depicted in the image shared below.
The following example code shows how to add multiple shapes and group/ungroup the shapes embedded in the spreadsheet.
// Add Multiple Shapes in activeSheet using AddShape() method
fpSpread1.AsWorkbook().ActiveSheet.Shapes.AddShape(AutoShapeType.Rectangle, 10, 10, 100, 100);
fpSpread1.AsWorkbook().ActiveSheet.Shapes.AddConnector(ConnectorType.Straight, 110, 100, 200, 200);
fpSpread1.AsWorkbook().ActiveSheet.Shapes.AddShape(AutoShapeType.Rectangle, 200, 200, 100, 100);

// Group Shapes using Group() method.
IGroupShape groupShape = fpSpread1.AsWorkbook().ActiveSheet.Shapes.Range(new int[] { 0, 1, 2 }).Group();

// Ungroup Shapes using Ungroup() method.
groupShape.Ungroup();
' Add Multiple Shapes in activeSheet using AddShape() method.
FpSpread1.AsWorkbook().ActiveSheet.Shapes.AddShape(AutoShapeType.Rectangle, 10, 10, 100, 100)
FpSpread1.AsWorkbook().ActiveSheet.Shapes.AddConnector(ConnectorType.Straight, 110, 100, 200, 200)
FpSpread1.AsWorkbook().ActiveSheet.Shapes.AddShape(AutoShapeType.Rectangle, 200, 200, 100, 100)
' Group Shapes using Group() method.
Dim groupShape As IGroupShape = FpSpread1.AsWorkbook().ActiveSheet.Shapes.Range(New Integer() {0, 1, 2}).Group()
' Ungroup Shapes using Ungroup() method.
groupShape.Ungroup()Binding Shape Properties
Users can bind the shape properties to the cell and set property bindings to add additional functionalities to the shapes.
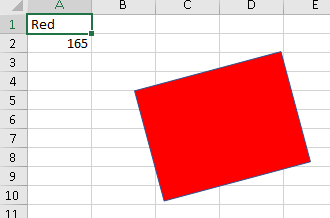
For example - In the following image, a rectangular shape has been added in the worksheet and then the binding operation has been done on the shape to change its color (defined in cell A1) and value (defined in cell A2) at runtime as shown in the image shared below.
The following example code binds the shapes in the spreadsheet with different properties.
// Binding Shapes with different properties
// Set cell values
fpSpread1.ActiveSheet.Cells[0, 0].Value = "Red";
fpSpread1.ActiveSheet.Cells[1, 0].Value = 165;

// Add a rectangle shape
var rectangle = fpSpread1.AsWorkbook().ActiveSheet.Shapes.AddShape(AutoShapeType.Rectangle, 118.5, 53.25, 151.5, 114);
// Binding shape properties with cell A1 & A2 values
// If cell A1 & A2 values are changed at runtime then it is reflected back in shape too
rectangle.Bindings.Add(nameof(IShape.Fill), "A1");
rectangle.Bindings.Add("Rotation", "A2");
' Binding Shapes with different properties
' Set cell values
FpSpread1.ActiveSheet.Cells(0, 0).Value = "Red"
FpSpread1.ActiveSheet.Cells(1, 0).Value = 165
' Add a rectangle shape
Dim rectangle = FpSpread1.AsWorkbook().ActiveSheet.Shapes.AddShape(AutoShapeType.Rectangle, 118.5, 53.25, 151.5, 114)
' Binding shape properties with cell A1 & A2 values
' If cell A1 & A2 values are changed at runtime then it is reflected back in shape too
rectangle.Bindings.Add(NameOf(IShape.Fill), "A1")
rectangle.Bindings.Add("Rotation", "A2")Shape Fills and Effects
While working with shapes in spreadsheets, users can also customize the fill format (solid fill, pattern fill, gradient fill, and texture fill etc.), modify the shape lines (solid and gradient lines), shape text and shape effects (inner shadow, outer shadow, glow, soft edge, reflection) along with a lot of other predefined settings.
The following image depicts two shapes - one rectangle and other octagon with different gradient settings applied to them.
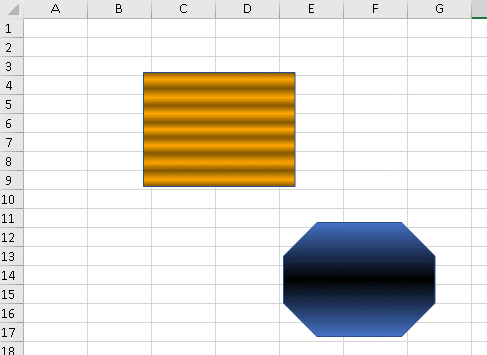
The following image depicts shape texture with image.

The following code shows how to customize shape fill in the spreadsheet.
// Add a rectangle shape
var rectangle = fpSpread1.AsWorkbook().ActiveSheet.Shapes.AddShape(AutoShapeType.Rectangle, 118.5, 53.25, 151.5, 114);

// Set shapes PresetGradient with GradientStyle
rectangle.Fill.PresetGradient(GradientStyle.Horizontal, 3, 0);

// Add an Octagon shape
var Octagon = fpSpread1.AsWorkbook().ActiveSheet.Shapes.AddShape(AutoShapeType.Octagon, 258.5, 203.25, 151.5, 114);

// Set shapes OneColorGradient with GradientStyle
Octagon.Fill.OneColorGradient(GradientStyle.Horizontal, 3, 0);

// Set Shape's texture with Image
shapes.Fill.UserTextured(@"..\..\\Logo.png");
shapes.Fill.TextureAlignment = GrapeCity.Drawing.RectAlignment.TopLeft;
' Add a rectangle shape
Dim rectangle = FpSpread1.AsWorkbook().ActiveSheet.Shapes.AddShape(AutoShapeType.Rectangle, 118.5, 53.25, 151.5, 114)
' Set shapes PresetGradient with GradientStyle
rectangle.Fill.PresetGradient(GradientStyle.Horizontal, 3, 0)
' Add an Octagon shape
Dim Octagon = fpSpread1.AsWorkbook().ActiveSheet.Shapes.AddShape(AutoShapeType.Octagon, 258.5, 203.25, 151.5, 114)
' Set shapes OneColorGradient with GradientStyle
Octagon.Fill.OneColorGradient(GradientStyle.Horizontal, 3, 0)
' Set Shape's texture with Image
shapes.Fill.UserTextured("..\..\\Logo.png")
shapes.Fill.TextureAlignment = GrapeCity.Drawing.RectAlignment.TopLeft!type=note
Note: The following points must be kept in mind while working with shapes in Spread for Winforms:
The border color of the shape is darker than the border color in Excel.
The preview row feature is not supported while adding shapes to the spreadsheets.
The text in the shape may appear blurred as compared to the text in normal cell.
When the PresetShadow() method is used, applying the blur effect will not work.
The Shape feature doesn't support undo action, drag, drop and move operations on the rows and columns (i.e. SheetView.MoveColumn(0, 1, true) is not supported).
Adding 3-D shapes is not supported.
While importing a shape, it is important to ensure that the data is imported properly but the Preset type is not kept like PresetShadowType or ShapeStyle etc.
Shapes can't be added when width/height = 0.
The shape painting style of connector points in group shapes will be different in Excel when shapes are selected. This is a bug of Excel.
Working with old shape engine - The new shape engine is different from the old shape engine. Using both of them at the same time may cause some unexpected behavior (for instance - while moving/resizing the old shape, the display order of shapes may be changed. This issue can be seen when worksheet contains both the new shape and chart/camera shape (that are still using the old shape engine). It's the limitation in V13 and this issue will be resolved after the Chart/Camera Shape feature is moved to the new shape engine.
Painting shapes of size larger than 8K for each dimension (for e.g.- 7680 × 7680) is not supported. IColorFormat.ARGB may return different values than the assigned value because the alpha channel is stored as percentage in the range 0....to 100.
Shape Text Orientation
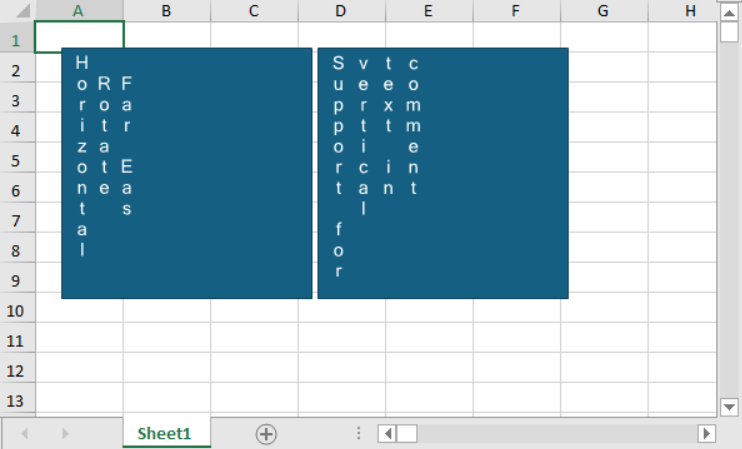
Users can stack text vertically within a shape using the HorizontalRotatedFarEast property of TextOrientation enumeration. With this API, you can control the orientation and formatting of text within the shapes.
The following example code shows how to change text orientation in shape.
// Add support paint stacked text direction for shape
fpSpread1.Features.EnhancedShapeEngine = true;
var TestActiveSheet = fpSpread1.AsWorkbook().ActiveSheet;
IShape shape = TestActiveSheet.Shapes.AddShape(AutoShapeType.Rectangle, 20, 20, 200, 200);
shape.TextFrame.TextRange.Text = "Horizontal Rotated\n Far East";
shape.TextFrame.WordWrap = true;
shape.TextFrame.Orientation = GrapeCity.Spreadsheet.Drawing.TextOrientation.HorizontalRotatedFarEast;
IShape shape2 = TestActiveSheet.Shapes.AddShape(AutoShapeType.Rectangle, 225, 20, 200, 200);
shape2.TextFrame.TextRange.Text = "Support for vertical text in comment";
shape2.TextFrame.WordWrap = true;
shape2.TextFrame.Orientation = GrapeCity.Spreadsheet.Drawing.TextOrientation.HorizontalRotatedFarEast;
' Add support paint stacked text direction for shape
FpSpread1.Features.EnhancedShapeEngine = True
Dim TestActiveSheet = FpSpread1.AsWorkbook().ActiveSheet
Dim shape As IShape = TestActiveSheet.Shapes.AddShape(AutoShapeType.Rectangle, 20, 20, 200, 200)
shape.TextFrame.TextRange.Text = "Horizontal Rotated" & vbLf & " Far East"
shape.TextFrame.WordWrap = True
shape.TextFrame.Orientation = GrapeCity.Spreadsheet.Drawing.TextOrientation.HorizontalRotatedFarEast
Dim shape2 As IShape = TestActiveSheet.Shapes.AddShape(AutoShapeType.Rectangle, 225, 20, 200, 200)
shape2.TextFrame.TextRange.Text = "Support for vertical text in comment"
shape2.TextFrame.WordWrap = True
shape2.TextFrame.Orientation = GrapeCity.Spreadsheet.Drawing.TextOrientation.HorizontalRotatedFarEastThe image below depicts vertically oriented text in a shape.
Drag and Copy Shapes
Users have the ability to move or copy a shape by holding the right-mouse button and dragging shapes to the target location. A context-menu pops up after releasing the mouse button and shows the option to move or copy the shape.
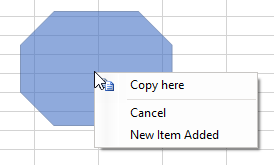
You can also customize the above context menu by accessing it through the ContextMenuType.ShapeDrag enumeration option. The following image illustrates a customized context menu where the "Move" option is hidden and a new item has been added.
The following code shows how to access and customize the shape drag context menu.
private void ShapeContextMenu_Load(object sender, EventArgs e)
{
    // Enable the shape engine
    fpSpread1.Features.EnhancedShapeEngine = true;
    var worksheet = fpSpread1_Sheet1.AsWorksheet();

    // Add shape in worksheet
    worksheet.Shapes.AddShape(GrapeCity.Spreadsheet.Drawing.AutoShapeType.Octagon, 10, 10, 151.5, 114);
    // Capture BeforeRightClick event
    fpSpread1.BeforeRightClick += OnBeforeRightClick;
}
private void OnBeforeRightClick(object sender, FarPoint.Win.Spread.BeforeRightClickEventArgs e)
{
    if (e.ContextMenuType == FarPoint.Win.Spread.ContextMenuType.ShapeDrag)
    {
        GrapeCity.Spreadsheet.Drawing.IShapeRange movingShapes = (GrapeCity.Spreadsheet.Drawing.IShapeRange)sender;
        // To remove context menu
        // e.ContextMenuStrip = null;
        // To remove item from context menu
        e.ContextMenuStrip.Items[0].Visible = false;
        // To add a new item in context menu
        e.ContextMenuStrip.Items.Add("New Item Added");
    }
}
Private Sub ShapeContextMenu_Load(sender As Object, e As EventArgs) Handles MyBase.Load
'Enable the shape engine
FpSpread1.Features.EnhancedShapeEngine = True
Dim worksheet = FpSpread1_Sheet1.AsWorksheet()
'Add shape in worksheet
worksheet.Shapes.AddShape(GrapeCity.Spreadsheet.Drawing.AutoShapeType.Octagon, 10, 10, 151.5, 114)
'Capture BeforeRightClick event
AddHandler FpSpread1.BeforeRightClick, AddressOf OnBeforeRightClick
End Sub
Private Sub OnBeforeRightClick(ByVal sender As Object, ByVal e As FarPoint.Win.Spread.BeforeRightClickEventArgs)
If e.ContextMenuType = FarPoint.Win.Spread.ContextMenuType.ShapeDrag Then
Dim movingShapes As GrapeCity.Spreadsheet.Drawing.IShapeRange = CType(sender, GrapeCity.Spreadsheet.Drawing.IShapeRange)
'To remove context menu
'e.ContextMenuStrip = Nothing
'To remove item from context menu
e.ContextMenuStrip.Items(0).Visible = False
'To add a new item in context menu
e.ContextMenuStrip.Items.Add("New Item Added")
End If
End SubAdd Shapes to Charts/ChartSheet
Users can embed shapes inside a chart object or in a ChartSheet. Once the shapes are added to a chart or ChartSheet, these shapes interact as normal shapes, but their boundaries are limited to the extent of the chart only. To work with shapes, use the properties and methods of the IShape and IShapeRange interfaces.
Examples
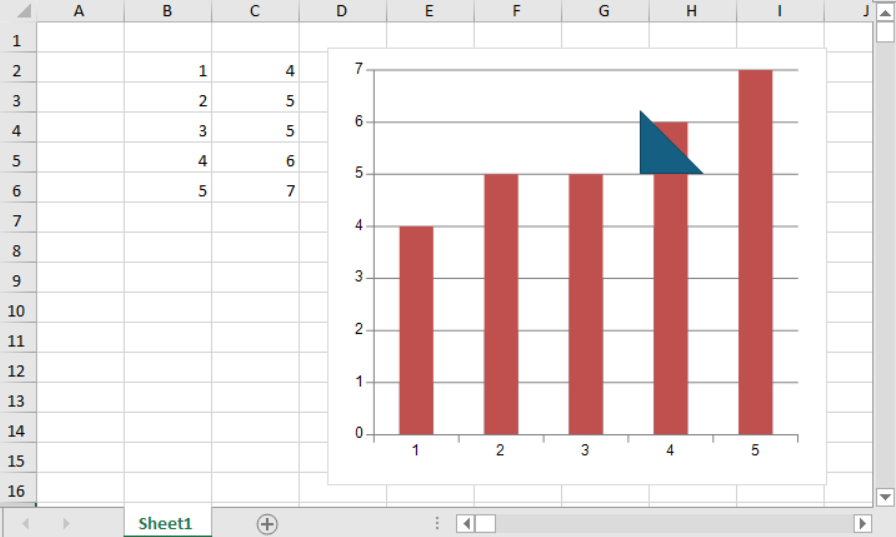
The following image depicts a triangle shape embedded inside the chart object.
The following example code shows how to add a shape to a chart object.
// Add shape to ChartObject
IWorksheet TestActiveSheet = fpSpread1.AsWorkbook().ActiveSheet;
fpSpread1.Features.EnhancedShapeEngine = true;
TestActiveSheet.SetValue(1, 1, new int[,] { { 1, 4 }, { 2, 5 }, { 3, 5 }, { 4, 6 }, { 5, 7 } });
FarPoint.Win.Spread.Model.CellRange range = new FarPoint.Win.Spread.Model.CellRange(1, 1, 5, 2);
fpSpread1.ActiveSheet.AddChart(range, typeof(BarSeries), 400, 350, 250, 120, ChartViewType.View2D, false);
TestActiveSheet.ChartObjects[0].Chart.Shapes.AddShape(AutoShapeType.RightTriangle, 250, 50, 50, 50);
' Add shape to ChartObject
Dim TestActiveSheet As IWorksheet = FpSpread1.AsWorkbook().ActiveSheet
FpSpread1.Features.EnhancedShapeEngine = True
TestActiveSheet.SetValue(1, 1, New Integer(,) {
{1, 4},
{2, 5},
{3, 5},
{4, 6},
{5, 7}})
Dim range As FarPoint.Win.Spread.Model.CellRange = New FarPoint.Win.Spread.Model.CellRange(1, 1, 5, 2)
fpSpread1.ActiveSheet.AddChart(range, GetType(BarSeries), 400, 350, 250, 120, ChartViewType.View2D, False)
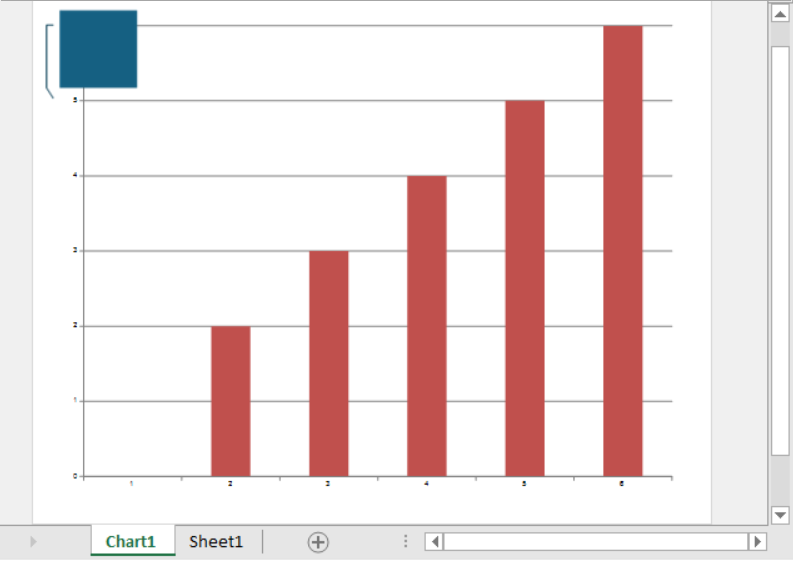
TestActiveSheet.ChartObjects(0).Chart.Shapes.AddShape(AutoShapeType.RightTriangle, 250, 50, 50, 50)Similarly, the image below shows a callout shape added to the ChartSheet.
The following example code shows how to add a shape to a ChartSheet.
// Add shape to ChartSheet
IWorksheet TestActiveSheet = fpSpread1.AsWorkbook().ActiveSheet;
fpSpread1.Features.EnhancedShapeEngine = true;
fpSpread1.AsWorkbook().ActiveSheet.SetValue(1, 1, new object[,] { { "data1", "data2", "data3", "data4", "data5", "data6" }, { "Series1", 2, 3, 4, 5, 6 }, { "Series2", 2, 3, 4, 5, 6 }, { "Series3", 12, 3, 4, 5, 6 }});
fpSpread1.AsWorkbook().Charts.Add();
var spreadchart = fpSpread1.Sheets[0].Charts[0];
spreadchart.DataFormula = "Sheet1!B2:G3";
var shape = fpSpread1.AsWorkbook().Charts[0].Shapes.AddCallout(CalloutType.Three, 15, 15, 100, 100);
' Add shape to ChartSheet
Dim TestActiveSheet As IWorksheet = FpSpread1.AsWorkbook().ActiveSheet
FpSpread1.Features.EnhancedShapeEngine = True
FpSpread1.AsWorkbook().ActiveSheet.SetValue(1, 1, New Object(,) {
{"data1", "data2", "data3", "data4", "data5", "data6"},
{"Series1", 2, 3, 4, 5, 6},
{"Series2", 2, 3, 4, 5, 6},
{"Series3", 12, 3, 4, 5, 6}})
FpSpread1.AsWorkbook().Charts.Add()
Dim spreadchart = FpSpread1.Sheets(0).Charts(0)
spreadchart.DataFormula = "Sheet1!B2:G3"
Dim shape = FpSpread1.AsWorkbook().Charts(0).Shapes.AddCallout(CalloutType.Three, 15, 15, 100, 100)Drawing Freeform
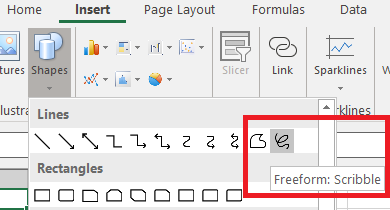
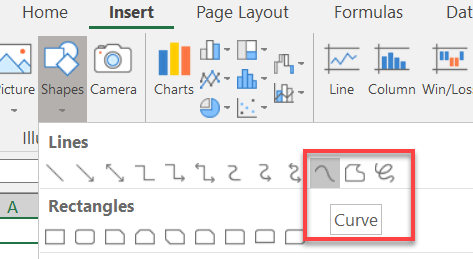
Users can create open and closed custom shapes using annotation mode options such as the Freeform Shape, Freeform Scribble, and Curve.
The Freeform Shape mode draws a shape that has both curved and straight segments.
The Freeform Scribble mode draws a shape that looks like it was drawn with a pen by hand or to create smooth curves.
The freeform shape and freeform scribble modes show the following behavior:
Pressing the Enter key finishes the drawing.
Pressing the ESC key skips the current segment and finishes the drawing.
In Freeform Shape, holding Shift makes the lines aligned by multiple(s) of 45 degrees.
The Curve mode draws a shape that has curved segments.
To draw a shape with curve annotation, click where you want the curve to start, move the mouse to draw, and then click wherever you want to add a curve. However, to end the drawing, perform any of the following:
Make a single click at the start point if you want a close shape.
Double-click or press the Esc/Enter key at any point if you want an open shape.
The following code shows how to enable the freeform shape, freeform scribble, and curve modes:
// Annotation Mode - FreeForm
fpSpread1.StartAnnotationMode(FarPoint.Win.Spread.AnnotationMode.Freeform);
// Annotation Mode - Scribble
fpSpread1.StartAnnotationMode(FarPoint.Win.Spread.AnnotationMode.Scribble);
// Annotation Mode - Curve
fpSpread1.LegacyBehaviors = LegacyBehaviors.None;
fpSpread1.StartAnnotationMode(FarPoint.Win.Spread.AnnotationMode.Curve);
'Annotation Mode - FreeForm
FpSpread1.StartAnnotationMode(FarPoint.Win.Spread.AnnotationMode.Freeform)
'Annotation Mode - Scribble
FpSpread1.StartAnnotationMode(FarPoint.Win.Spread.AnnotationMode.Scribble)
'Annotation Mode - Curve
fpSpread1.LegacyBehaviors = LegacyBehaviors.None
FpSpread1.StartAnnotationMode(FarPoint.Win.Spread.AnnotationMode.Curve)Using Spread Designer
Enable EnhancedShapeEngine from the Spread property side pane.
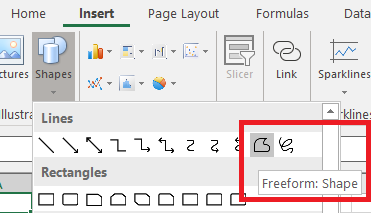
Select the Insert menu.
Select the Shapes dropdown.
Select the freeform mode of choice.
Draw the shape on the sheet.
From the File menu choose Apply and Exit to apply your changes to the component and exit Spread Designer.
Supported Shortcut Keys
The following keyboard shortcuts can be used while working with shapes:
Shortcut Key | Description |
|---|---|
Left/Right/Up/Down key | Use this key to move the shape to different directions. |
Tab or Shift+Tab | Use this key to move from one shape to other. |
Delete | Use this key to remove the selected shape from the spreadsheet. |
Alt+ Left/Right | Use this key to rotate the shape to left or right side. |
Shift + Up/Down/Left/Right | Use this key to resize the shape to smaller or bigger follow vertical or horizontal. |
Ctrl+A | Use this key to select all shapes in SheetView. |
Ctrl+D or Ctrl+move mouse | Use these keys to duplicate the selected shapes. |
Ctrl+Shift + Up/Down/Left/Right | Use this key to resize the shape (increase or decrease its dimensions) and rotate it vertically or horizontally. |
Keep right mouse down and move | Use this action to display the menu to select the "copy shape" option or the "move shape" option. |
Esc | Use this key to deselect the shape. |