-
Spread Windows Forms Product Documentation
- Getting Started
-
Developer's Guide
- Understanding the Product
- Working with the Component
- Spreadsheet Objects
- Ribbon Control
- Sheets
-
Rows and Columns
- Customizing the Number of Rows or Columns
- Adding a Row or Column
- Removing a Row or Column
- Showing or Hiding a Row or Column
- Setting the Row Height or Column Width
- Setting Frozen and Pinned Rows/Columns
- Moving Rows or Columns
- Creating Alternating Rows
- Setting up Preview Rows
- Input Data in Rows or Columns
- Rows or Columns That Have Data
- Adding a Tag to a Row or Column
- Headers
- Cells
- Cell Types
- Data Binding
- Customizing the Sheet Appearance
- Customizing Interaction in Cells
- Tables
- Pivot Table
- Understanding the Underlying Models
- Customizing Row or Column Interaction
- Formulas in Cells
- Sparklines
- Keyboard Interaction
- Events from User Actions
- File Operations
- Storing Excel Summary and View
- Printing
- Chart Control
- Enhanced Chart
- Customizing Drawing
- Touch Support with the Component
- Spread Designer Guide
- Assembly Reference
- Import and Export Reference
- Version Comparison Reference
Setting Frozen and Pinned Rows/Columns
You can freeze rows or columns or both in a sheet to make them unscrollable.
Note: Frozen rows or columns are not scrollable at run time but they are scrollable during design time.
Set Frozen Rows or Columns
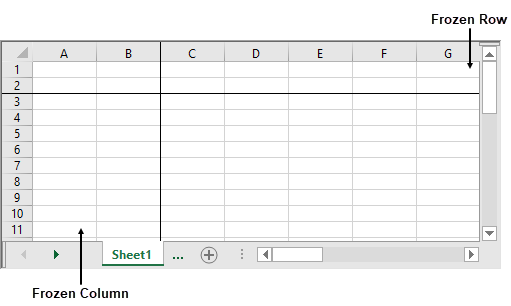
The frozen top rows are called leading rows and the frozen left-most columns are called leading columns. The frozen leading rows and columns stay at the top and left of the view regardless of the scrolling.
You can set the number of frozen rows or columns by using the FrozenRowCount or FrozenColumnCount properties.
// freeze rows and columns
FpSpread1.Sheets[0].FrozenColumnCount = 2;
FpSpread1.Sheets[0].FrozenRowCount = 2;
'freeze rows And columns
FpSpread1.Sheets(0).FrozenColumnCount = 2
FpSpread1.Sheets(0).FrozenRowCount = 2Set Trailing Frozen Rows or Columns
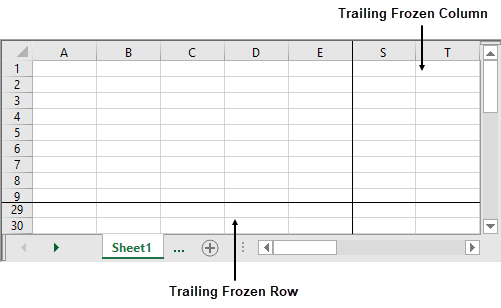
The frozen trailing rows and columns stay at the bottom and right of the view regardless of the scrolling.
You can set the number of frozen trailing bottom rows or trailing right-most columns by using FrozenTrailingColumnCount or FrozenTrailingRowCount properties.
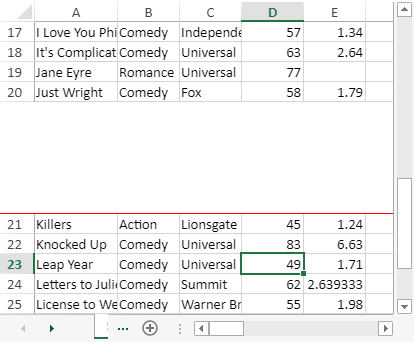
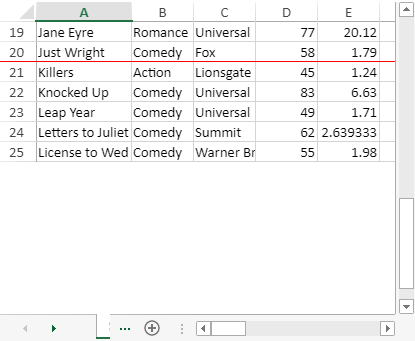
When the height of data rows and frozen trailing rows is less than that of the viewport area, you can choose whether to display the blank space between the data rows and frozen trailing rows or not. The FrozenTrailingStickToEdge option can be used to control this behavior and accepts RowCol enumeration values such as Both (default), Rows, Columns, None.
When FrozenTrailingStickToEdge = Row | When FrozenTrailingStickToEdge = None |
|---|---|
|
|
fpSpread1.ActiveSheet.Rows.Count = 25;
fpSpread1.ActiveSheet.Columns.Count = 20;
fpSpread1.Sheets[0].FrozenTrailingRowCount = 5;
fpSpread1.ActiveSheet.FrozenTrailingStickToEdge = FarPoint.Win.Spread.RowCol.Rows;
FpSpread1.ActiveSheet.Rows.Count = 25
FpSpread1.ActiveSheet.Columns.Count = 20
FpSpread1.Sheets(0).FrozenTrailingRowCount = 5
FpSpread1.ActiveSheet.FrozenTrailingStickToEdge = FarPoint.Win.Spread.RowCol.RowsNote:
When using the print option, trailing frozen rows and columns are not printed repeatedly at the bottom and right of every page, but print only once as the last row and column.
Leading frozen rows and columns can be repeatedly printed at the top and left of every page. For more information about repeating rows and columns, refer to Repeating Rows or Columns on Printed Pages.
Set Frozen Line Color
You can specify the color of the line displayed between the frozen and non-frozen areas of the worksheet with the FrozenLineColor property in the WorksheetOptions class. By default, no color is set to show the frozen line.
The preferred frozen line color can be chosen by using Color methods.
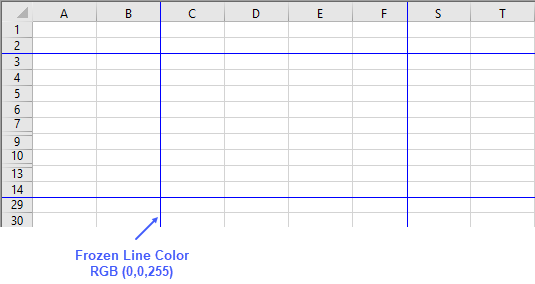
// freeze rows and columns
fpSpread1.Sheets[0].FrozenColumnCount = 2;
fpSpread1.Sheets[0].FrozenRowCount = 2;
fpSpread1.Sheets[0].FrozenTrailingColumnCount = 2;
fpSpread1.Sheets[0].FrozenTrailingRowCount = 2;
// set frozen line color
fpSpread1.AsWorkbook().Worksheets[0].Options.FrozenLineColor = GrapeCity.Spreadsheet.Color.FromArgb(0, 0, 255);
'freeze rows And columns
FpSpread1.Sheets(0).FrozenColumnCount = 2
FpSpread1.Sheets(0).FrozenRowCount = 2
FpSpread1.Sheets(0).FrozenTrailingColumnCount = 2
FpSpread1.Sheets(0).FrozenTrailingRowCount = 2
'set frozen line color
FpSpread1.AsWorkbook().Worksheets(0).Options.FrozenLineColor = GrapeCity.Spreadsheet.Color.FromArgb(0, 0, 255)Set Frozen Line Width
You can specify or change the width of the displayed line between the frozen and non-frozen areas of the worksheet using FrozenLineThickness property from the WorksheetOptions class.
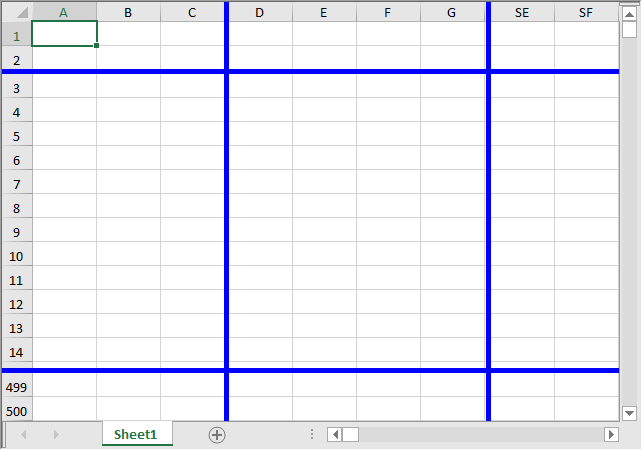
fpSpread1.ActiveSheet.FrozenColumnCount = 3;
fpSpread1.ActiveSheet.AsWorksheet().Options.FrozenLineThickness = 5;
fpSpread1.ActiveSheet.FrozenColumnCount = 3
fpSpread1.ActiveSheet.AsWorksheet().Options.FrozenLineThickness = 5Set Pinned Rows or Columns
Spread Windows Forms provides the TogglePinnedRows() and TogglePinnedColumns() methods to pin rows and columns, keeping them visible at the top or left while scrolling. This is useful for comparing data or keeping important rows or columns in view.
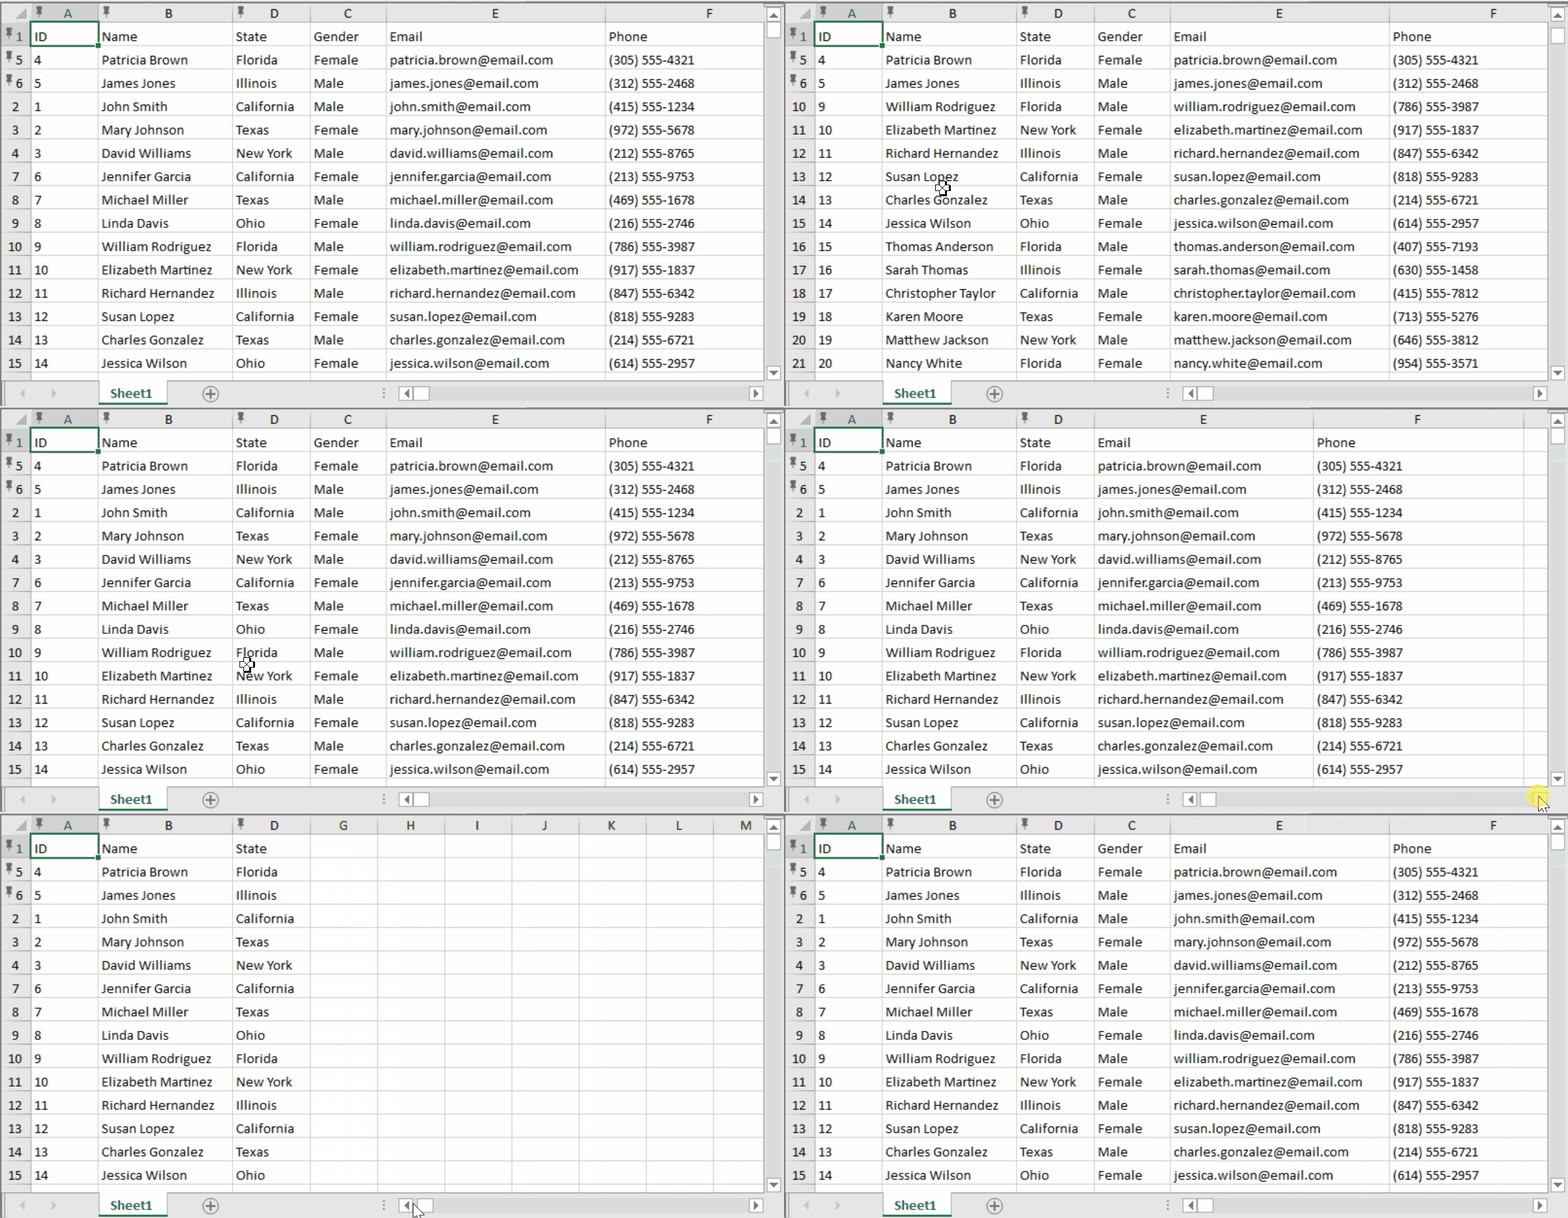
Pinned rows or columns can be used together with frozen rows or columns. If a pinned row is also within the frozen rows, it will be displayed as a frozen row. For example, if you set FrozenRowCount = 3 and pin rows 1, 5, and 6, the top of the sheet will show the three frozen rows, with the pinned rows (such as 5 and 6) grouped above the rest of the data.
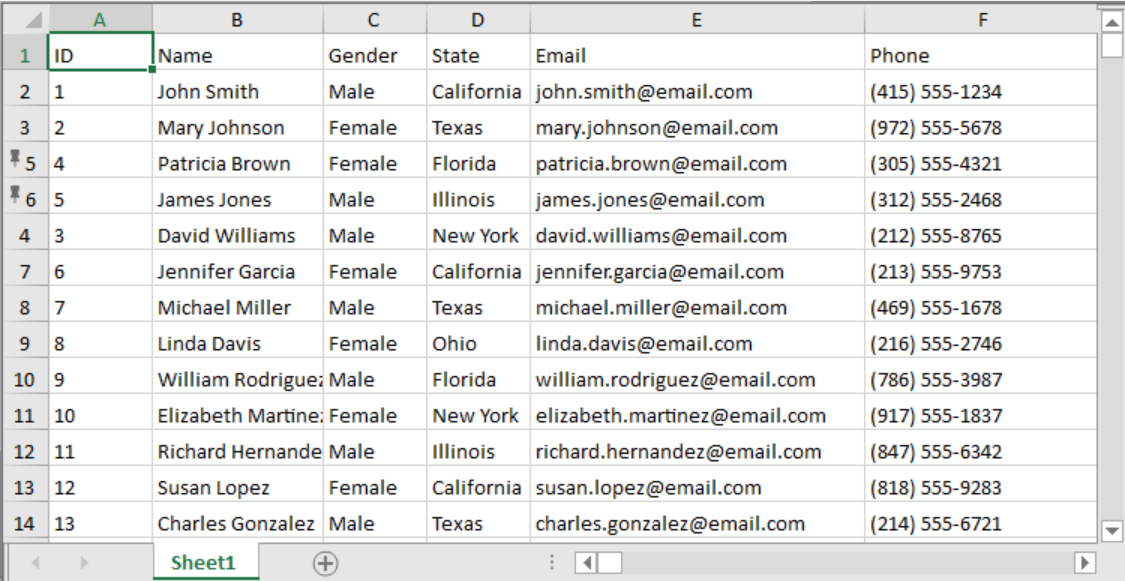
The following example demonstrates how to pin specific rows and columns in the worksheet.
C#
// Pin specified rows.
fpSpread1.AsWorkbook().ActiveSheet.TogglePinnedRows(0, 4, 5);

// Pin specified columns.
fpSpread1.AsWorkbook().ActiveSheet.TogglePinnedColumns(0, 1, 3);
VB
' Pin specified rows.
fpSpread1.AsWorkbook().ActiveSheet.TogglePinnedRows(0, 4, 5)

' Pin specified columns.
fpSpread1.AsWorkbook().ActiveSheet.TogglePinnedColumns(0, 1, 3)
Using the Properties Window
At design time, in the Properties window, select the Sheet.
In the SheetView Collection Editor (Appearance section), set the FrozenRowCount, FrozenColumnCount, FrozenTrailingRowCount, FrozenTrailingColumnCount, or the FrozenTrailingStickToEdge property.
Using the Spread Designer
Select Sheet from the drop-down combo list located on the top right side of the Designer.
From the SheetView Collection Editor, set the FrozenColumnCount, FrozenRowCount, FrozenTrailingColumnCount, FrozenTrailingRowCount, FrozenTrailingStickToEdge.
From the File menu, select Save and Exit to save the changes.
See Also
Customizing the Number of Rows or Columns
Showing or Hiding a Row or Column
Setting the Row Height or Column Width
Rows or Columns That Have Data
Adding a Tag to a Row or Column
Customizing the Number of Rows or Columns
Showing or Hiding a Row or Column
Setting the Row Height or Column Width


