
-
Spread Windows Forms Product Documentation
- Getting Started
-
Developer's Guide
- Understanding the Product
- Working with the Component
- Spreadsheet Objects
- Ribbon Control
-
Sheets
- Working with the Active Sheet
- Working with Multiple Sheets
- Customizing the Sheet Name Tabs
- Navigating Sheet Tabs
- Adding a Sheet
- Adding ChartSheet
- Removing a Sheet
- Showing or Hiding a Sheet
- Moving a Sheet
- Selecting Multiple Sheets
- Copying and Inserting a Sheet
- Protecting a Worksheet
- Form Controls
- Adding a Title and Subtitle to a Sheet
- Placing Child Controls on a Sheet
- Displaying a Footer for Columns or Groups
- Adding a Tag to a Sheet
- Working with 1-Based Indexing
- Customizing Clipboard Operation Options
- Rows and Columns
- Headers
- Cells
- Cell Types
- Data Binding
- Customizing the Sheet Appearance
- Customizing Interaction in Cells
- Tables
- Pivot Table
- Understanding the Underlying Models
- Customizing Row or Column Interaction
- Formulas in Cells
- Sparklines
- Keyboard Interaction
- Events from User Actions
- File Operations
- Storing Excel Summary and View
- Printing
- Chart Control
- Enhanced Chart
- Customizing Drawing
- Touch Support with the Component
- Spread Designer Guide
- Assembly Reference
- Import and Export Reference
- Version Comparison Reference
Protecting a Worksheet
You can protect a worksheet with a password in order to prevent other users from accidentally or deliberately changing, moving, or deleting data. In Spread for WinForms, the Protect method provides a variety of password protection and lock options that are available in the Protect Sheet dialog box.
Using PivotTable Protection
The Use PivotTable option allows users to interact with PivotTables on a protected worksheet without unprotecting it. You can enable Use PivotTable in the Designer, or use the AllowUsingPivotTables property of the IProtection interface to achieve this.
Note: This option affects pivot table only. Other worksheet protection settings (such as formatting, editing, inserting rows/columns) are separate and independent. Pivot table formatting, editing, and structural changes are supported only when explicitly enabled by other worksheet protection options.
When AllowUsingPivotTables is enabled, users can perform the following layout-level PivotTable interactions that do not modify data or calculations:
Expand and collapse row and column fields
Reorder fields within the PivotTable
Move fields between Rows, Columns, and Filters
Change report filters (page fields)
Sort and filter items by labels only
The following actions are not allowed even when AllowUsingPivotTables is enabled:
Refresh PivotTables
Change aggregation functions
Sort by values
Modify PivotTable styles
Add or edit calculated fields or calculated items
Using Code
You can choose to protect or unprotect a worksheet using the Protect method which passes the WorksheetLocks enumeration as the parameter.
C#
fpSpread1.LegacyBehaviors = LegacyBehaviors.None;
activeSheet.Cells["A1:A4"].Value = 1;
activeSheet.Cells["B1:B4"].Value = 3;
activeSheet.Cells["C1:C4"].Value = 5;
fpSpread1.AsWorkbook().ActiveSheet.Protect(WorksheetLocks.DeleteColumns | WorksheetLocks.DeleteRows | WorksheetLocks.PivotTables);
VB
fpSpread1.LegacyBehaviors = LegacyBehaviors.None
activeSheet.Cells("A1:A4").Value = 1
activeSheet.Cells("B1:B4").Value = 3
activeSheet.Cells("C1:C4").Value = 5
fpSpread1.AsWorkbook().ActiveSheet.Protect(WorksheetLocks.DeleteColumns Or WorksheetLocks.DeleteRows Or WorksheetLocks.PivotTables)
You can also set various types of protection options available for a worksheet using the IProtection interface. Each property from this interface gets a Boolean value, true or false indicating whether a particular action is allowed on a protected worksheet. For example, you can set the AllowDeletingColumns property as shown below:
C#
fpSpread1.AsWorkbook().ActiveSheet.Protect(WorksheetLocks.DeleteColumns);
GrapeCity.Spreadsheet.IProtection protection = fpSpread1.AsWorkbook().ActiveSheet.Protection;
var value = protection.AllowDeletingColumns;
MessageBox.Show(value.ToString());
VB
fpSpread1.AsWorkbook().ActiveSheet.Protect(WorksheetLocks.DeleteColumns)
Dim protection As GrapeCity.Spreadsheet.IProtection = fpSpread1.AsWorkbook().ActiveSheet.Protection
Dim value = protection.AllowDeletingColumns
MessageBox.Show(value.ToString())
In the above example, the MessageBox will show a false value as the worksheet has already been locked and protected to prevent column deletion.
Using Runtime UI
You can implement the Protect method in the runtime UI by setting the tab strip as editable. This allows you to open the Protect Sheet dialog.
C#
fpSpread1.TabStrip.Editable = true;VB
fpSpread1.TabStrip.Editable = TrueThe following GIF illustrates opening protect sheet dialog box at runtime.
Using Spread Designer
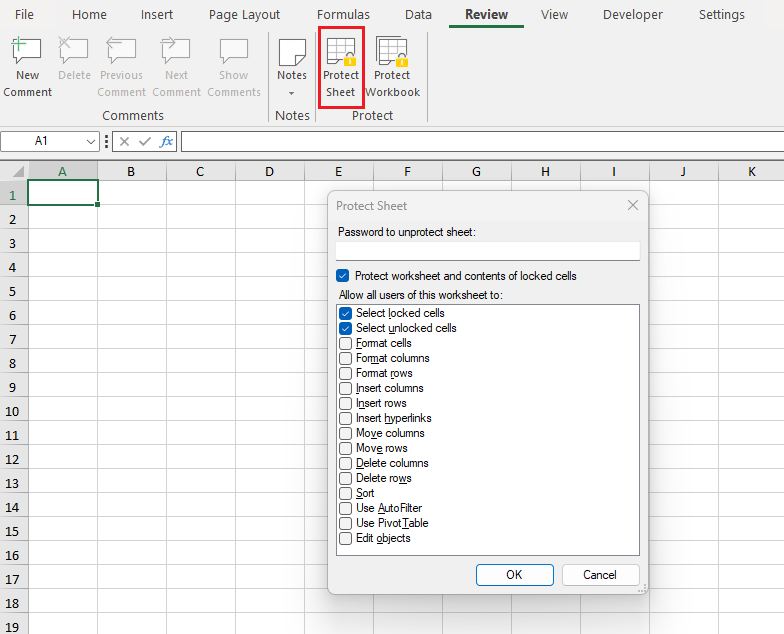
To access the Protect Sheet dialog, navigate to the Protect Sheet button in the Protect group under the Review tab of the Spread ribbon.
Steps to activate or deactivate protect sheets options
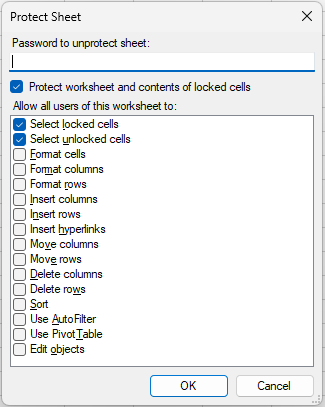
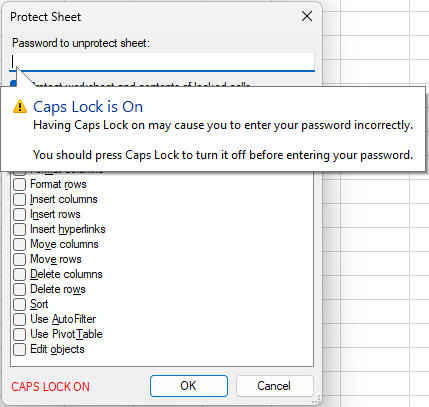
Select the multiple options you want to implement while protecting the worksheet from the Protect Sheet dialog box. Enter the password to protect the worksheet.
When you enter password to protect the worksheet, another dialog appears to confirm the password.
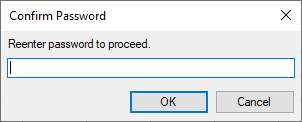
If the caps lock is on, a label indicator "CAPS LOCK ON" appears on the left side of the dialog box.
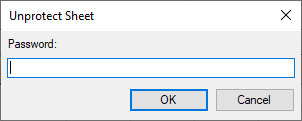
Once a password is successfully set, you can access the protected worksheet, but cannot make any changes to the sheet. To unprotect the worksheet enter the set password using the Unprotect Sheet dialog.
Limitations
Currently worksheet protection options do not include protection of PivotChart and Edit Scenarios, but still support import/export for those options. The worksheet protection options work only when LegacyBehaviors.Protect is not set, otherwise the old behavior is applied.