- ASP.NET MVC
- Getting Started
- Configuring your MVC Application
- Adding NuGet Packages to your App
- Adding Controls
- Client-Side Support
- Globalization
- Working with Controls
- Styling
- ASP.NET MVC Samples
- Release History
Custom Toolbar Options
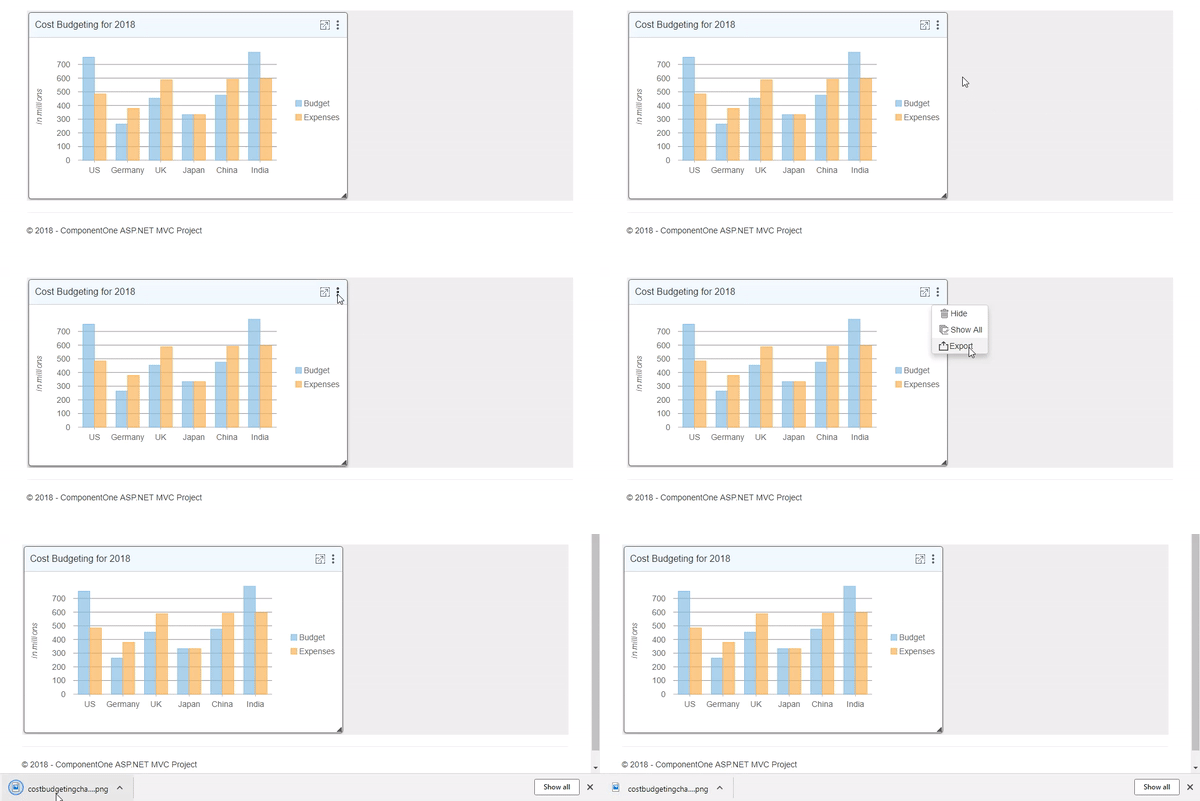
This walkthrough depicts how you can add more options to the toolbar menu which is displayed when clicking on the tool icon in the toolbar. In this walkthrough, we have added an Export option to the menu, which when clicked exports/saves the chart displayed in the tile to a PNG image.
Follow the given steps to get started:

Create an MVC Application
Create a new MVC application using the ComponentOne or VisualStudio templates. For more information about creating an MVC application, see Configuring your MVC Application topic.
Add Data to the Application
Add a new class to the Models folder (Name:
DashboardData.cs). For more information on how to add a new model, see Adding Controls.Replace the following code in the
DashboardData.csmodel to define the classes that serve as a datasource for the different controls rendered in the DashboardLayout control.using System; using System.Collections.Generic; using System.Linq; using System.Web; namespace CustomContextMenu.Models { public class DashboardData { private IEnumerable<CountryData> _countryDetails = null; public IEnumerable<CountryData> CountryDetails { get { if (_countryDetails == null) { _countryDetails = GetCountryData(); } return _countryDetails; } } public IEnumerable<CountryData> GetCountryData() { var rand = new Random(0); var countryID = new[] { "CR001", "CR002", "CR003", "CR004", "CR005", "CR006" }; var countries = new[] { "US", "Germany", "UK", "Japan", "China", "India" }; var list = countries.Select((c, i) => { double sales = rand.Next(1, 6); double budget = rand.Next(1, 9); double expenses = rand.Next(1, 6); return new CountryData { ID = countryID[i], Country = c, Sales = sales, Budget = budget, Expenses = expenses }; }); return list; } } public class CountryData { public string ID { get; set; } public string Country { get; set; } public double Sales { get; set; } public double Budget { get; set; } public double Expenses { get; set; } } }
Add Controller to the Application
In the Solution Explorer, right click the folder Controllers.
From the context menu, select Add | Controller. The Add Scaffold dialog appears.
In the Add Scaffold dialog, follow these steps:
- Select the MVC 5 Controller - Empty template, and then click Add.
- Set name of the controller (for example:
DashboardController). - Click Add.
Include the following references as shown below.
using <ApplicationName>.Models;
Replace the Index() method with the following method.
public ActionResult Index()
        {
            DashboardData data = new DashboardData();
            return View(data.CountryDetails);
        }
Add View to the Application
The code snippet provided below shows how to handle the OnClientFormatTile client event provided by DashboardLayout class to create a custom toolbar for the DashboardLayout control. The event argument for this event is of type TileFormattedEventArgs and provides access to different elements of the tile.
In this sample code, the tile toolbar is accessed by using the toolbar property. This property returns an instance of the toolbar which provides different methods such as insertBefore and insertToolbarItem, to add new toolbar item. Note that we have also added two images in the sample to display the custom icons for the toolbar options.
The code snippet provided below initializes a DashboardLayout control and the controls that are to be rendered inside the DashboardLayout control. Follow the given steps to accomplish the above:
From the Solution Explorer, expand the folder Controllers and double click the
DashboardController.Place the cursor inside the method
Index().Right click and select Add View. The Add View dialog appears.
In the Add View dialog, verify that the View name is Index and View engine is Razor (CSHTML).
Click Add to add a view for the controller, and then copy the following code and paste it inside Index.cshtml.
@using <ApplicationName>.Models
@using C1.Web.Mvc.Chart;
@model IEnumerable<CountryData>
<script type="text/javascript">
    function formatTile(dashboardLayout, e) {
            var tile = e.tile,
                toolbar = e.toolbar;
            if(tile.headerText == ('Cost Budgeting for 2018')){
                var strExportIcon = '<img style="vertical-align:middle" src="@Href("Images/icon_export.png")" alt="Export" title="Export" />';
                toolbar.insertToolbarItem({
                    icon: strExportIcon,
                    title: 'Export',
                    command: function () {
                        var selector = e.tile.content,
                        chart = wijmo.Control.getControl(selector);
                        chart.saveImageToFile(selector.substr(1) + '.png');
                    }
                });
            }
        }
</script>
<div style="position:absolute;left:-10000px; top:-10000px; visibility:hidden">
    @(Html.C1().FlexChart().Id("costBudgetingChart")
        .BindingX("Country").ChartType(ChartType.Column)
        .Legend(Position.Right)
        .Bind(Model)
        .AxisY(ayb => ayb.Title("in millions"))
        .Series(ssb =>
        {
            ssb.Add().Name("Budget").Binding("Budget");
            ssb.Add().Name("Expenses").Binding("Expenses");
        })
        .Tooltip(ttb => ttb.Content("<b>{seriesName}</b><br/>{x} {y:c0}"))
        .ShowAnimation(ab => ab.AnimationMode(AnimationMode.All)
        .Easing(Easing.Swing).Duration(400)))
</div>
<br />
@(Html.C1().DashboardLayout()
        .Id("custom")
        .AttachFlowLayout(flb => flb.Direction(FlowDirection.LeftToRight)
        .Items(isb =>
        {
            isb.Add(ftb => ftb.HeaderText("Cost Budgeting for 2018")
            .Content("#costBudgetingChart").Width(549).Height(322));
        }))
        .OnClientFormatTile("formatTile"))
Build and Run the Project
- Configure the RouteConfig.cs file to set the default navigation path by setting the controller to Dashboard and action to Index.
- Click Build | Build Solution to build the project.
- Press F5 to run the project.


