- Introduction
- Report Readers
- Report Authors
- DevOps
-
Developers
- Quick Start
- Breaking Changes
- ActiveReports Version Compatibility and Migration
- License ActiveReports
- Configure ActiveReports Using Code
- Work with Reports using Code
- Report Parts
- Create Designer and Viewer Applications
- Extensibility in ActiveReports
- External Customizations in ActiveReports
- Export Reports
- Print Reports
- Plugins Development
- Samples
- Troubleshooting
Add Code to Layouts Using Script
In a Page Report or an RDLX Report, you can create and maintain a custom assembly for code that you want to use in multiple reports and refer to its methods in expressions. The Script tab in Visual Studio Integrated Designer opens the script editor, where you can provide VB.NET functionality to the reports without compiling the .vb file.
type=note
Note:
- You should be aware that scripts allow you to execute different code and can create a security gap. Therefore, it is not recommended to use scripts in web/cloud environments.
- In WebDesigner, the Scripts are available for Section reports only.
Some of the simpler Page/RDLX report scripting capabilities are discussed in the Scripts topic.
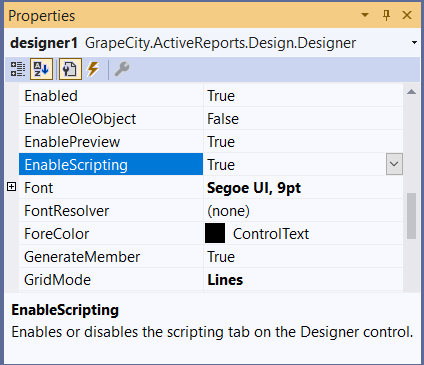
To turn on or off scripts in End-User Report Designer,
set the EnableScripting property of the designer.

Or use the following code in Form1.Designer.cs:
_designer.EnableScripting = false;
Create custom assemblies
You can create custom assemblies in C# or Visual Basic .NET to make code available to multiple reports:
- Create or find the assembly you wish to use. The assemblies can be found at the installed location: C:\Program Files (x86)\MESCIUS\ActiveReports 19\NuGet\\lib\net46\
- Make the assembly available to the report engine.
- If you are embedding the designer or viewer controls in your own application, copy the assembly to the same location as your executable.
- If you are using the included designer or viewer, copy the assembly into the ActiveReports assembly folder located at ...\MESCIUS\ActiveReports 19 by default.
type=note
Note: To make the assembly available for use in your own application and for use in designing reports for your application, copy it to both locations listed above. Alternatively, you can place the assembly in the Global Assembly Cache (C:\Windows\assembly).
- Add an assembly reference to the report.
- From the Report Menu, choose Report Properties.
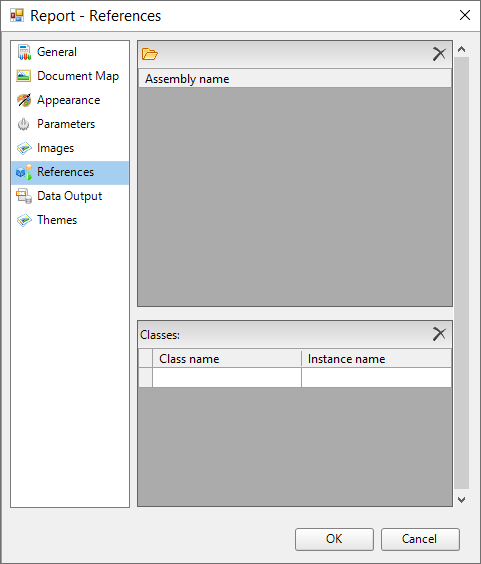
- In the Report dialog that appears, select References and click the Open icon above the assembly name list to add your own assembly.
- Go to the Class list below the assembly names and under Class name, enter the namespace and class name. Similarly, under Instance name, enter the name you want to use in your expressions.

- Access the assembly through expressions.
To access static members (member denoted as public static in C# assemblies, or as Public Shared in Visual Basic assemblies):
=Namespace.Class.MemberTo access class instances:
=Code.InstanceName


