- Introduction
- Report Readers
- Report Authors
- DevOps
-
Developers
- Quick Start
- Breaking Changes
- ActiveReports Version Compatibility and Migration
- License ActiveReports
- Configure ActiveReports Using Code
- Work with Reports using Code
- Report Parts
- Create Designer and Viewer Applications
- Extensibility in ActiveReports
- External Customizations in ActiveReports
- Export Reports
- Print Reports
- Plugins Development
- Samples
- Troubleshooting
Migrate to .NET Core
An existing ActiveReports application can be migrated to a .NET Core version by following these simple steps provided on MSDN page. To migrate ActiveReports application to .NET 8/.NET 9, you need Visual Studio 2022 with .NET 8/.NET 9 installed.
The following steps consider an ActiveReports 15 WinViewer desktop application as a sample .NET Framework project that needs to be migrated to .NET 8/.NET 9 platform. The sample can be found on GitHub.
For more information, please refer to the following Microsoft documentation:
Upgrade the project to ActiveReports 19
(skip this if you are already in ActiveReports 19)
Open the \Desktop\WinViewer\C#\WinViewer.sln file in Visual Studio 2022 v17.8+.
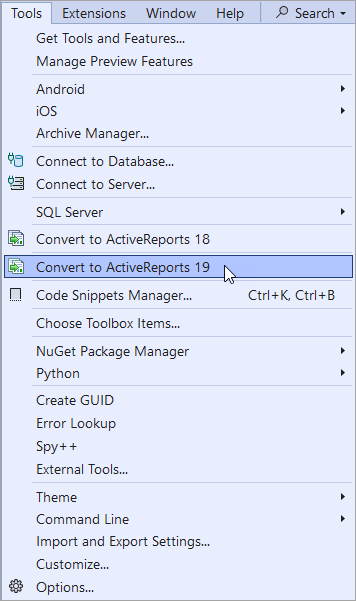
Convert the project to ActiveReports 19 by running the 'Convert to ActiveReports 19' tool.
Analyze Portability
(this step is for the analysis purpose to see if the assemblies are portable to .NET Core; it can be skipped)Click on Extensions > Manage Extensions and in the Manage Extensions dialog, search for '.NET Portability Analyzer' and download it. You may need to reopen the project for VSIX installer to run.
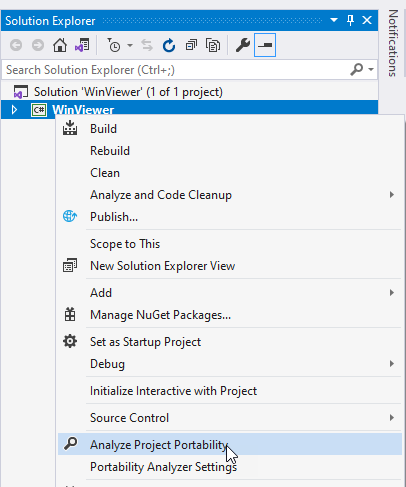
Right-click on the WinViewer solution and click 'Analyze Assembly Portability'.
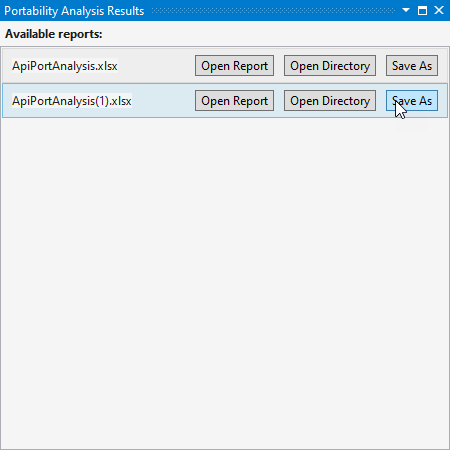
Save the Analysis report on your system and open it to analyze the portability details of your project.
Migrate to .NET 6/.NET 7/.NET 8 platform
Right-click 'packages.config' in the project, click 'Migrate packages.config to PackageReference..' and press OK.
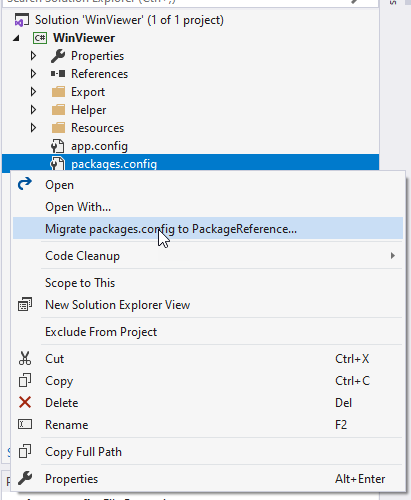
You will see a NuGet migration log page with details.Right-click the project and select 'Unload Project'. Double-click 'WinViewer' in the Solution Explorer to view WinViewer.csproj file.
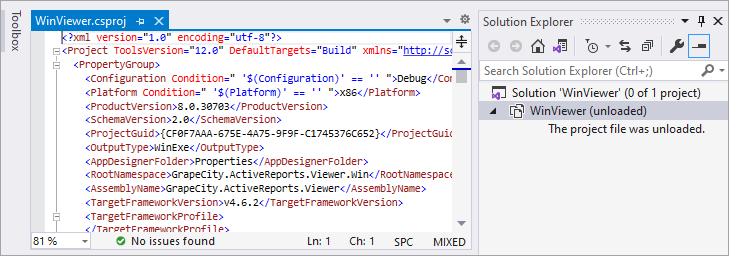
Remove the content of the WinViewer.csproj file and copy it in a text file so that the file appears blank and you have its backup in a text file.
Add the following code to blank WinViewer.csproj file to change it to project SDK type.
type=note
Note: The OutputType is "library" because the project is a class library project. Also, 'auto-generate assembly info' should be turned off.
<Project Sdk="Microsoft.NET.Sdk">
<PropertyGroup>
<OutputType>library</OutputType>
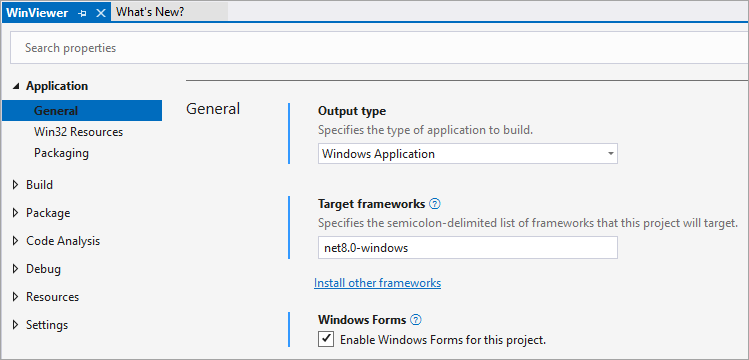
<TargetFramework>net8.0-windows</TargetFramework>
<GenerateAssemblyInfo>false</GenerateAssemblyInfo>
</PropertyGroup>
</Project>
Find the text "PackageReference" in the backup text file and copy the whole <ItemGroup> inside <Project> to WinViewer.csproj file. The final WinViewer.csproj will look like below:
xml <Project Sdk="Microsoft.NET.Sdk"> <PropertyGroup> <OutputType>library</OutputType> <TargetFramework>net8.0-windows</TargetFramework> <GenerateAssemblyInfo>false</GenerateAssemblyInfo> <ApplicationIcon /> <StartupObject /> </PropertyGroup> <ItemGroup> <PackageReference Include="MESCIUS.ActiveReports.Chart.Win"> <Version>18.0.0-beta-2687</Version> </PackageReference> <PackageReference Include="MESCIUS.ActiveReports.Export.Rdf"> <Version>18.0.0-beta-2687</Version> </PackageReference> <PackageReference Include="MESCIUS.ActiveReports.Export.Excel"> <Version>18.0.0-beta-2687</Version> </PackageReference> <PackageReference Include="MESCIUS.ActiveReports.Export.Html"> <Version>18.0.0-beta-2687</Version> </PackageReference> <PackageReference Include="MESCIUS.ActiveReports.Export.Image"> <Version>18.0.0-beta-2687</Version> </PackageReference> <PackageReference Include="MESCIUS.ActiveReports.Export.Pdf"> <Version>18.0.0-beta-2687</Version> </PackageReference> <PackageReference Include="MESCIUS.ActiveReports.Export.Word"> <Version>18.0.0-beta-2687</Version> </PackageReference> <PackageReference Include="MESCIUS.ActiveReports.Export.Xml"> <Version>18.0.0-beta-2687</Version> </PackageReference> <PackageReference Include="MESCIUS.ActiveReports.Design.Win"> <Version>18.0.0-beta-2687</Version> </PackageReference> <PackageReference Include="MESCIUS.ActiveReports.Core.DataProviders.Excel"> <Version>1.0.0-alpha-114</Version> </PackageReference> <PackageReference Include="MESCIUS.ActiveReports.Viewer.Win"> <Version>18.0.0-beta-2687</Version> </PackageReference> <PackageReference Include="System.Data.SQLite.Core"> <Version>1.0.118</Version> </PackageReference> <PackageReference Include="System.Text.Encoding.CodePages"> <Version>6.0.0</Version> </PackageReference> <PackageReference Include="System.Resources.Extensions"> <Version>6.0.0</Version> </PackageReference> </ItemGroup></Project>
- Right-click the project in Solution Explorer and click on Reload project. You may see version errors for 'Compile Time Assemblies'. Resolve them by manually correcting the version as suggested in the window.
- Build the project to observe that the build is successful and the project has been successfully migrated to .NET 6/.NET 7/.NET 8 platform.
