
- Introduction
- Report Readers
- Report Authors
- DevOps
-
Developers
- Quick Start
- Breaking Changes
- ActiveReports Version Compatibility and Migration
- License ActiveReports
- Configure ActiveReports Using Code
- Work with Reports using Code
- Report Parts
-
Create Designer and Viewer Applications
- .NET Viewer Application
- Web Viewer and Web Designer Middlewares
- Js Viewer Application
- ASP.NET WebViewer Application
- Blazor Viewer Application
- WebDesigner Application
- Blazor WebDesigner Application
- End User Report Designer in WinForms Application
- Themes in WebDesigner and Js Viewer Components
- Role Based Authorization with JWT
- Extensibility in ActiveReports
- External Customizations in ActiveReports
- Export Reports
- Print Reports
- Plugins Development
- Samples
- Troubleshooting
Blazor Viewer Application
A Blazor Viewer application uses the same client-server model as the JS Viewer, so all details on the server-side configurations like Custom Font Resolver or Prevent Cross-Site Scripting Attacks are relevant for a Blazor Viewer as well.
This topic describes how to create a web application that embeds Blazor Viewer.
NuGet Packages
The following packages are required to be included in the application:
MESCIUS.ActiveReports.Aspnetcore.Viewer
MESCIUS.ActiveReports.Blazor.Viewer
Initialize Blazor Viewer Component
<div class="main">
    <div id="viewerContainer">
        <ReportViewer @ref="_viewer" ReportName="@_currentReport" ViewerInitialized="InitializedViewer" DocumentLoaded="@DocumentLoaded"/>
    </div>
</div>
Create ActiveReports Blazor Viewer Server Application
Let us create a Blazor server application with ActiveReports Blazor Viewer using local report service.
Using built-in ActiveReports application template
Open Microsoft Visual Studio 2026.
Select ActiveReports 20 Blazor Server Application template and click Next.
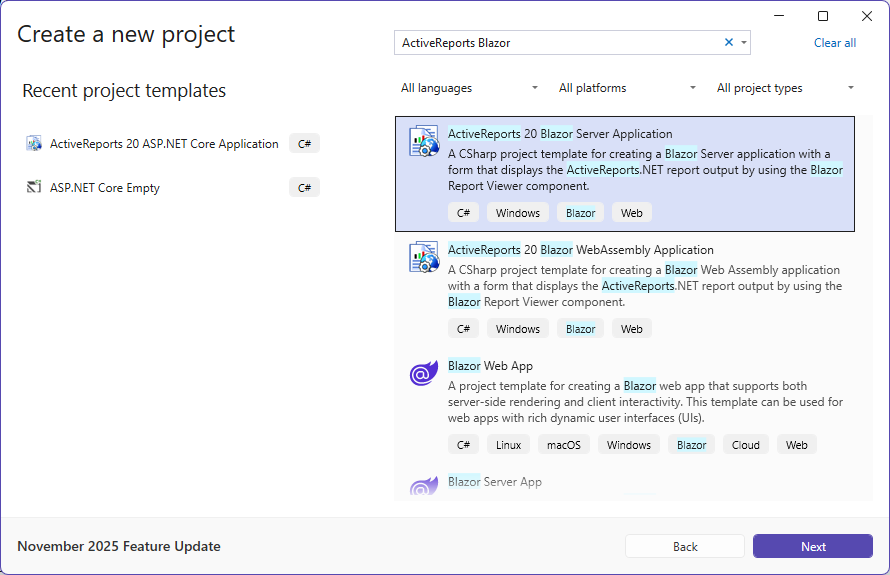
Type a name for your project and click Create.
From the New Report dialog, choose a report type, and click Finish to skip the data binding at this stage or choose Next to bind the data to the report.
The following required packages are automatically added to project:
MESCIUS.ActiveReports.Aspnetcore.Viewer
MESCIUS.ActiveReports.Blazor.Viewer
Open the report from the 'Reports' folder and design.
Make sure to set the Build Action property of the report to 'Embedded Resource'.
Run the application.
Using Visual Studio Template
Open Microsoft Visual Studio 2026.
Create a new project and choose the template Blazor Server App.
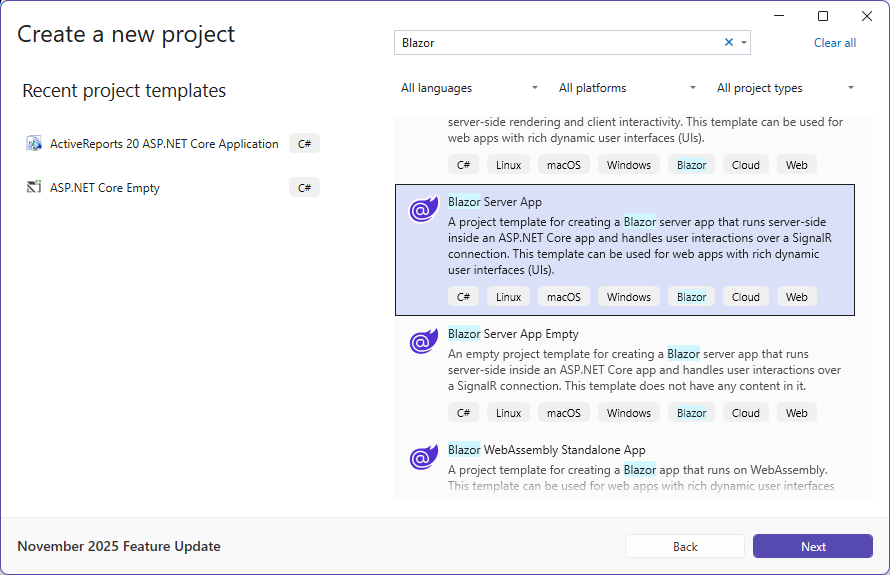
Type a name for your project (say, BlazorApp1) and click Next.
Select a target framework and uncheck 'Configure for HTTPS' option, and then click Create.
Add the following packages:
MESCIUS.ActiveReports.Aspnetcore.Viewer
MESCIUS.ActiveReports.Blazor.Viewer
Add a new folder called 'Reports' in application's root and place the report (say, Report.rdlx) you want to display in the viewer, in this folder.
Make sure to set the Build Action property of the report to 'Embedded Resource'.
Add a Razor component to the folder Pages (right-click Pages > Add - Razor component). Set a name for it, for example, BlazorViewer.razor.
Write the following code in BlazorViewer.razor page:
@page "/blazorviewer"

<h3>BlazorViewerTest</h3>
<div style="width:100%; height: 100vh">
    <GrapeCity.ActiveReports.Blazor.Viewer.ReportViewer ReportName="Report.rdlx"></GrapeCity.ActiveReports.Blazor.Viewer.ReportViewer>
</div>

@code {

}
In the Shared folder > NavMenu.razor page, add the following code:
```html
<li class="nav-item px-3">
    <NavLink class="nav-link" href="blazorviewer">
        <span class="oi oi-list-rich" aria-hidden="true"></span> Blazor Viewer
    </NavLink>
</li>
11. In the **Data** folder, add **ReportService.cs** class:

```auto
```csharp
namespace BlazorApp1.Data
{
    public class ReportsService
    {
        public static string EmbeddedReportsPrefix = "BlazorApp1.Reports";
        public IEnumerable<string> GetReports()
        {
            string[] validExtensions = { ".rdl", ".rdlx", ".rdlx-master", ".rpx" };
            return GetEmbeddedReports(validExtensions);
        }
        private static string[] GetEmbeddedReports(string[] validExtensions) =>
            typeof(ReportsService).Assembly.GetManifestResourceNames()
                .Where(x => x.StartsWith(EmbeddedReportsPrefix))
                .Where(x => validExtensions.Any(x.EndsWith))
                .Select(x => x.Substring(EmbeddedReportsPrefix.Length + 1))
                .ToArray();
    }
}
12. Update **Program.cs** file:
    \* add following directives:
    * using GrapeCity.ActiveReports.Aspnetcore.Viewer;
    * using System.Reflection;
        \* add service to the application
        \* provide access to a report output from the browser by adding the **UseReportViewer()** middleware

    ```csharp
    builder.Services.AddSingleton<ReportsService>();
    app.UseReportViewer(settings =>
    {
        settings.UseEmbeddedTemplates(ReportsService.EmbeddedReportsPrefix, Assembly.GetAssembly(typeof(ReportsService)));
    });
    ```

```auto
> type=note
> **Note**: Instead of ‘UseEmbeddedTemplates', you can use either 'UseFileStore' or 'UseReportProvider’ method calls.
>
> *   'UseEmbeddedTemplates' stores reports as resources in dlls.
> *   'UseFileStore' stores reports in the file system.
> *   'UseReportProvider’ allows you to store reports in any user-defined location, like a custom database or any other type of location.
Run the application.
Create ActiveReports Blazor Viewer WebAssembly Application
Here we describe creating the application using built-in ActiveReports application template. This application uses remote report service.
Using built-in ActiveReports application template
Open Microsoft Visual Studio 2026.
Select ActiveReports 20 Blazor WebAssembly Application template and click Next.
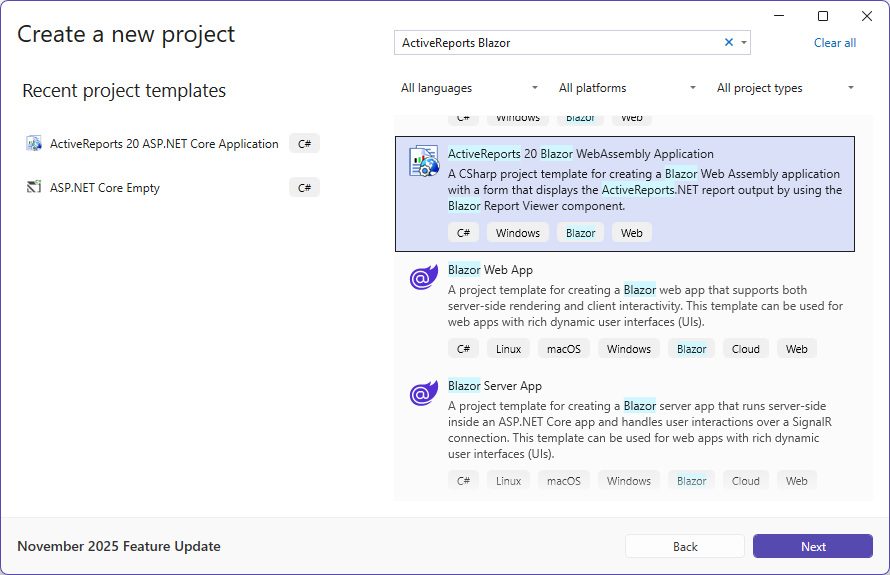
Type a name for your project and click Create.
From the New Report dialog, choose a report type, and click Finish to skip the data binding at this stage or choose Next to bind the data to the report.
The following required packages are automatically added to the project:
MESCIUS.ActiveReports.Blazor.Viewer
Open the report from the 'Reports' folder and design.
Make sure to set the Build Action property of the report to 'Embedded Resource'.
Make sure to set multiple startup projects:
In the Solution Explorer, select the solution (the top node).
Choose the solution node's context (right-click) menu and then choose Properties.
In the Solution Property Pages dialog box, expand the Common Properties node, and choose Startup Project.
Choose the Multiple Startup Projects option and set the actions of both projects to Start.
Make sure that the URL is the same in launchSettings.json file of the ReportService project and index.razor file of BlazorViewerWebAssembly project.
Run the application.
Using Visual Studio Template
Open Microsoft Visual Studio 2026.
Create a new project and choose the template Blazor WebAssembly Standalone App.
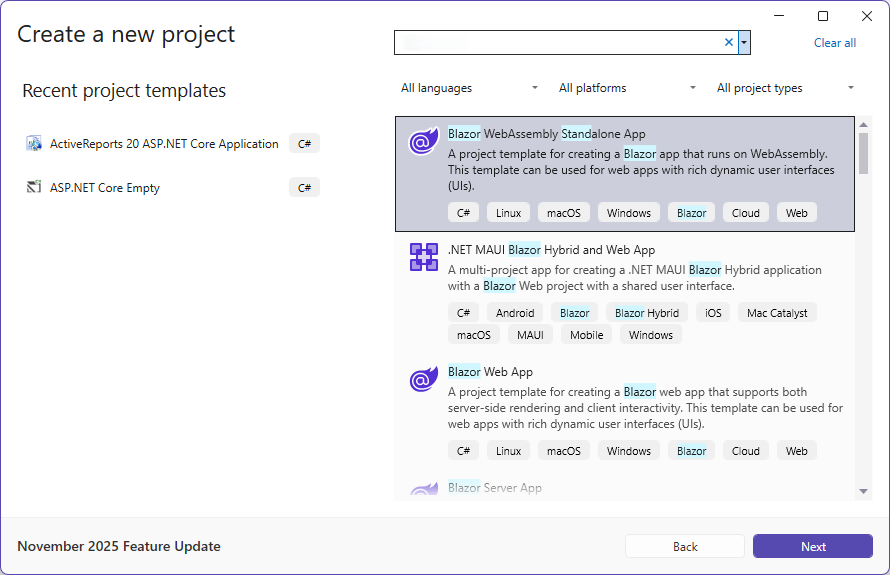
Type a name for your project and click Next.
Select a target framework and uncheck 'Configure for HTTPS' option, and then click Create.
Add the following package:
MESCIUS.ActiveReports.Blazor.Viewer
Add a new folder called 'Reports' in application's root and place the report (say, Report.rdlx) you want to display in the viewer, in this folder.
Make sure to set the Build Action property of the report to 'Embedded Resource'.
Update the existing Index.razor page as follows:
@page "/"
@using MESCIUS.ActiveReports.Blazor.Viewer
<PageTitle>Index</PageTitle><div style="width:100%; height: 100vh">
 <ReportViewer ReportName="Report.rdlx" ReportService="@_reportService"></ReportViewer></div>
@code{
    private ReportServiceSettings _reportService = new ReportServiceSettings()
    {
        Url = "http://localhost:58865/",
    };
}
Run the application.