
- Introduction
- Report Readers
- Report Authors
- DevOps
-
Developers
- Quick Start
- Breaking Changes
- ActiveReports Version Compatibility and Migration
- License ActiveReports
- Configure ActiveReports Using Code
- Work with Reports using Code
- Report Parts
-
Create Designer and Viewer Applications
- .NET Viewer Application
- Web Viewer and Web Designer Middlewares
- Js Viewer Application
- ASP.NET WebViewer Application
- Blazor Viewer Application
- WebDesigner Application
- Blazor WebDesigner Application
- End User Report Designer in WinForms Application
- Themes in WebDesigner and Js Viewer Components
- Role Based Authorization with JWT
- Extensibility in ActiveReports
- External Customizations in ActiveReports
- Export Reports
- Print Reports
- Plugins Development
- Samples
- Troubleshooting
Customize the Design View
Get a currently active tab
By using Designer.ActiveTabChanged event, you can add a reaction to switching between the Script, Design, and Preview tabs. By using this event, you can get a currently active tab.
The example code is as follows.
public partial class Form1 : Form
{
  public Form1()
  {
    InitializeComponent();
    _designer = new Designer() { Dock = DockStyle.Fill };
    _designer.ActiveTabChanged += (sender, args) => {
        //Get the currently editing report name.
        var reportName = designer.Report switch {
            PageReport pageReport => pageReport.Report.Name,
            SectionReport sectionReport => sectionReport.Name,
            _ => "Report"
        };
        //Set the form title to reflect the current designer state
        this.Text = designer.ActiveTab switch {
            DesignerTab.Script => $"{reportName} - Script",
            DesignerTab.Preview => $"{reportName} - Preview",
            _ => $"{reportName} - Edit"
        };
    };
    Controls.Add(designer);
  }
}
Add or remove a grid on the Designer surface
The Designer.DrawGrid property adds or removes the grid on the design surface. You can setup this property at the designer initialization or any time later.
type=note
Note: You can control the grid visibility by using the buttons on the Tool Panel. You can deprecate it by using the Designer.ToolPanel property.
The code example below demonstrates how you can add your own button to switch the grid off.
void Button_OnClick(object sender, EventArgs e)
{
    _designer.DrawGrid = false;
}
The code example below demonstrates how you can add your own button to switch the grid on.
void Button_OnClick(object sender, EventArgs e)
 {
     _designer.DrawGrid = true;
 }
Switch between the grid types
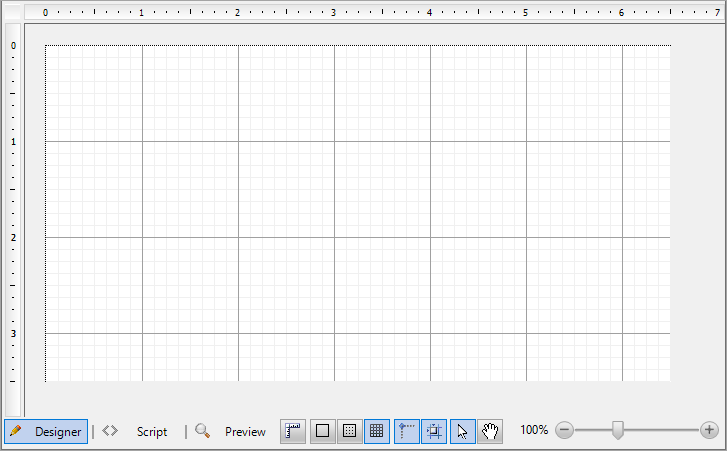
If the Designer.DrawGrid property is set to True, there are two possible grid types - Lines or Dots. You can switch between them by using the Designer.GridMode property.
This code example demonstrates how you can switch to the Dots grid mode.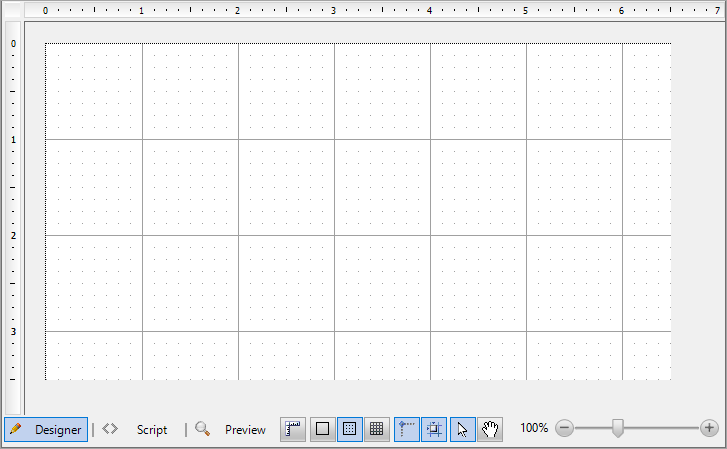
_designer.GridMode = GridMode.Dots;
Specify a number of grid dots or lines per unit
type=note
Note: This is for Section Report designer only.
The Designer.GridX and Designer.GridY properties specify how many dots (or lines) of grid per unit need to be drawn on the design surface. If you specify a similar code as in the example below, you will get the following result.
_designer.GridX = 8;
_designer.GridY = 2;
Show or hide the Preview tab
The Designer.EnablePreview property controls the visibility of the Preview tab on the Tool panel of the design surface.
_designer.EnablePreview = true;

_designer.EnablePreview = false;
Show or hide the Script tab
The Designer.EnableScripting property controls the visibility of the Script tab on the Tool panel of the design surface.
_designer.EnableScripting = true;

_designer.EnableScripting = false;
Change the layout mode of items
The Designer.LayoutMode property changes the items layout mode and is currently available for Section reports only.
private void ButtonSnapGrid_Click(object sender, EventArgs args)
{
  _designer.LayoutMode = designer.LayoutMode ^ LayoutMode.SnapGrid;
}
private void ButtonSnapLines_Click(object sender, EventArgs args)
{
  _designer.LayoutMode = designer.LayoutMode ^ LayoutMode.SnapLines;
}
Lock the position or size of report items
The Designer.LockControls property makes it impossible to change the position or size of report items.
The code example below opens the Windows Form with the designer with a pre-built report. You can change some properties of the existing controls but it is impossible to change the report layout.
class TweakSalesReportForm : Form
{
  public TweakSalesReportForm()
  {
    var _designer = new Designer {Dock = DockStyle.Fill};
    var _propertyGrid = new PropertyGrid(){Dock = DockStyle.Right};
    _designer.LoadReport(new FileInfo("c:\\reports\\Sales.rdlx"));
    _designer.PropertyGrid = propertyGrid;
    _designer.LockControls = false;
    Controls.Add(designer);
    Contorls.Add(propertyGrid);
  }
}
Deprecate pages in a Page report
With the Designer.PageReportDesignerActions property, you can deprecate some actions under pages in page reports.
//Deprecate new page creation.
_designer.PageReportDesignerActions = PageReportDesignerActions.All ^ PageReportDesignerActions.AddPage
Show or hide the Designer, Script, and Preview tabs
The Designer.ReportTabsVisible property controls the visibility of the Designer, Script, and Preview tabs.
_designer.ReportTabsVisible = false;
Show or hide the Tool panel
The Designer.ReportTabsPanelVisible property specifies whether the Tool panel is visible.
_designer.ReportTabsPanelVisible = false;
Specify a scrolling mode for the Viewer
The Designer.ScrollingMode property specifies the scrolling mode for the embedded report Viewer.
_designer.ScrollingMode = ScrollingMode.Paged;
Control the visibility of the Designer tools
The Designer.ToolPanel property controls the visibility of some items in the Tool panel, which is located next to the Preview tab of the Design surface.

The code example below demonstrates how to remove the zoom slider.
_designer.ToolPanel = ToolPanelButton.All ^ ToolPanelButton.ZoomSlider;
The Tool panel includes these items that you can remove:
- DimensionLines
- GridMode
- SnapGrid
- SnapLines
- MouseMode
- ZoomSlider
Show or hide the data source icon in the Detail section of Section report
The Designer.ShowDataSourceIcon property is used for Section reports and allows to control the visibility of the data source icon in the Detail section.
public partial class Form1 : Form
{
  Designer designer;
  public Form1()
  {
    InitializeComponent();
    _designer = new Designer() { Dock = DockStyle.Fill };
    _designer.NewReport(DesignerReportType.Section);
    _designer.ShowDataSourceIcon = false;
  }
}
Undo the latest operation
You can call the Designer.Undo() method of the object returned by UndoManager property to undo the latest operation. Just add the button you want and assign the Click event handler like in this sample code.
private void UndoButton_Click(object sender, EventArgs args)
{
  _designer.UndoManager.Undo();
}
Redo the undone operation
To redo the undone operation, you can call the Designer.Redo() method of the object returned by UndoManager property. Just add the button you want and assign the Click event handler like in this sample code.
private void RedoButton_Click(object sender, EventArgs args)
{
  _designer.UndoManager.Redo();
}
Specify zoom as scale factor
The Designer.Zoom property specifies zoom as scale factor.
private void ResetZoom_Click(object sender, EventArgs e)
{
  _designer.Zoom = 1;
}
Add the PropertyGrid to the Designer
You can add the PropertyGrid component that allows you to set the properties of a selected report item.
Use WinForms Designer
- From the ActiveReports 19 Toolbox, drag and drop the Designer component on the form.
- Drag and drop the PropertyGrid component from the All Windows Forms Toolbox group onto the surface of your form or the Designer component.
- Select the Designer component and from properties pane, set the PropertyGrid property to the name of the PropertyGrid component.
Use code
The code example below demonstrates adding the PropertyGrid component using the Designer.PropertyGrid property.
using GrapeCity.ActiveReports.Design;
using GrapeCity.ActiveReports.Design.ReportExplorer;
class MyForm : Form
{
  MyForm()
  {
    var _designer = new Designer() { Dock = DockStyle.Fill };
    var _propertyGrid = new PropertyGrid { Dock = DockStyle.Right };
    _designer.PropertyGrid = _propertyGrid;
    Controls.Add(_designer);
    Controls.Add(_propertyGrid);
  }
}