-
WPF and Silverlight Edition Basic Library
- Combo Box
- DragDrop Manager
- Drop Down
- FilePicker
- HeaderedContentControl
- HyperPanel
- LayoutPanels
- ListBox
- Masked Text Box
- Menu and ContextMenu
- NumericBox
- Progress Bar
- Progress Indicator
- RadialMenu
- RangeSlider
- TabControl
- TreeView
- Windows
Step 5 of 5: Running the Application
Now that you have created a Silverlight project with a C1Menu control and a C1ContextMenu control, the only thing left to do is run the project and observe the results of your work.
Complete the following steps:
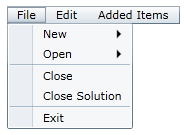
From the toolbar, select Debug | Start Debugging to run the application. The application appears as follows:

Click File and observe that a submenu appears.

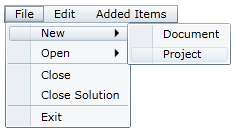
Hover your cursor over New and observe that another submenu appears.

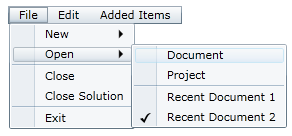
Hover your cursor over Open and observe that another submenu appears. Note that Recent Document 1 is checked.

Click Recent Document 2.
The Open submenu closes.
Select File | Open and observe that Recent Document 2 is checked instead of Recent Document 1.

The two checkable items, Recent Document 1 and Recent Document 2, are grouped together to form a list of mutually exclusive checkable items. You can read more about this by visiting the Checkable Menu Items topic.
Click Edit and observe that the Edit submenu appears.

Click Added Items and observe that it has no submenu.
Right-click the menu to bring up the context menu.
On the context menu, click Add Item.

Click Added Items and observe that it has a submenu consisting of one new item, which is named Added Item.

Congratulations!
You have completed the Menu for Silverlight quick start.


