Step 1 of 4: Creating a Windows Application
Complete the following steps:
In Visual Studio, select File | New Project.
In the New Project dialog box, select Windows Desktop from the Templates in the left-hand pane.
New Project Dialog Box
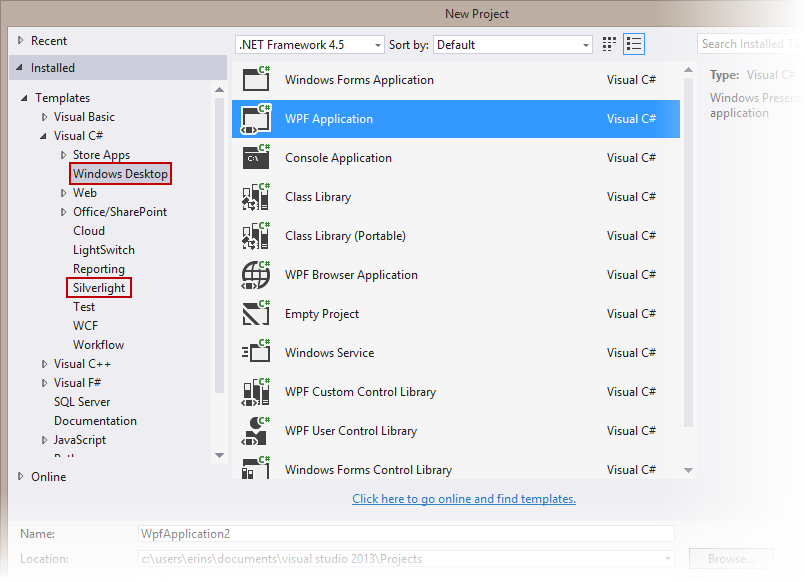
Select WPF Application, depending on the template you chose.
Enter a Name for your project, for example "QuickStart", and click OK. In a WPF Application, the MainWindow.xaml file will open.
Add the following assemblies to your application by right-clicking the References folder and selecting Add Reference:
WPF: C1.WPF.x.dll
Click once on the form to select it, navigate to the Visual Studio Toolbox, and add a TextBlock and two Button controls (double-clicking on an item in the Toolbox to add it to the form).
Resize the form, and resize the controls on the form.
Select each control in turn, and set the following properties for each in the Properties window:
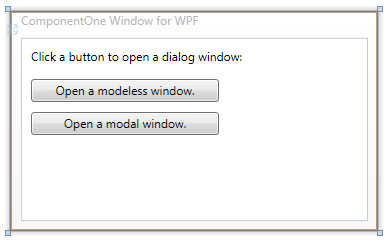
Set TextBlock1's Text property to "Click a button to open a dialog window:"
Set Button1's Content property to "Open a modeless window."
Set Button2's Content property to "Open a modal window."
The XAML markup will appear similar to the following:
<Grid>
        <TextBlock Height="23" Margin="10,10,31,0" Name="TextBlock1" VerticalAlignment="Top" Text="Click a button to open a dialog window:" />
        <Button Height="23" Margin="10,41,148,0" Name="Button1" VerticalAlignment="Top">Open a modeless window.</Button>
        <Button Margin="10,74,148,0" Name="Button2" Height="23" VerticalAlignment="Top">Open a modal window.</Button>
</Grid>
The form will appear similar to the following image: