
Step 1 of 3 : Creating an Application
In this step you'll begin in Visual Studio to create a WPF application or a Silverlight application which will use DragDropManager for WPF and Silverlight to manage user interactions.
To set up and add controls to your application, complete the following steps:
In Visual Studio, select File | New Project.
In the New Project dialog box, select either Windows Desktop or Silverlight from the Templates in the left-hand pane.
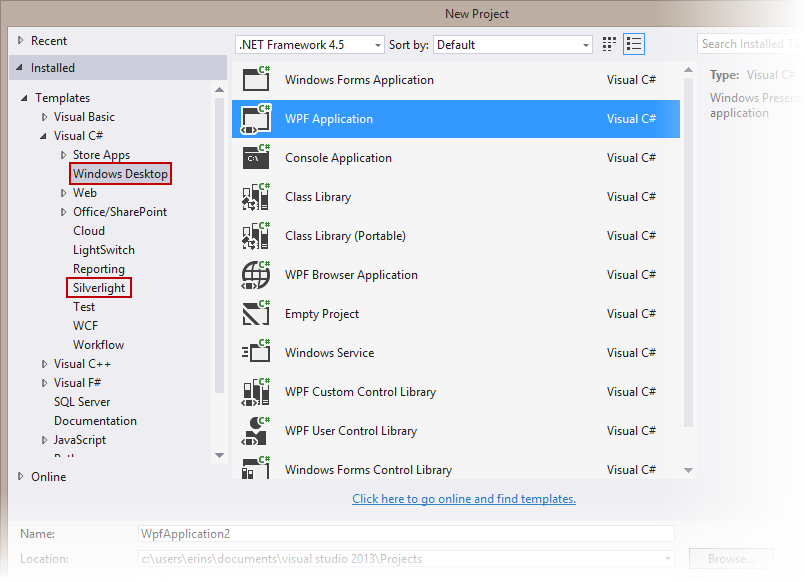
Select WPF Application or Silverlight Application, depending on the template you chose.
Enter a Name for your project, for example "QuickStart", and click OK. In a WPF Application, the MainWindow.xaml file will open.
If you selected a Silverlight Application, when you click OK, the New Silverlight Application dialog box will appear.
Click OK to accept default settings. This will close the New Silverlight Application dialog box and create your project.
The MainPage.xaml file should open.
Add the following assemblies to your application by right-clicking the References folder and selecting Add Reference:
WPF: C1.WPF.4.dll
Silverlight: C1.Silverlight.5.dll
In the XAML window of the project, place the cursor between the <Grid> and </Grid> tags and click once.
Add the following XAML markup between the <Grid> and </Grid> tags in the MainPage.xaml file:
<Grid x:Name="ddGrid" Background="Lavender" ShowGridLines="True" Width="400" Height="300" >
    <Grid.RowDefinitions>
        <RowDefinition/>
        <RowDefinition/>
        <RowDefinition/>
        <RowDefinition/>
        <RowDefinition/>
        <RowDefinition/>
    </Grid.RowDefinitions>
    <Grid.ColumnDefinitions>
        <ColumnDefinition/>
        <ColumnDefinition/>
        <ColumnDefinition/>
        <ColumnDefinition/>
        <ColumnDefinition/>
        <ColumnDefinition/>
    </Grid.ColumnDefinitions>
    <TextBlock Text="Drag Me" FontSize="14" Grid.Row="1" Grid.Column="2" />
    <TextBlock Text="Or Me" FontSize="14" Grid.Row="3" Grid.Column="4" />
    <Rectangle Fill="Red" Grid.Row="2" Grid.Column="0"/>
    <Rectangle Fill="Blue" Grid.Row="0" Grid.Column="4"/>
</Grid>
This markup creates a grid with row definitions in the grid to keep TextBlock and Rectangle controls in separate areas.
What You've Accomplished
You've successfully created and set up a WPF application or a Silverlight application and added controls to the page. In the next step you'll add code to add functionality to your application.