- SpreadJS Overview
- Getting Started
- JavaScript Frameworks
- Best Practices
- Features
- SpreadJS Designer
- SpreadJS Designer VSCode Plugin
- Tutorials
-
SpreadJS Designer Component
- Getting Started
- Quick Start
- Theme
- Designer Interface
- JavaScript Frameworks
- Template-Based Workbook Initialization
- Customizations
-
Work in Designer Component
- AutoSum Functions
- Set Range Template Cell
- Name Box
- Select Cells Using Go To
- Find and Replace
- Edit Font Size
- Edit Font Family
- Manage Conditional Formatting Rules
- Shape Selection Pane
- Automatic Outline
- Format Painter
- Table Slicer
- Data Source
- TableSheet
- GanttSheet Designer
- ReportSheet Designer
- Data Chart Designer
- Text to Columns
- Remove Duplicates
- Pivot Table
- Dockable Side Panel
- Command Palette
- Transform Cells with LAMBDA Formula
- Threaded Comments Panel
- What-If Analysis
- Insert Function Dialog
- Named Cell Templates
- Insert Pictures in Designer
- Toolbar Ribbon
- API Documentation
- SpreadJS Collaboration Server
- Touch Support
- Formula Reference
- Import and Export Reference
- Events
- API Documentation
- Release Notes
Named Cell Templates
SpreadJS Designer provides a visual interface for applying and managing Named Cell Templates.
With Designer, you can:
Apply templates to selected ranges
Create reusable templates
Modify, duplicate, or delete templates
Use built-in preset templates
Templates created or modified in Designer are stored in the workbook and are fully compatible with the SpreadJS runtime API.
For detailed rule behavior, see Named Cell Templates (Runtime Feature).
Accessing Named Cell Templates
Select a target cell or range.
Go to the Home tab.
In the Styles group, click Named Templates.

The template gallery opens and displays available templates.
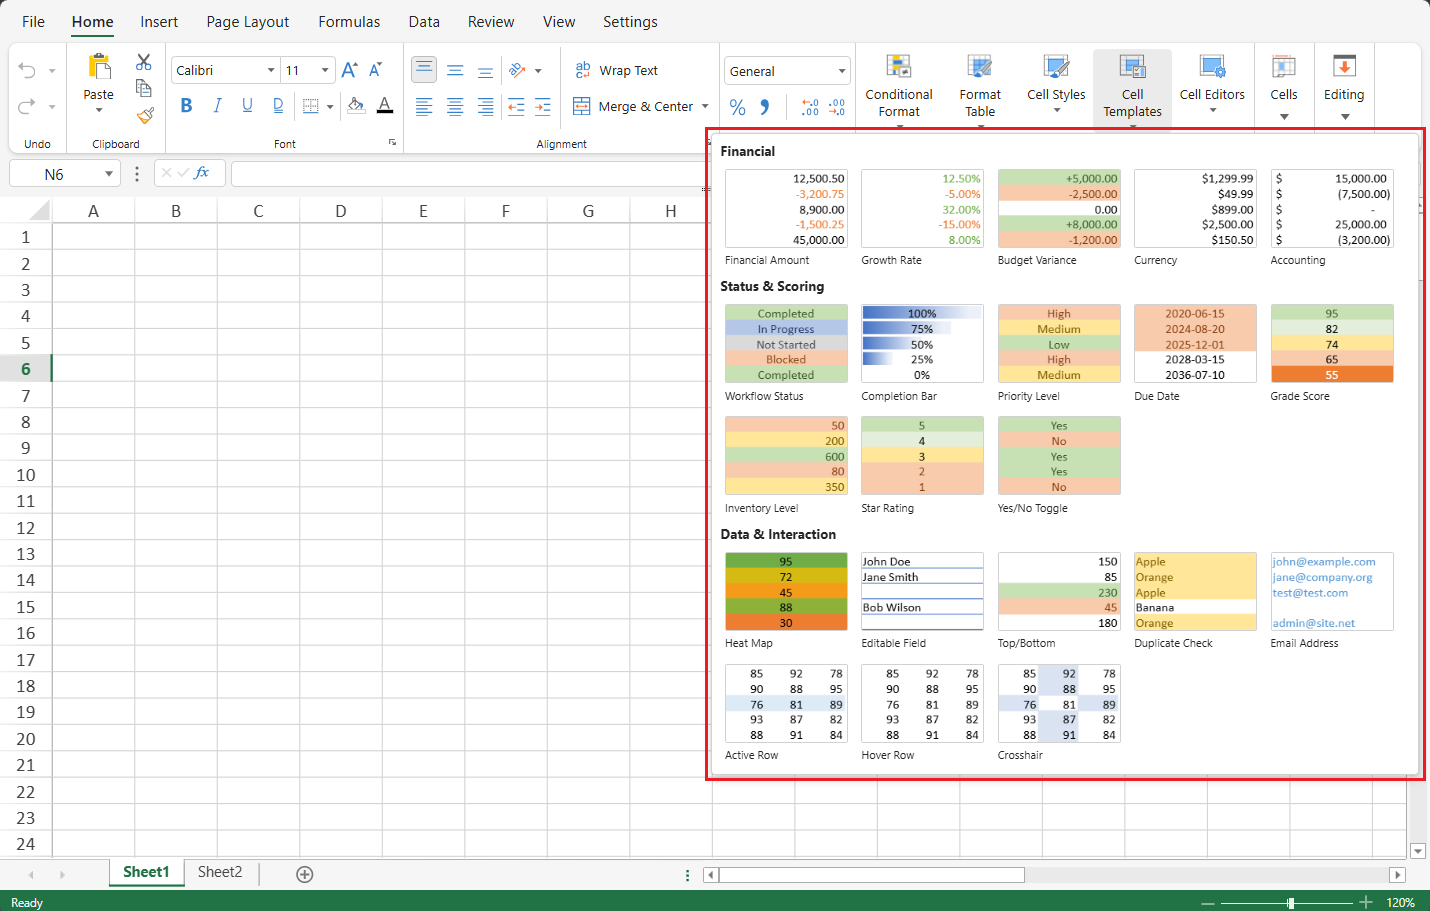
Template Gallery
The gallery displays all templates available in the current workbook.
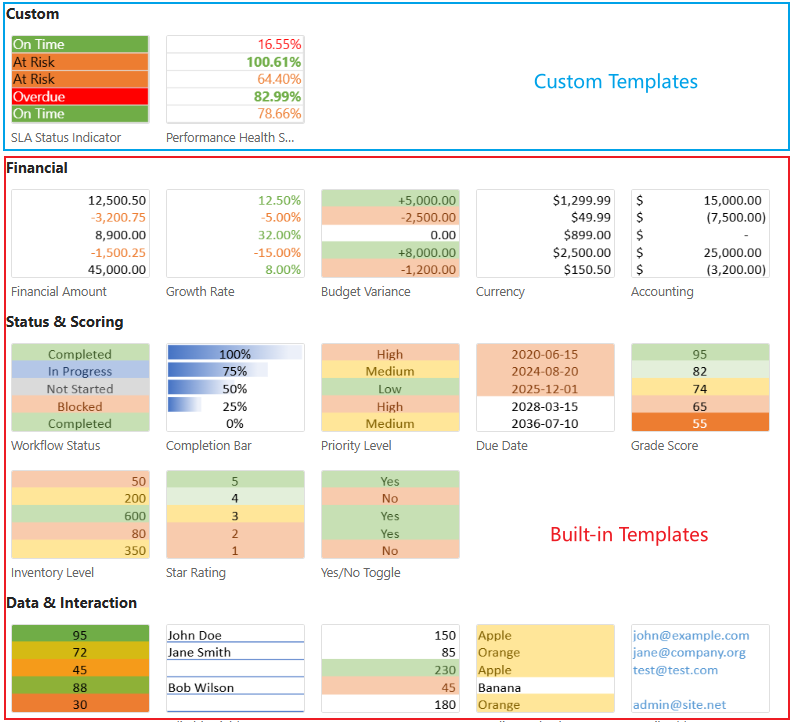
Templates are organized into:
Built-in Templates — Provided by SpreadJS Designer.
Custom Templates — Created by users and stored in the workbook.
Notes:
If a custom template has the same name as a built-in template, the custom template takes precedence and the built-in template is hidden. If the custom template is deleted, the built-in template becomes visible again.
Each template includes a preview thumbnail. When the gallery is opened for the first time, a loading indicator is shown while previews are generated. Thumbnails refresh automatically when the workbook theme changes.
In TableSheet, GanttSheet, and DataSource scopes, sheet-level state templates (such as Active Row, Hover Row, and Crosshair) are hidden from the gallery because they rely on worksheet-level state behavior.
For a detailed description of each built-in template and its included components, see Built-in Named Cell Template Gallery.
Applying Templates
Worksheet & ReportSheet
Select the target range.
Open the Named Templates gallery.
Click a template.
The template is applied immediately. Multiple selections are supported.
TableSheet & GanttSheet
Open the Column Settings panel.
In the Styles group, select Named Templates.
Choose a template.
Application Behavior
Templates follow an apply-only model.
Changes made to a template later do not update previously formatted cells.
Style and Data Validation overwrite existing settings.
Conditional Formatting and Cell States are appended.
Creating Custom Templates
You can create a template based on an existing cell configuration.
Select a configured cell.
Right-click and choose Create Cell Template…
Enter a name.
Select which components to include:
Style
Conditional Formatting
Data Validation
Cell States
Click OK.
Naming Rules
The name cannot be empty.
The name must not duplicate an existing custom template.
Name comparison is case-insensitive and ignores leading/trailing spaces.
If multiple cells are selected, only the active cell is used.
The new template appears in the Custom group and is saved with the workbook.
Managing Templates
Right-click a template in the gallery to manage it.

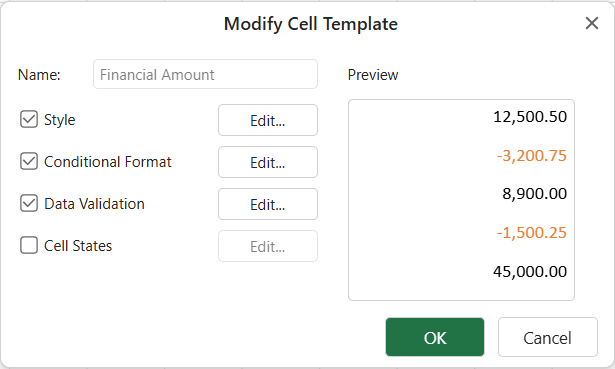
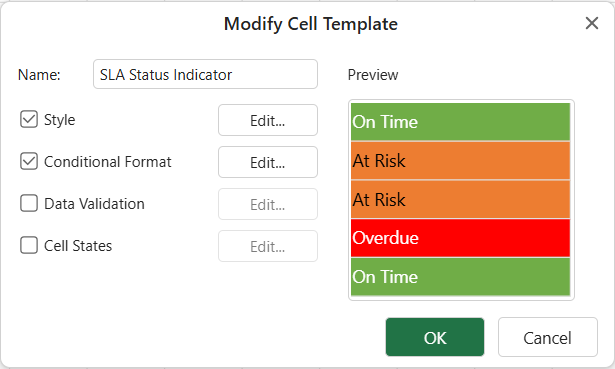
Modify
You can edit the template name (custom templates only) and configure included components.
Built-in Templates
Custom Templates
Changes update the template definition but do not affect cells where it was previously applied.
Built-in templates cannot be renamed. If you need to customize one, duplicate it first.
Notes:
The preview area supports editing sample data to verify template effects with different values. Modified sample data is serialized together with the template definition.
Modifications to built-in templates are persisted only after the template is modified or applied. Unmodified built-in templates are restored to their original definitions after refresh or reinitialization.
Duplicate
Right-click a template and choose Duplicate.
A new name is generated automatically (for example,
Template - Copy).If the name already exists, it increments (
Copy (2),Copy (3), etc.).
The duplicate is always created as a custom template.
Delete
Built-in Templates
Deletion is local to the current Designer instance.
Deleted built-in templates are restored after refresh or reinitialization.
Custom Templates
Removed from the workbook.
If the Custom group becomes empty, it is hidden.
If the custom template previously overrode a built-in template, the built-in template becomes visible again.
Deleting a template does not remove formatting from cells where it has already been applied.