Wijmo Open for Juice UI Extender Controls / WijDialog / WijDialog Task-Based Help / Using the Modal Dialog Window Option / Creating a Confirm Dialog
Creating a Confirm Dialog

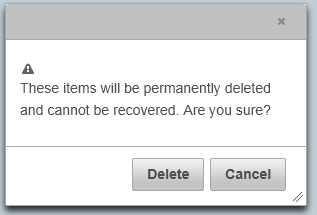
The WijDialog control allows you to create Confirm windows to confirm events like file deletion or emptying the recycle bin.

  1. Create an ASP.NET Web application with a ScriptManager control and install Juice UI and the Wijmo Juice libraries to your project via NuGet.
  2. Add a standard Panel control to the main content of your page.
  3. Insert the following markup within the Panel markup to create the dialog window:
    <div>
    
            <input type="button" value="Show Confirm" onclick="$('#dialog-confirm').wijdialog('open')" />
    
            <div id="dialog-confirm" title="Empty recycle bin?">
    
                <p>
    
                    <span class="ui-icon ui-icon-alert"></span>These items will be permanently deleted
    
                    and cannot be recovered. Are you sure?</p>
    
            </div>
    
    </div>
    
  4. Use the following markup to add a WijDialog control to the page and set the TargetControlID to Panel1.
      <cc1:WijDialog ID="Panel1_WijDialog" runat="server"
    
            TargetControlID="Panel1">
    
      </cc1:WijDialog>
    
  5. Select View | Properties Window in the Visual Studio menu.
  6. Click the drop-down list at the top of the Properties window and select Panel1_WijDialog.
  7. Set the Modal property to True.
  8. Add the following markup within the <cc1:WijDialog> tags to create a Delete and Cancel button in the dialog window, so the markup looks like the following:
    <cc1:WijDialog ID="Panel1_WijDialog" runat="server"
    
            CloseOnEscape="False" Show="blind" TargetControlID="Panel1" Modal="True">
    
             <ExpandingAnimation Duration="400">
    
            </ExpandingAnimation>
    
            <Buttons>
    
                <cc1:DialogButton OnClientClick="delClick" Text="Delete" />
    
                <cc1:DialogButton OnClientClick="cancelClick" Text="Cancel" />
    
            </Buttons>
    
            <CaptionButtons>
    
                <Pin Visible="false" />
    
                <Refresh Visible="False" />
    
                <Toggle Visible="False" />
    
                <Minimize Visible="False" />
    
                <Maximize Visible="False" />
    
            </CaptionButtons>
    
           <CollapsingAnimation Duration="300" />
    
     </cc1:WijDialog>
    
  9. Insert the following script within the <asp:Content> tags to close the dialog window when either of the buttons is clicked:
    <asp:Content ID="HeaderContent" runat="server" ContentPlaceHolderID="HeadContent">
    
      <script type="text/javascript">
    
          function delClick() {
    
              $(this).wijdialog("close");
    
          }
    
          function cancelClick() {
    
              $(this).wijdialog("close");
    
          }
    
    
        </script>
    
    </asp:Content>
    
  10. Run your application to see the Confirm Window. It should resemble the following image: