In This Topic
The WijMenu control supports using custom icons in the menu. You will use special markup to apply the icons to the WijMenu control.
- Create an ASP.NET Web application with a ScriptManager control and install Juice UI and the Wijmo Juice libraries to your project via NuGet.
- Add a standard Panel control to the main content of your page.
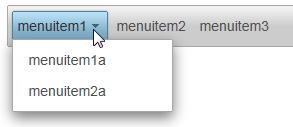
- Add the following markup within the <asp:Panel> tags to create a list that will become the menu.
<ul id="menu">
<li><a>menuitem1</a>
<ul>
<li><a>menuitem1a</a></li>
<li><a>menuitem2a</a></li>
</ul>
</li>
<li><a>menuitem2</a></li>
<li><a>menuitem3</a></li>
</ul>
- In Source view, use the following markup to add a WijMenu control to the page and set the TargetControlID to Panel1.
<cc1:WijMenu ID="Panel1_WijMenu" runat="server"
TargetControlID="Panel1">
</cc1:WijMenu>
- Select View | Properties Window in the Visual Studio menu.
- Click the drop-down list at the top of the Properties window and select Panel1_WijMenu.
- Expand the Animation node.
- Set th Animation.Duration property to 800.
- Expand the Animated node and set Effect to bounce.
- Press F5 to run the application. Click menuitem1 and notice the submenu bounces as it appears.

