Posted 24 July 2021, 8:37 am EST
In the Spread Designer component, how do I create a toggle button in the ribbon, similar to a “Bold” or “Left Align” button - the state of the button reflects the state of the current cell.
Forums Home / Spread / SpreadJS
Posted by: mhill on 24 July 2021, 8:37 am EST

mhill
Posted 24 July 2021, 8:37 am EST
In the Spread Designer component, how do I create a toggle button in the ribbon, similar to a “Bold” or “Left Align” button - the state of the button reflects the state of the current cell.

avinash.pathak
Posted 26 July 2021, 1:26 am EST
Hi,
The checkbox and the toggle button are the same the only difference it the toggle button has the icon. Internally it is implemented the same as the CheckBox control. Please refer to the following code snippet and attached sample that demonstrates how we implement checkbOX and toggle buttons in Designer.
	config.commandMap = {
			MyCheckbox: {
				title: "Custom Checkbox",
				text: "MyCheckbox",
				type: 'checkbox',
				commandName: "MyCheckbox",

				execute: async (context, propertyName) => {
					let state = context.getData("myCheckState");
					context.setData("myCheckState", !state);
				},
				getState: (context) => {
					return context.getData("myCheckState");
				}
			},
			myFontWeight: {
				iconClass: "ribbon-button-bold",
				title: "Bold",
				text: "MyToggelButton",
				type: 'checkbox',
				commandName: "myFontWeight",

				execute: async (context, propertyName) => {
					let state = context.getData("myState");
					context.setData("myState", !state);
				},
				getState: (context) => {
					return context.getData("myState");
				}
		}
	}
		var designer = new GC.Spread.Sheets.Designer.Designer(document.getElementById("designer_host"), config);
	}
Regards
Avinash
mhill
Posted 26 July 2021, 5:25 am EST - Updated 3 October 2022, 9:43 am EST
Excellent! Thank you very much. That worked a treat.
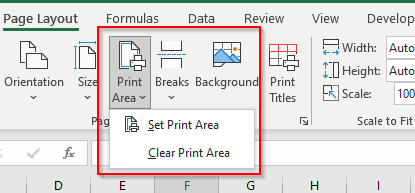
FYI - I’m expanding the designer to add more functions that I need for my project. I’m starting with adding buttons to set, get and clear the print area similar to what’s available in Excel.
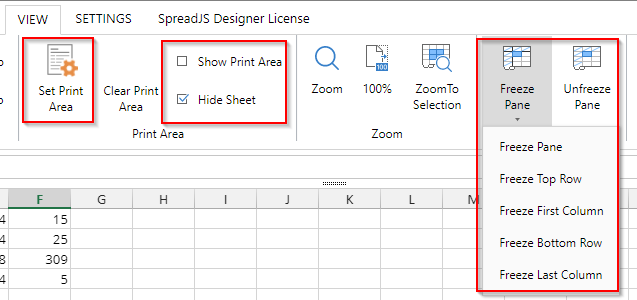
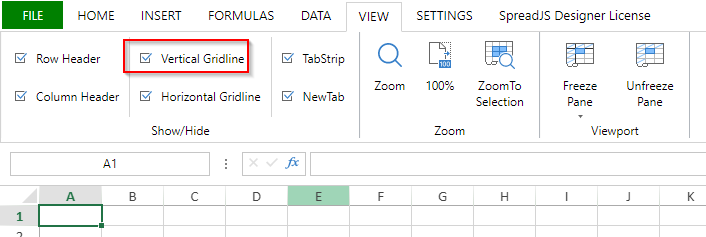
It would be a big help if you could also tell me how I can create a large dropdown button, similar to the button in the designer for Freeze Pane (see image).
Thanks very much,
Mark
avinash.pathak
Posted 27 July 2021, 5:02 am EST
Hi,
For this, you may create a command and define multiple subCommands. Please refer to the following code snippet and let us know if you face any issues.
  let commandMap = config.commandMap;
  if (!config.commandMap) {
    commandMap = config.commandMap = {};
  }
  let myTab = {
    id: 'MyTab',
    text: 'My Tab',
    buttonGroups: [customBtn]
  };

  commandMap['commandSave'] = {
    title: 'Save data to server',
    text: 'Save',
    iconClass: 'YourIconClassHere',
    bigButton: 'true',
    commandName: 'commandSave',
    subCommands: ['customCmd1', 'customCmd2', 'customCmd3']
  };
  commandMap['customCmd1'] = {
    text: 'customCmd1',
    iconClass: 'YourIconClassHere',
    bigButton: 'true',
    commandName: 'customCmd1',
    execute: async (context, propertyName, fontItalicChecked) => {
      // customize operator
      alert(propertyName);
    }
  };

  commandMap['customCmd2'] = {
    text: 'customCmd2',
    iconClass: 'YourIconClassHere',
    bigButton: 'true',
    commandName: 'customCmd2',
    execute: async (context, propertyName, fontItalicChecked) => {
      // customize operator
      alert(propertyName);
    }
  };
  commandMap['customCmd3'] = {
    text: 'customCmd3',
    iconClass: 'YourIconClassHere',
    bigButton: 'true',
    commandName: 'customCmd3',
    execute: async (context, propertyName, fontItalicChecked) => {
      // customize operator
      alert(propertyName);
    }
  };
  config.ribbon.push(myTab);
sample: https://stackblitz.com/edit/js-6gfeig
Regards
Avinash
mhill
Posted 27 July 2021, 11:27 am EST
That worked brilliantly. Thank you very much!