How to Build a C# .NET Scheduler Windows App
| Quick Start Guide | |
|---|---|
| What You Will Need |
Visual Studio 2022 |
| Controls Referenced | |
| Tutorial Concept | This blog is part one of our Scheduler series which covers how to create a Windows Appointment Management application for handling doctors' schedules. We will model it after a real-world healthcare application for managing client appointments. |
In today’s fast-paced world, effective appointment management is crucial for both personal and professional success. Whether you’re a busy professional, a small business owner, or managing a team, optimizing your scheduling process can save time and enhance productivity. An effective scheduling system not only helps with appointment management but also improves communication.
ComponentOne provides the C1Scheduler control to achieve complete appointment scheduling functionality in your .NET desktop applications. This control is a fully functional Outlook-style schedule that allows users to add, edit, group, and manage their appointments.
In this blog, part one of ComponentOne’s Scheduler series, we will learn how to create a Doctors Scheduler Windows app for managing appointments using the C1Scheduler control. This sample is designed as a real-world healthcare provider application for managing appointments.

We will develop the Scheduler Management app by following the steps below:
- Setup the WinForms Project
- Create the Scheduler and Calendar UI
- Create C# Model Classes for Appointment and Doctor
- Data Bind and Group the Scheduler
Ready to check it out? Download ComponentOne Today!
Setup the WinForms Project
Let’s start by creating a WinForms project in Visual Studio 2022 and adding the required dependencies by following the steps below:
- Open Visual Studio and select File>New>Project.
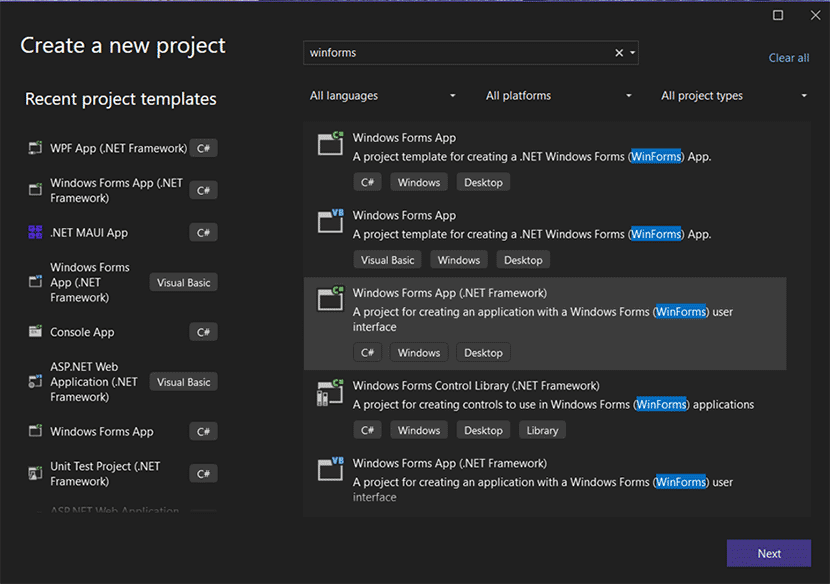
- Search “winforms” in the search box and select the “Windows Forms App (.Net Framework)” option. Then, click the “Next” button.
- Enter the project name, project location, solution name, and framework. Then, click “Next.”

- Add the C1Scheduler NuGet package by following the steps below:
a. In the Solution Explorer, right-click on the project and select “Manage NuGet packages...”

Now, we have a WinForms project with all the required NuGet packages.
Create the Scheduler and Calendar UI
In this section, we will build the healthcare application user interface.
- Add a SplitContainer in Form1.cs[Design] by dragging and dropping it from the toolbox. Name the SplitContainer “splitContainer1.”
- Set FixedPanel = Panel1 of splitContainer1. Then, resize the width of Panel1 per the requirement for a Calendar UI and CheckList of doctors.
- Add another SplitContainer inside Panel1 of splitContainer1. Name this SplitContainer “splitContainer2.”
- Set Orientation=Horizontal for splitContainer2.
- Set FixedPanel = Panel1 of splitContainer2. Then, resize the height of Panel1 to fit a Calendar UI.
At this point, the UI will appear as below:

- Next, drag and drop a C1Scheduler control from the toolbox into the right panel. Then, set Dock=Fill for the C1Scheduler. Name the C1Scheduler “appointmentScheduler.”
- Add a C1Calendar control from the toolbox into the top left panel. Then, set Dock=Fill and Schedule=appointmentScheduler to bind the two controls.
- Add a Label to the bottom left panel. Set its Text= “List of Doctors:”
- Add a CheckedListBox control to the bottom left panel. Then, set Anchor=Top, Bottom, Left on CheckedListBox and resize it over the panel.
Finally, the UI will appear as below:

Create C# Model Classes for Appointment and Doctor
Next, we will create some model classes, such as Appointment and Doctor, to represent our data collections. These model classes inherit the INotifyPropertyChanged interface so that they can bind with our scheduler data storage. The C1Scheduler Data Storage requires an INotifyPropertyChanged interface.
Below is the C# code for the Appointment and Doctor classes:
public class Appointment :INotifyPropertyChanged
{
    public string AppointmentId { get; set; }
    public string Body { get; set; }
    public DateTime Start { get; set; }
    public DateTime End { get; set; }
    public string Location { get; set; }
    public string Subject { get; set; }
    public int Owner { get; set; }
    public string Properties { get; set; }

    public event PropertyChangedEventHandler PropertyChanged;
}
Doctor class:
public class Doctor : INotifyPropertyChanged
 {
     public int DoctorID { get; set; }
     public string FirstName { get; set; }
     public string LastName { get; set; }
     public string Title { get; set; }
     public string TitleOfCourtesy { get; set; }
     public DateTime BirthDate { get; set; }
     public DateTime HireDate { get; set; }
     public string City { get; set; }
     public string Region { get; set; }
     public string PostalCode { get; set; }
     public string Country { get; set; }
     public string HomePhone { get; set; }
     public string Extension { get; set; }
     public string Photo { get; set; }
     public int? ReportsTo { get; set; }

     public event PropertyChangedEventHandler PropertyChanged;
 }
Data Bind and Group the Scheduler
In this section, we will learn how to fetch the data from JSON and bind it to the scheduler’s DataStorage, create the list of doctors, and group the scheduler by doctor.
In the constructor of Form1, add the code below to fetch and bind existing appointments from an Appointments.json file and doctors from the Doctors.json file.
//Bind Appointments
 var appointments = JsonConvert.DeserializeObject<ObservableCollection<SchedulerSample.Model.Appointment>>(File.ReadAllText("Resources/Appointments.json"));
 c1Schedule1.DataStorage.AppointmentStorage.Mappings.Body.MappingName = "Body";
 c1Schedule1.DataStorage.AppointmentStorage.Mappings.IdMapping.MappingName = "AppointmentId";
 c1Schedule1.DataStorage.AppointmentStorage.Mappings.Start.MappingName = "Start";
 c1Schedule1.DataStorage.AppointmentStorage.Mappings.End.MappingName = "End";
 c1Schedule1.DataStorage.AppointmentStorage.Mappings.Location.MappingName = "Location";
 c1Schedule1.DataStorage.AppointmentStorage.Mappings.Subject.MappingName = "Subject";
 c1Schedule1.DataStorage.AppointmentStorage.Mappings.OwnerIndexMapping.MappingName = "Owner";
 c1Schedule1.DataStorage.AppointmentStorage.Mappings.AppointmentProperties.MappingName = "Properties";
 c1Schedule1.DataStorage.AppointmentStorage.DataSource = appointments;

 //Bind List of Doctors
 var owners = JsonConvert.DeserializeObject<ObservableCollection<SchedulerSample.Model.Doctor>>(File.ReadAllText("Resources/Doctors.json"));
 this.c1Schedule1.DataStorage.OwnerStorage.Mappings.IndexMapping.MappingName = "DoctorID";
 this.c1Schedule1.DataStorage.OwnerStorage.Mappings.TextMapping.MappingName = "FirstName";
 c1Schedule1.DataStorage.OwnerStorage.DataSource = owners;
Setup the List of Doctors
Now, we have a list of doctors, and it's time to set up the list that will display them in the CheckListBox. This will allow users to hide or show doctors based on their checked state. The collection of doctors was added to the OwnerStorage of the scheduler. Follow the steps below to set up the doctors CheckListBox:
- Add all doctors to the CheckListBox:
foreach (Contact cnt in appointmentScheduler.DataStorage.OwnerStorage.Contacts) { cnt.Text = "Dr. " + cnt.MenuCaption; checkedListBox1.Items.Add(cnt); } - Check all items of CheckListBox:
for (int i = 0; i < checkedListBox1.Items.Count; i++) { checkedListBox1.SetItemChecked(i, true); } - Handle the ItemCheck event of CheckListBox to update the visible grouping in C1Scheduler.
checkedListBox1.ItemCheck += (s, e) =>
 {
     Contact cnt = checkedListBox1.Items[e.Index] as Contact;
     appointmentScheduler.GroupItems[cnt].IsChecked = e.NewValue == CheckState.Checked;
};
Group the Doctors in C1Scheduler
One of the key features of C1Scheduler is its capability for resource grouping. This allows us to view schedules in a grouped view where the group can be any contact, resource, room, etc. In this case, we will group the scheduler by doctor. Follow the steps below in your code to enable scheduler grouping.
Enable grouping by specifying how to group the scheduler and setting the GroupBy property. You can also listen to the BeforeGroupHeaderFormat event to customize the group header UI. See the code below:
appointmentScheduler.GroupBy = "Owner";
appointmentScheduler.BeforeGroupHeaderFormat += (s, e) =>
{
Contact contact = e.Group.Owner as Contact;
if (contact != null)
{
if (owners != null)
{
var owner = owners.Where(x => x.DoctorID == (int)contact.Key[0]).FirstOrDefault();
if (owners != null)
{
e.Html = " <img STYLE='padding-top:1mm' height='100px' width='100px' src='data:image/png;base64," + owner.Photo + "'/>" + "<br>" + owner.FirstName + " " + owner.LastName + "(" + owner.Title + ")";
}
}
if (e.Style.Hot != null)
{
e.Style.Hot.BackColor2 = e.Style.Hot.BorderColor = Color.DarkSlateGray;
e.Style.Hot.ForeColor = Color.WhiteSmoke;
}
}
};Add Appointments to the Scheduler
Finally, we will add some sample appointments to populate the schedule. We can also adjust the scheduler’s visible dates by setting the SelectedDates property on C1Calendar.
appointments.Add(new Appointment() { AppointmentId = Guid.NewGuid().ToString(), Subject = "Alex Marsh", Owner = 2, Start = DateTime.Today.AddHours(8), End = DateTime.Today.AddHours(8).AddMinutes(30) });
 appointments.Add(new Appointment() { AppointmentId = Guid.NewGuid().ToString(), Subject = "Gwen Smith", Owner = 1, Start = DateTime.Today.AddHours(9), End = DateTime.Today.AddHours(9).AddMinutes(30) });
appointments.Add(new Appointment() { AppointmentId = Guid.NewGuid().ToString(), Subject = "James Rodriguez", Owner = 2, Start = DateTime.Today.AddHours(9).AddMinutes(40), End = DateTime.Today.AddHours(10) });
appointments.Add(new Appointment() { AppointmentId = Guid.NewGuid().ToString(), Subject = "Maria Martinez", Owner = 1, Start = DateTime.Today.AddHours(8), End = DateTime.Today.AddHours(8).AddMinutes(30) });
 appointments.Add(new Appointment() { AppointmentId = Guid.NewGuid().ToString(), Subject = "Johny Johnsons", Owner = 3, Start = DateTime.Today.AddHours(10), End = DateTime.Today.AddHours(10).AddMinutes(30) });
 appointments.Add(new Appointment() { AppointmentId = Guid.NewGuid().ToString(), Subject = "Richard Miler", Owner = 4, Start = DateTime.Today.AddHours(11), End = DateTime.Today.AddHours(11).AddMinutes(15) });
 appointments.Add(new Appointment() { AppointmentId = Guid.NewGuid().ToString(), Subject = "William Marsh", Owner = 5, Start = DateTime.Today.AddHours(10), End = DateTime.Today.AddHours(10).AddMinutes(20) });
 appointments.Add(new Appointment() { AppointmentId = Guid.NewGuid().ToString(), Subject = "Christopher Lopez", Owner = 6, Start = DateTime.Today.AddHours(10).AddMinutes(15), End = DateTime.Today.AddHours(10).AddMinutes(45) });
 appointments.Add(new Appointment() { AppointmentId = Guid.NewGuid().ToString(), Subject = "Daniel Martin", Owner = 3, Start = DateTime.Today.AddHours(11), End = DateTime.Today.AddHours(11).AddMinutes(30) });
appointments.Add(new Appointment() { AppointmentId = Guid.NewGuid().ToString(), Subject = "Emily Clark", Owner = 1, Start = DateTime.Today.AddHours(12), End = DateTime.Today.AddHours(12).AddMinutes(15) });

var dateList = new List<DateTime>();
for (int i = 0; i < 7; i++)
{
    dateList.Add(DateTime.Today.AddDays(i));
}
c1Calendar1.SelectedDates = dateList.ToArray();
Ready to try it yourself? Download ComponentOne Today!
Conclusion
The first part of our Doctors Scheduler Windows app has been developed. We hope this blog helps you create a custom scheduling management application using C1Scheduler. Feel free to customize it further to fit your requirements. You can download the full sample to try it yourself.
When you build and run the sample, it will appear as below:

To learn more about the C1Scheduler control, you can check out the documentation.
Related Blogs
Try Our .NET UI Components & Datagrid
Getting Started With ComponentOne
