Creating and Configuring the OutBar Control
To create a C1OutBar at design time, complete the following steps:
- Place the C1OutBar control to your form using a drag-and-drop operation. The newly created C1OutBar will initially contain a single page with a C1ToolBar control on it (C1OutBar pages can contain either C1ToolBar controls which are specially treated in that case, or arbitrary other controls, such as pages of a tab control). Also, a C1CommandHolder will be automatically created and placed on the component's tray.
- Select C1OutPage1 from the Properties window drop-down list. Change its Text property from Page1 to File.
- Right-click on the (only) item in the C1ToolBar, and select Append Item from the context menu. The Link to Command dialog box appears.
- In the Link to Command designer set the following command properties:
- Text to New
- Name to cmdFileNew
- Select C1Command from the Create a new command listbox.
- Select OK.
- Select the C1CommandLink1 from the Properties window drop-down list and set the ButtonLook property to TextAndImage.
- Select the cmdFileNew and locate its image property. Click on the ellipsis button
 and locate the desired image.
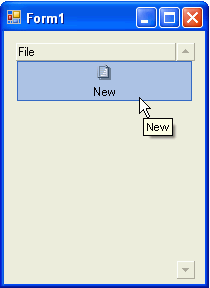
 - Select the image and click OK in the Select Resource dialog box. The new image appears above C1CommandLink1's text.
- Build and run the application. It will look similar to the following image:


