- Menus and Toolbars for WinForms Overview
- Key Features
- Overview
- Design-Time Support
- Menus and Toolbars Overview
- DockingTab Overview
- NavBar Overview
- OutBar Overview
- TopicBar Overview
- RadialMenu Overview
- Menus and Toolbars for WinForms Samples
- Menus and Toolbars for WinForms Task-Based Help
Adding an Icon to a Topic Page
In this topic, you will create an image list and then an image in that list to a topic page.
Complete the following steps:
- In the Toolbox, double-click the C1TopicBar icon to add the C1TopicBar control to your project.
- In the Toolbox, double click the Image List icon to add the Image List component to your project.
- Click the ImageList control's smart tag (
 ) to open the Image List Tasks menu.
 - Select Choose Images to open the Images Collection Editor.
- Click Add to open the Open dialog box and complete the following:
- Navigate to the image you wish to use as an icon.
- Select the image.
- Press OK to close the Open dialog box and to return to the Images Collection Editor. Observe that the image is numbered “0”.
- Press OK to close the Images Collection Editor.
- Right-click the C1TopicBar control to open its context menu and then select Properties from the list. The Properties window opens with the C1TopicBar control's properties in focus.
- Locate the ImageList property, click its drop-down arrow, and select imageList1 from the list. This loads the image list into the control so that the control's topic pages can pull images from the list.
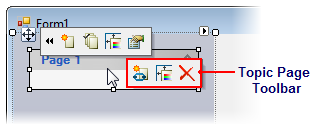
- Hover over Page 1 with your cursor until the floating toolbar appears. The topic page's toolbar appears as follows:

- Click the Edit topic page appearance button
 to open the C1TopicPage Properties editor.
 - Click the Image Index drop-down arrow and select 0 from the list.
The icon is added to Page 1.
This topic illustrates the following:
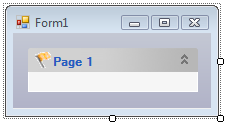
In this topic, you added an icon to a topic page. The image below depicts a page with an icon.


