Adding a Panel
In this topic, you will add a panel to the C1NavBar control using the smart tag and the floating toolbar.
Using the Smart Tag
Complete the following steps:
- Navigate to the Toolbox and double-click the C1NavBar icon. The C1NavBar control is added to the form. Observe that one panel, named Notes, appears on the control by default.
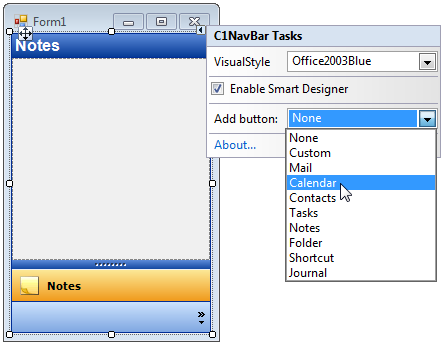
- Click C1NavBar's smart tag (
 ) to open the C1NavBar Tasks menu.
 - On the C1NavBar Tasks menu, click the Add button drop-down button and select one of the panel types from the list. For this example, select Calendar.
Using the Floating Toolbar
Complete the following steps:
- Navigate to the Toolbox and double-click the C1NavBar icon. The C1NavBar control is added to the form. Observe that one page, named Page 1, appears on the control by default.
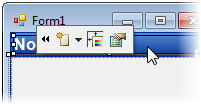
- Hover your cursor over the control to activate the floating toolbar. The floating toolbar will appear on the page as follows:
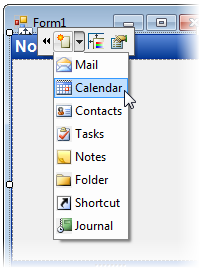
- From the Adding button and corresponding panel drop-down list, select a panel type. For this example, select Calendar.
This topic illustrates the following:
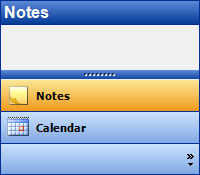
The result of this topic resembles the following: