
How to Import and Export Excel XLSX Using Angular
This tutorial shows how to import and export Excel XLSX files in an Angular application using SpreadJS, an Angular spreadsheet component. You’ll learn how to set up an Angular project, add a spreadsheet component, and enable Excel import/export.
Try Out an Import and Export Sample
Create an Angular Spreadsheet Application
Install the @angular/cli package.
npm i -g @angular/cliRun the following NPM command to create a new Angular app:
ng new spreadjs-angular-io
cd spreadjs-angular-io
Install the required npm packages: Spread-Sheets, Spread-Sheets-Angular, Spread-Sheets-IO, and Spread-Sheet-Charts.
npm install @mescius/spread-sheets
npm install @mescius/spread-sheets-angular
npm install @mescius/spread-sheets-io
npm install @mescius/spread-sheets-charts
Import the JavaScript (and CSS) modules into our src/main.js file:
import '@mescius/spread-sheets/styles/gc.spread.sheets.excel2013white.css'
import * as GC from '@mescius/spread-sheets';
import '@mescius/spread-sheets-io';
import 'file-saver';
Open the app.ts file and add the necessary imports for the SpreadJS module, as noted below.
import { Component } from '@angular/core';
import { SpreadSheetsModule } from "@mescius/spread-sheets-angular";
import * as GC from "@mescius/spread-sheets";
import '@mescius/spread-sheets-io';
import '@mescius/spread-sheets-charts';
@Component({
  selector: 'app-root',
  imports: [SpreadSheetsModule],
  template: `
    Welcome to Angular!
  `,
  styles: [],
})
export class App {
  protected title = 'spreadjs-angular-io';
}
In the app.ts file delete the template's placeholder contents (or in the app.html file if you are using a templateUrl). Then add SpreadJS’ Angular Template to the application, along with buttons for opening, exporting, and modifying the .xlsx file like so:
@Component({
selector: 'app-root',
imports: [SpreadSheetsModule],
template: `
<div class="container">
<div class="spread-panel">
<gc-spread-sheets [hostStyle]="hostStyle" (workbookInitialized)="workbookInit($event)">
</gc-spread-sheets>
</div>
<div class="side-panel">
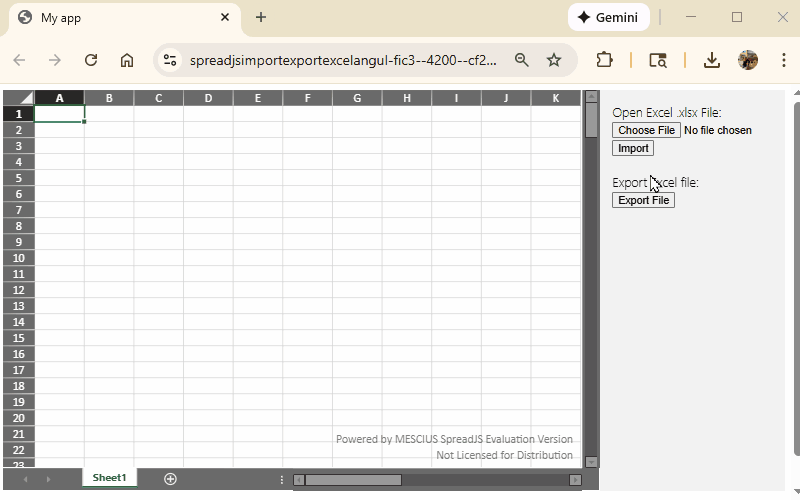
<label for="selectedFile">Open Excel .xlsx File:</label>
<input id="selectedFile" type="file" accept=".xlsx" (change)="selectedFileChange($event)" />
<button (click)="open()" id="open">Import</button>
<br/>
<label>Add Data</label><br/>
<button (click)="addCustomer()">Add Customer</button>
<br/>
<label>Export Excel file:</label><br/>
<button (click)="save()">Export File</button>
</div>
</div>
`,
styles: [],
})In the app.ts file, add the following code to the App class to add the Angular spreadsheet component to the application and initialize the workbook. We also have a few placeholder functions that we will fill out later.
export class App {
  protected title = 'spreadjs-angular-io';
   hostStyle = {
    width: '100%',
    height: '600px'
  };
  spread: GC.Spread.Sheets.Workbook | any = null;
  columnWidth = 100;
  constructor() {
  }
  // Initialize SpreadJS
  workbookInit($event: any) {
    this.spread = $event.spread;
  }
  // Get the selected Excel file
  selectedFileChange(e: any) {
  }
  // Imported the Excel file into SpreadJS
  open() {
  }
  // Modify data imported
  addCustomer() {
  }
  // Save the instance as an Excel File
  save() {
  }
Open the styles.css file and import the SpreadJS stylesheet (as shown below). This applies one of the built-in themes, changing the UI of the spreadsheet instance—refer to our demo for more details. We will also add some styles for the layout of the SpreadJS panel and side panel.
@import '@mescius/spread-sheets/styles/gc.spread.sheets.excel2016darkGray.css';
body {
    font-family: -apple-system, BlinkMacSystemFont, 'Segoe UI Light', Roboto,
    Oxygen-Sans, Ubuntu, Cantarell, 'Helvetica Neue', sans-serif;
}
.container {
  display: flex;
  flex-direction: row;
  flex-wrap: nowrap;
  height: 100%;
}
.spread-panel {
  flex: 1 1 auto;
}
.side-panel {
  width: 200px;
  padding: 1rem;
  background-color: #f2f2f2;
}
.side-panel input {
  width: 100%;
  min-width: 100px;
}
Save all the files, and run the Angular app:
npm startWith the steps so far, the Angular app renders a basic spreadsheet.

Add Excel Import Code to an Angular App
SpreadJS has a workbook import method that imports the object state from Excel. Before we can invoke this method, we must get the user-selected .xlsx file. To do this, we will go to the app.ts file, and add selectedFile variable:
export class App {
  protected title = 'spreadjs-angular-io';
   hostStyle = {
    width: '100%',
    height: '600px'
  };
  spread: GC.Spread.Sheets.Workbook | any = null;
  columnWidth = 100;
   // Stores the user-selected file in the selectedFileChange function
  selectedFile: File | any = null;
  constructor() {
  }
...
In the selectedFileChange() function store the selected file object in the selectedFile variable :
// Get the selected Excel file
  selectedFileChange(e: any) {
      this.selectedFile = e.target.files[0];
}
Now, in the open() function, with the selectedFile, invoke the SpreadJS import method, be sure to specify the FileType as excel.
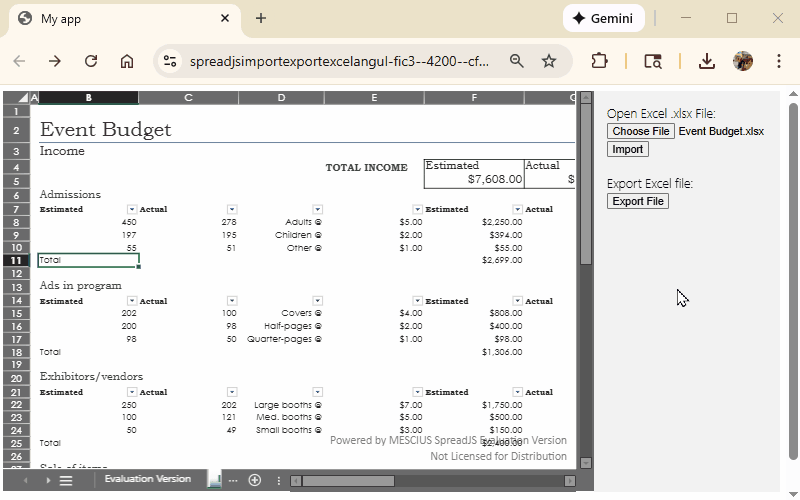
open() {
    let file = this.selectedFile;
        if (!file) {
            return;
        }
    // Specify the file type to ensure proper import
    const options: GC.Spread.Sheets.ImportOptions = {
      fileType: GC.Spread.Sheets.FileType.excel
    };
    if(this.spread){
      this.spread.import(file, () => {
        console.log('Import successful');
      }, (e: any) => {
        console.error('Error during import:', e);
      }, options);
    }
}
With these steps, you've successfully add Excel import functionality to the Angular spreadsheet application.
Add Excel Export Code to an Angular App
With the export method included with SpreadJS and the file-saver npm package, Angular app developers can effortlessly export a spreadsheet state as an Excel file. First, install the file-saver npm package and save its type definitions.
npm install file-saver
npm i --save-dev @types/file-saver
Import the file-saver package to the app.ts file.
import { Component } from '@angular/core';
import { SpreadSheetsModule } from "@mescius/spread-sheets-angular";
import * as GC from "@mescius/spread-sheets";
import '@mescius/spread-sheets-io';
import '@mescius/spread-sheets-charts';
import { saveAs } from 'file-saver';
...
Next, update the save() function by first specifying the exported XLSX file name; we used “Excel_Export.xlsx”, then invoke the SpreadJS export method, which exports the current spreadsheet state into a Blob. Within the export method, invoke the file-saver's saveAs method to save the exported spreadsheet Blob as an actual Excel file on the client side.
  // Save the instance as an Excel File
  save() {
    let fileName = 'Excel_Export.xlsx'
    if(this.spread){
      this.spread.export(function (blob:any) {
        // save blob to a file
        saveAs(blob, fileName);
      }, function (e:any) {
          console.log(e);
      }, {
          fileType: GC.Spread.Sheets.FileType.excel
      });
    }
  }
With these steps, you've successfully added Excel export functionality to the Angular spreadsheet application.
Include Extra Features
If you want to import and export Excel files with Shapes and PivotTables, make sure to include those optional add-on modules for SpreadJS (@mescius/spread-sheets-shapes and @mescius/spread-sheets-pivot-addon).
Import and Export Excel FAQs
Do I need to have Excel installed for this import or export in Angular to work?
No! SpreadJS is a stand-alone Angular component that can import and export Excel files without depending on Excel at all.
Can my end users changes be included in the export?
Yes! SpreadJS allows users to modify spreadsheets in an Excel-like experience. Those changes will be included when the spreadsheet is exported.
What types of files can be imported or exported?
SpreadJS supports import and export of .xlsx, .xlsm, .xltm file types. It can even import .csv files and has a custom SpreadJS (.sjs)file format for optimized performance and app development.
Do you support Excel files with macros?
The macros will not run, but Excel files with macros can be imported and exported without losing the macros. The macros simply will be ignored when the spreadsheet runs in SpreadJS. Note: most macro use cases can be replicated in custom JavaScript code using SpreadJS