
Convert Workbook Formats using Data Posted from Client
This section demonstrates how to call the Web API service through a client application and convert between excel file formats, posted from client.
Step 2: Run the Client Project
The following example makes a call to the Web API service through HTML as well as WinForms client applications. These clients send a POST request to the service, which returns a response stream. This response stream is then saved in the desired excel file format.
In the following example, user provides excel data file through the client applications. Moreover, the end user needs to specify the service URL, name and appropriate file format of generated excel file through client project. It is so, because the parameters or query string for converting excel formats are sent in the HTTP message body of the POST request and not in the request URL.
type=note
Note: Service can convert xls, xlsx, and csv files posted from the client.
Step 1: Call the Service
Complete the following steps to call the Web API service.
csharpC#
private void button1_Click(object sender, EventArgs e) {
  var result = openFileDialog1.ShowDialog();
  if (result == DialogResult.OK || result == DialogResult.Yes) {
    _filePath = openFileDialog1.FileName;
    if (!string.IsNullOrEmpty(_filePath)) {
      label1.Text = _filePath;
    }
  }
}
HTML
<form action="https://demos.componentone.com/ASPNET/5/C1WebAPI/3.0.20193.222/api/excel" method="POST" enctype="multipart/form-data">
        <label for="WorkbookFile">Select data file:</label>
        <input type="file" id="WorkbookFile" name="WorkbookFile" />
        <br/><br/>
        <label for="FileName">File Name:</label>
        <input type="text" id="FileName" name="FileName" value="Excel"/>
        <br /><br />
        <label for="Type">File Format:</label>
        <input type="text" id="Type" name="type" value="xlsx" />
        <br /><br />
        <input type="submit" value="Convert Excel Format"/>
</form>
Step 2: Run the Client Project
WinForms Application
- Click Build | Build Solution to build the project.
- Press F5 to run the project.
- Click Select Data File button, to select and post excel file (xls, xlsx, or csv) to convert.* Specify the name and appropriate file format of the generated excel, in respective text boxes.
- Provide the service URL for POST request (https://developer.mescius.com/componentone/demos/aspnet/c1WebAPI/latest/api/excel) in respective text box, and click the Convert Excel Format button. The generated excel data file will open.
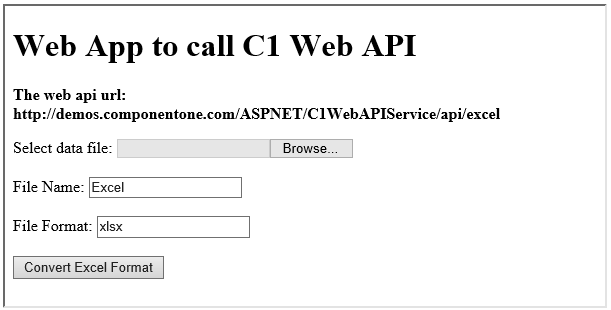
HTML Application
- Save your HTML file and open it in a browser.
- Select and post excel data file.
- Set name and appropriate file format for generated excel, and click Convert Excel Format button.
type=note
Explore detailed demo samples of REST API service to convert between excel file formats at: