How to Create an Imaging Service over Azure Blob Storage Events

This article is part of an ongoing series involving GrapeCity Documents and Azure Cloud Services. Here, we'll discuss how to use events from Azure Blob Storage to modify an image stored. We'll use Azure Event Hub to consume the upload event coming from Azure Blob Storage and notify our serverless function to add effects like watermarking and resizing to uploaded image.
Designing the Service
GcImaging and Image Operations
GcImaging is distributed as standalone NuGet packages, available directly from NuGet.org.
- NuGet Package Manager
Install-Package GrapeCity.Documents.Imaging
- Dotnet CLI
dotnet add package GrapeCity.Documents.Imaging
In this article, we will be designing a service that will read an image uploaded to AWS S3 and create a grayscale thumbnail with a watermark.
Using GcImaging We Will:
- Add Watermark on the image
- Convert Image to Grayscale
- Resize the image to a thumbnail

Take a look at all of additional imaging operations that you can perform with GcImaging. Here, you can browse sample sources, view or download generated images in JPEG, PNG or TIFF formats, and download complete sample projects in C# or VB.NET.
The Azure Event Grid Workflow
Our architecture is going to be very similar to the one we discussed in this blog. The major difference between these two designs is that in Azure, unlike AWS, all events are routed via Event Grid. This allows Azure to provide different event subscription patterns. Where as in AWS we can only use a Lambda function to invoke a custom code on some events, Azure allows various other subscribers like Azure Automation, Webhooks, and REST APIs. For this article we will focus solely on Functions.

Azure Functions comes with out-of-box support for Azure event bindings. With output binding, now it's possible to directly upload an image to a container without using Storage SDKs. It is important that you understand how Blob Storage’s bindings with Function facilitate our use case. The Blob storage trigger starts a function when a new or updated blob is detected. The blob contents are provided as input to the function. The Event Grid trigger has built-in support for blob events and can also be used to start a function when a new or updated blob is detected.
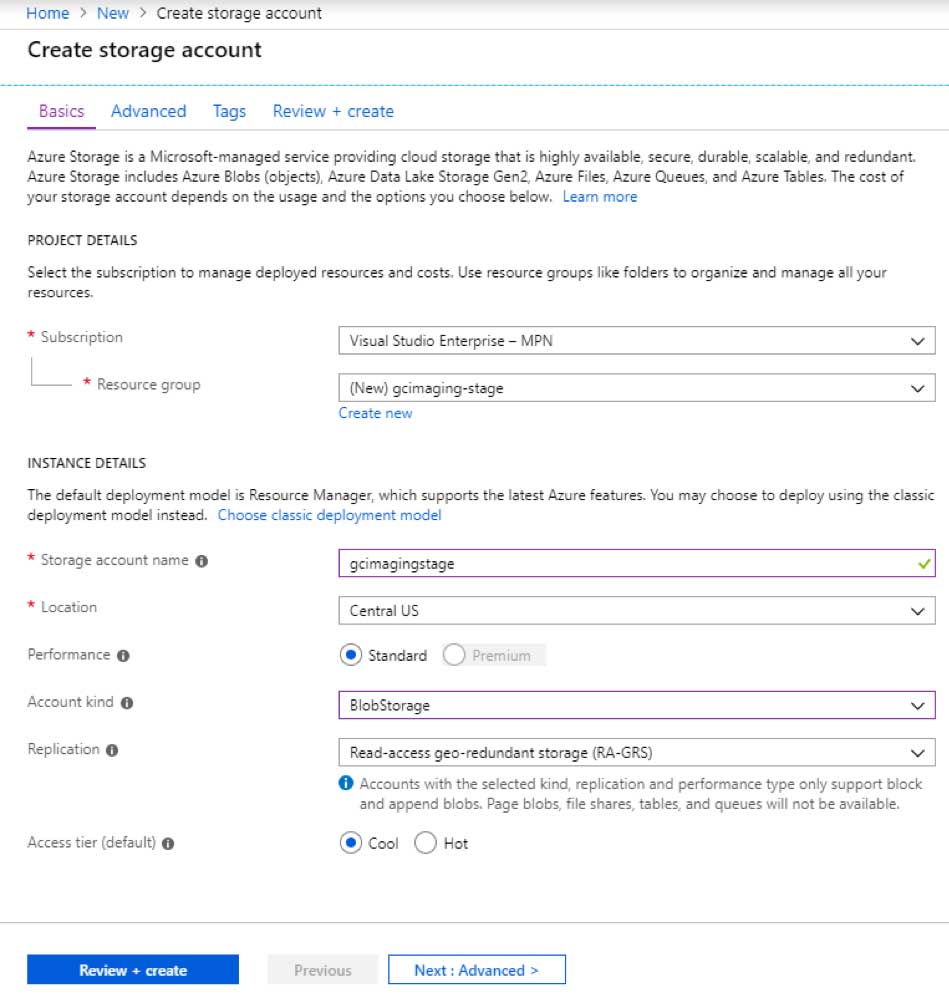
Note: Blob storage events are available in general-purpose v2 storage accounts and Blob storage accounts only.
Azure Blob Storage are general-purpose, durable, scalabile, and high-performing storage. Blob storage allows consumers to store files as containers. Containers work exactly like buckets in S3. Whenever a file is added or deleted from a Blob storage container, event grid uses event subscriptions to route event messages to subscribers. For our design, we are going to use Azure Functions as subscriber of the event coming from Blob via Event Grid.
A generic Blob storage account should look like this:
Creating an Azure Function with Visual Studio
Visual Studio Walkthrough
- Open Visual Studio and create a new project “GrapeCity.Documents.Imaging.FunctionsV2” by selecting C# > Cloud > Azure Functions.
- Select “Azure Functions v2 (.NET Core)”.
- Choose Storage Account. (You can select Storage Emulator for local development)
- Select Blob trigger as Functions trigger.

- Open NuGet Package Manager, search GrapeCity.Documents.Imaging, and install the package.
- Create a new class GcImagingOperations.cs.
GcImagingOperations class would contain static functions that will manipulate your image. This function does the following:- Load a byte array into a GcBitmap object.
- Using GcBitmap.CreateGraphics, we'll then draw this image on another GcBitmap.
- We'll then add a watermark text with DrawString method.
- After this we will apply GrayScale effect using GcBitmap’s ApplyEffect method.
- Next, resize the image and return the image’s base64 string.
The code for the same would look like this:
using System;
using System.IO;
using System.Drawing;
using GrapeCity.Documents.Drawing;
using GrapeCity.Documents.Text;
using GrapeCity.Documents.Imaging;

namespace GrapeCity.Documents.Imaging.FunctionsV2

{
    public class GcImagingOperations

    {
        public static byte[] GetConvertedImage(byte[] str)

        {

            GcBitmap.SetLicenseKey("<ADD YOUR LICENSE HERE>");

            using (var bmp = new GcBitmap())

            {
                bmp.Load(str);

                // Add watermark

                var newImg = new GcBitmap();

                newImg.Load(str);

                using (var g = bmp.CreateGraphics(Color.White))

                {

                    g.DrawImage(

                        Image.FromGcBitmap(newImg, true),

                        new RectangleF(0, 0, bmp.Width, bmp.Height),

                        null,

                        ImageAlign.Default

                        );

                    g.DrawString("DOCUMENT", new TextFormat

                    {

                        FontSize = 22,

                        ForeColor = Color.FromArgb(128, Color.Yellow),

                        Font = FontCollection.SystemFonts.DefaultFont

                    },

                    new RectangleF(0, 0, bmp.Width, bmp.Height),

                    TextAlignment.Center, ParagraphAlignment.Center, false);

                }

                // GcBitmap.SetLicenseKey("");

                //  Convert to grayscale

                bmp.ApplyEffect(GrayscaleEffect.Get(GrayscaleStandard.BT601));

                //  Resize to thumbnail

                var resizedImage = bmp.Resize(100, 100, InterpolationMode.NearestNeighbor);

                using (MemoryStream m = new MemoryStream())

                {

                    resizedImage.SaveAsPng(m);

                    m.Position = 0;


                    byte[] _buffer = new byte[16 * 1024];

                    using (MemoryStream _ms = new MemoryStream())

                    {

                        int _read;

                        while ((_read = m.Read(_buffer, 0, _buffer.Length)) > 0)
                        {

                            _ms.Write(_buffer, 0, _read);

                        }

                        return _ms.ToArray();

                    }

                }

            }

        }

    }

}
- Open ThumbnailFunction class and add the following code:
using System.IO;
using Microsoft.Azure.WebJobs;
using Microsoft.Extensions.Logging;

namespace GrapeCity.Documents.Imaging.FunctionsV2

{
    public static class ThumbnailFunction

    {
        [FunctionName("ThumbnailFunction")]

        public static void Run(

            [BlobTrigger("images/{name}", Connection = "AzureWebJobsStorage")] byte[] myBlob,

            [Blob("thumbs/{name}", Connection = "AzureWebJobsStorage")] out byte[] myOutputBlob,

            string name,

            ILogger log)

        {
            log.LogInformation($"ThumbnailFunction function started for \n Name:{name} \n Size: {myBlob.Length} Bytes");

            myOutputBlob = GcImagingOperations.GetConvertedImage(myBlob);

            log.LogInformation($"ThumbnailFunction function finished");

        }

        public static void CopyStream(Stream input, Stream output)

        {

            byte[] buffer = new byte[32768];

            int read;

            while ((read = input.Read(buffer, 0, buffer.Length)) > 0)

            {

                output.Write(buffer, 0, read);

            }

        }

    }

}
- You can later publish your function to Azure with Visual Studio.
Once published, you can browse your functions app. See if everything went as expected!

Test the Function
Download and install the Microsoft Azure Storage Explorer. In a Storage Explorer, expand your storage account > Containers. You can upload your files here. Once uploaded, you will see that a thumbnail of your image is created in one of the Containers in your storage account.
Troubleshooting
If you are developing your function with Visual Studio, please be advised that Visual Studio publishes an auto generated configuration file called ‘function.json’. Changes made to function.json from Azure portal will not be used by Functions runtime. In order to change function from Azure portal, you should follow these steps:
- Open your Function app in Azure portal.
- Go to Platform features and open “App Service Editor”. App Service Editor provides an in-browser editing experience for your code.
- Open ‘function.json’ and remove the auto generated line “"generatedBy": "Microsoft.NET.Sdk.Functions-***"”.
- Now you can edit function.json file from portal.
Happy coding! Be sure to leave any comments or questions below.

