Creating a Child Items Template
In This Topic
This tutorial will teach you how to create a ChildItemsTemplate for the C1Menu control. The template, which will be the prototype for all items in the C1Menu control's various submenus, will consist of a Div element, an Input (check box) control, and a Label control. The label control's Text property will be bound to the Text property of the individual menu items.
Complete the following steps:
- Create a C1Menu control that has one top-level menu item with three child items. Name the child items "One", "Two", and "Three".
- Click the C1Menu control's smart tag
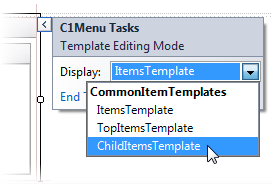
 and select Edit Templates from the C1Menu Tasks menu. The C1Menu Tasks menu changes to Template Editing Mode.
- Select ChildTopItemsTemplate from the Display drop-down list box.

- Navigate to the Toolbox and, using a drag-and-drop operation, add a Div element to the ChildItems template.
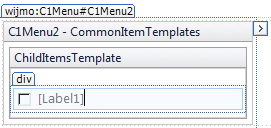
- Navigate to the Toolbox and, using a drag-and-drop operation, add an Input (Checkbox) control and a Label control to the Div element. The template will look like this:

- Select the Label element, navigate to the Properties window, and set the Text property to "<% #DataBinder.Eval(Container.DataItem,"Text") %>". This will bind the label's Text property to a data binding, which we will specify in a later step.
- Click End Template Editing to close the template.
- Create a data binding by completing the following steps:
- Click the C1Menu control's smart tag
 and select Edit Menu Databindings from the C1Menu Tasks menu.
- Complete the following steps in the Bindings Collection Editor dialog box:
- Click Add to add an <Empty> databinding to the project.
- Set the <Empty> databinding's TextField property to Text.
- Click OK to close the Bindings Collection Editor dialog box.
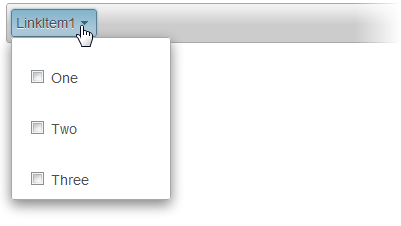
- Run the project and select LinkItem1. Observe that each menu item in the sub menu contains a check box and a label. Also observe that the label text is the same as the text you specified in step 1 of this tutorial; that is because of the data bindings.


