Creating a Top-Level Item Template
In This Topic
This tutorial will teach you how to create an TopItemsTemplate for theC1Menu control. The template, which will be the prototype for all items in the C1Menu control, will consist of a Div element, an Input (check box) control, and a Label control. The label control's Text property will be bound to the Text property of the individual menu items.
Complete the following steps:
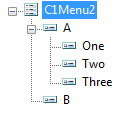
- Create a C1Menu control that has one two top-level menu items named "A" and "B". Give item "A" three child items and name them "One", "Two", and "Three".

- Click the C1Menu control's smart tag
 and select Edit Templates from the C1Menu Tasks menu. The C1Menu Tasks menu changes to Template Editing Mode. The default mode listed in the Description drop-down list is TopItemsTemplate, so there's no need to change it.
- Navigate to the Toolbox and, using a drag-and-drop operation,add a Div element to the ChildItems template.
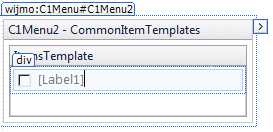
- Navigate to the Toolbox and, using a drag-and-drop operation, add an Input (Checkbox) control and a Label control to the Div element. The template will look like this:

- Select the Label element, navigate to the Properties window, and set the Text property to "<% #DataBinder.Eval(Container.DataItem,"Text") %>". This will bind the label's Text property to a data binding, which we will specify in a later step.
- Click End Template Editing to close the template.
- Create a data binding by completing the following steps:
- Click the C1Menu control's smart tag
 and select Edit Menu Databindings from the C1Menu Tasks menu.
- Complete the following steps in the Bindings Collection Editor dialog box:
- Click Add to add an
<Empty> databinding to the project.
- Set the
<Empty> databinding's TextField property to Text.
- Click OK to close the Bindings Collection Editor dialog box.
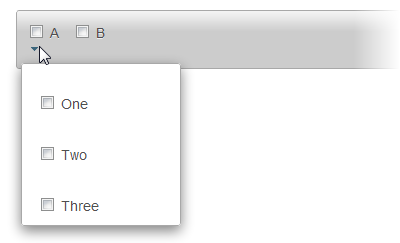
- Run the project and select A. Observe that each menu item in the C1Menu control top-level and child items - contains a check box and a label. Also observe that the label text is the same as the text you specified in step 1 of this tutorial because of the data bindings you specified in this tutorial.


