- Spread for WPF Overview
- About the Product
- Getting Started
- Quick Start
- Designer
- Features
- Assembly Reference
Step 3: Bind Controls to Data Source
1. In the top menu bar of Visual Studio, select View > Other Windows > Data Sources.
2. In the Data Sources window, view the data sources that have been added.
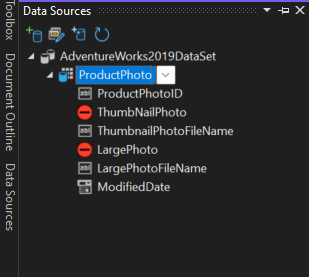
3. Select the ProductPhoto table, and then click the  button.
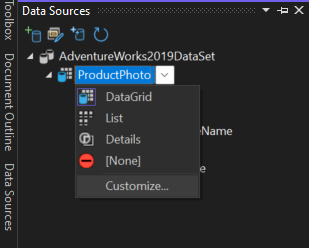
4. (Optional) If you do not see GcSpreadSheet in the drop-down list, select Customize to open the Customize Control Binding dialog. In the Associated controls section, select GcSpreadSheet, and then click OK.
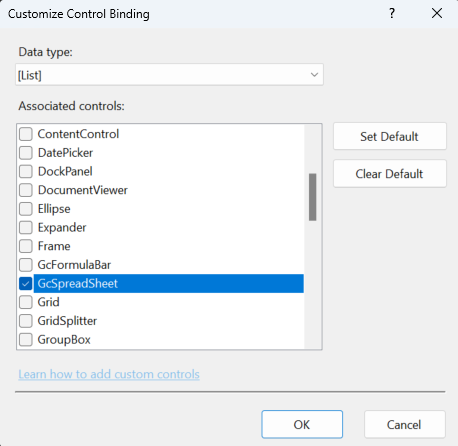
Note: If GcSpreadSheet is not visible in the Customize Control Binding dialog, it may not have been added to the Visual Studio Toolbox. For instructions on adding components to the Toolbox, see Add Components to Toolbox.
5. Select the ProductPhoto table in Data Sources, click the  button, and then select GcSpreadSheet.
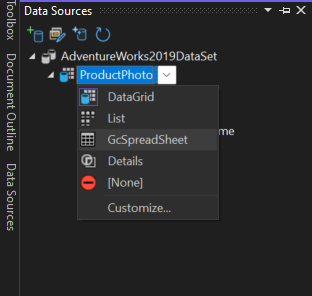
6. Before proceeding with the next steps, ensure that the assemblies required to use the product have been added to the project by assembly references or NuGet packages, and that the licenses.licx file has been created and incorporated into the project. Then, build the project.
7. Drag the ProductPhoto table from the data source and drop it onto MainWindow.xaml.
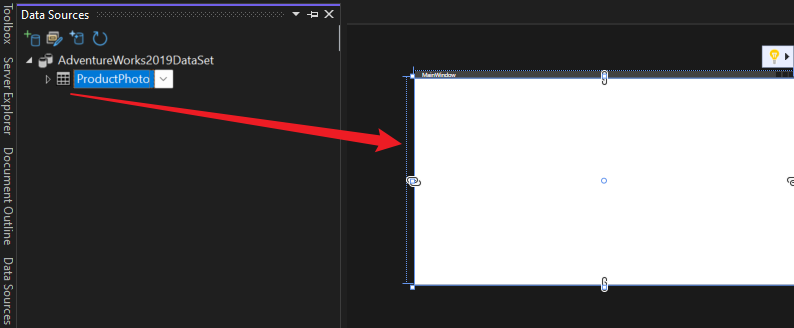
The definition of the data source and the necessary code for loading data will be added to MainWindow.xaml and the code-behind file as shown below.
gss:GcSpreadSheet x:Name="productPhotoGcSpreadSheet" Margin="xx,xx,xx,xx"/>// Get the dataset object named "adventureWorks2019DataSet" from the window resources.
var ds = (AdventureWorks2019DataSet)this.Resources["adventureWorks2019DataSet"];
var adapter = new AdventureWorks2019DataSetTableAdapters.ProductPhotoTableAdapter();
adapter.Fill(ds.ProductPhoto);
// Bind the ProductPhoto table as the data source to the first sheet of the GcSpreadSheet.
productPhotoGcSpreadSheet.Sheets[0].DataSource = ds.ProductPhoto;' Get the dataset object named "adventureWorks2019DataSet" from the window resources.
Dim ds As AdventureWorks2019DataSet = CType(Me.Resources("adventureWorks2019DataSet"), AdventureWorks2019DataSet)
Dim adapter As New AdventureWorks2019DataSetTableAdapters.ProductPhotoTableAdapter()
adapter.Fill(ds.ProductPhoto)
' Bind the ProductPhoto table as the data source to the first sheet of the GcSpreadSheet.
productPhotoGcSpreadSheet.Sheets(0).DataSource = ds.ProductPhotoIn addition, the GcSpreadSheet control will be placed on MainWindow.xaml. If you right-click the GcSpreadSheet control in MainWindow.xaml and select Layout > Reset All from the context menu, you can initialize layout-related settings such as margins and size.
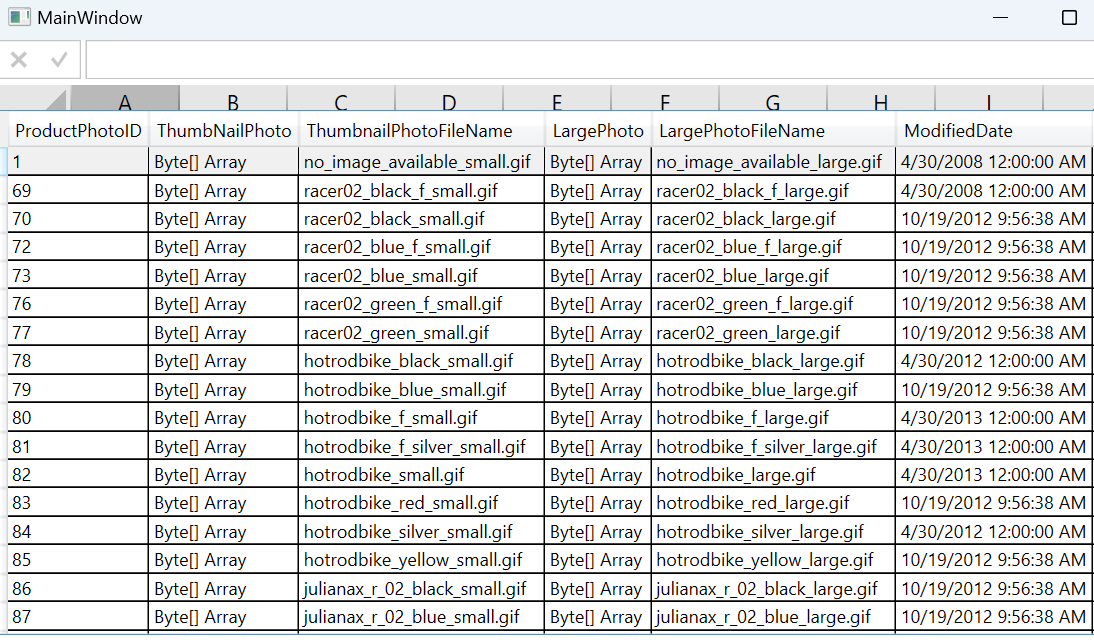
8. When you choose Start Debugging from the Debug menu in Visual Studio, data from the ProductPhoto table is displayed in the GcSpreadSheet control.