[]
        
(Showing Draft Content)

Step 2: Add a Data Source

  1. After creating the WPF application, select View > Other Windows > Data Sources from Visual Studio.

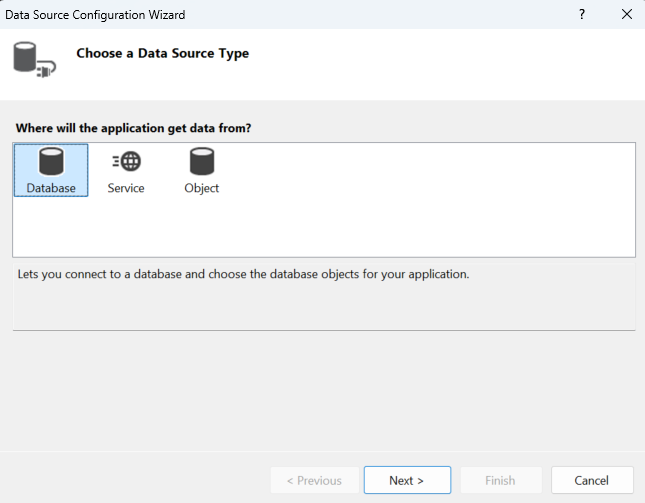
  2. In the Data Sources panel, click Add New Data Source to launch the Data Source Configuration Wizard, select Database, and then click Next.
    Spread for WPF illustrates the worksheet feature task with image.df5f14 worksheet output, while IRange supports the documented spreadsheet operation.

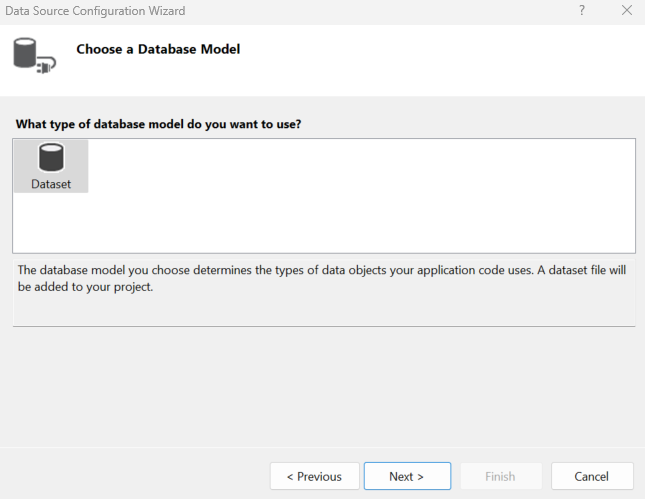
  3. Select Dataset as the data model, and then click Next.
    Spread for WPF illustrates the worksheet feature task with image.bad9ef worksheet output, while IRange supports the documented spreadsheet operation.

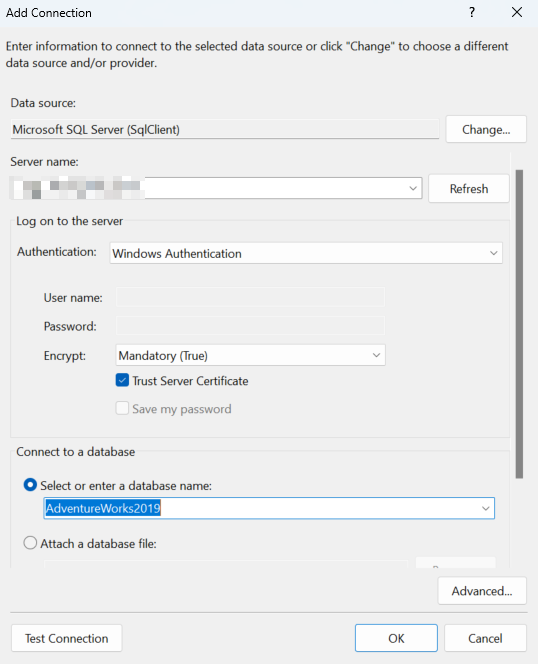
  4. Click New Connection. In the Add Connection dialog, set the Server name, connect to the SQL Server sample database Adventure Works, and then click OK.
    Spread for WPF illustrates the worksheet feature task with image.af7ae7 worksheet output, while IRange supports the documented spreadsheet operation.

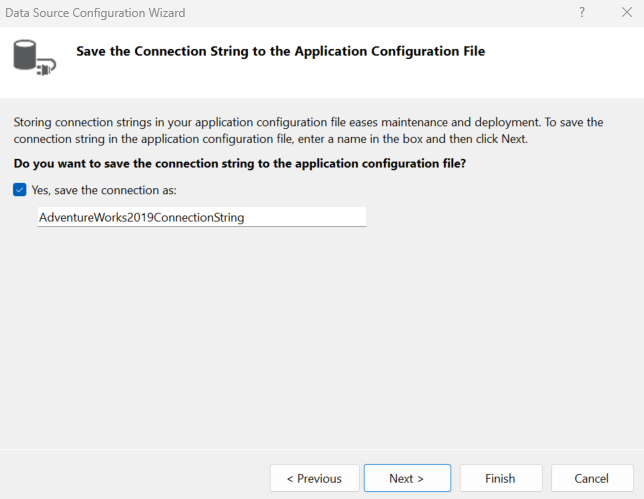
  5. Save the connection string with the name AdventureWorks2019ConnectionString, and then click Next.
    Spread for WPF illustrates the worksheet feature task with image.24998e worksheet output, while IRange supports the documented spreadsheet operation.

  6. Select the ProductPhoto table as the database object, and then click Finish.
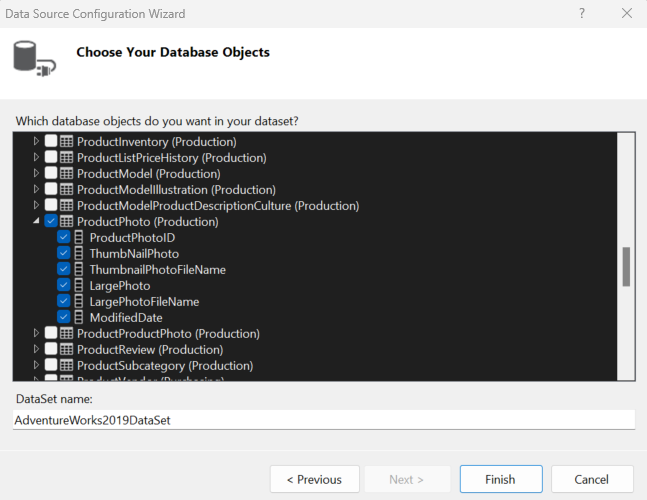
    Spread for WPF illustrates the worksheet feature task with image.d5f89a worksheet output, while IRange supports the documented spreadsheet operation.

  7. View the added data source in the Data Sources window of Visual Studio.
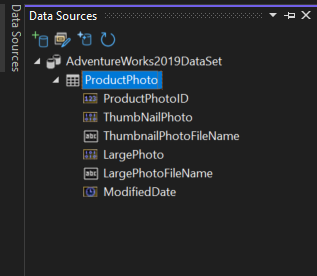
    Spread for WPF illustrates the worksheet feature task with image.0bba0c worksheet output, while IRange supports the documented spreadsheet operation.