


Setting the Data Source
Use the C1Schedule Tasks menu to select data sources for Scheduler storage objects.
Choose Appointment Data Source
Open the Choose Appointment Data Source drop-down list to view the data sources available for AppointmentStorage or to add a data source.
To add a data source, select Add Project Data Source to open the Data Source Configuration Wizard.
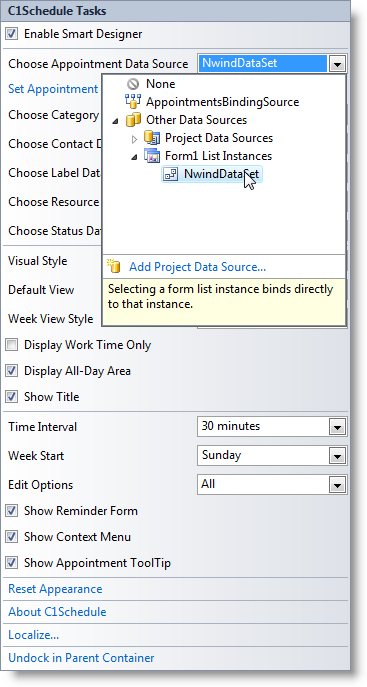
After binding AppointmentStorage to a data source, the appointment mapping option becomes available.
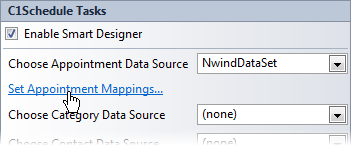
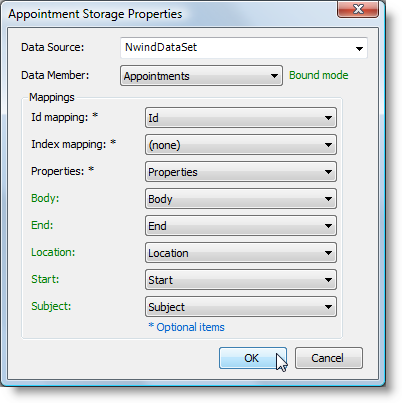
Select Set Appointment Mappings to open the Appointment Storage Properties dialog box and map fields from the appointment data source to the corresponding Scheduler fields.
Choose Category Data Source
Open the Choose Category Data Source drop-down list to view the data sources available for CategoryStorage or to add a data source.
After binding CategoryStorage to a data source, the corresponding data-mapping options become available.
Choose Contact Data Source
Open the Choose Contact Data Source drop-down list to view the data sources available for ContactStorage or to add a data source.
After binding ContactStorage to a data source, the corresponding data-mapping options become available.
Choose Owner Data Source
Open the Choose Owner Data Source drop-down list to view the data sources available for OwnerStorage or to add a data source.
After binding OwnerStorage to a data source, the corresponding data-mapping options become available.
Choose Label Data Source
Open the Choose Label Data Source drop-down list to view the data sources available for LabelStorage or to add a data source.
After binding LabelStorage to a data source, the corresponding data-mapping options become available.
Choose Resource Data Source
Open the Choose Resource Data Source drop-down list to view the data sources available for ResourceStorage or to add a data source.
After binding ResourceStorage to a data source, the corresponding data-mapping options become available.
Choose Status Data Source
Open the Choose Status Data Source drop-down list to view the data sources available for StatusStorage or to add a data source.
After binding StatusStorage to a data source, the corresponding data-mapping options become available.