


Visual Styles
The C1Schedule and the C1Calendar controls support Visual Styles. In addition to Visual Styles, Scheduler for WinForms also supports C1ThemeController so you can choose from many predefined themes using Themes for WinForms.
.NET Core
In .NET, Scheduler and Calendar provide three basic types of Visual Styles such as Default, System and Custom.
Visual Styles | Description |
|---|---|
Default | Uses the predefined theme of the Default type. |
System | Uses the current desktop settings. |
Custom | Uses Custom visual style. |
You can access the themes in different Visual Styles using the code snippet below:
c1Schedule1.Theme = ScheduleTheme.System;
c1Calendar1.Theme = CalendarTheme.System;
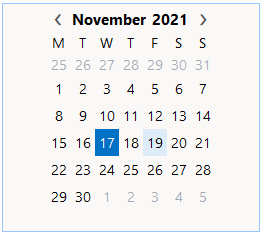
The Calendar control with default Visual Style looks like this:
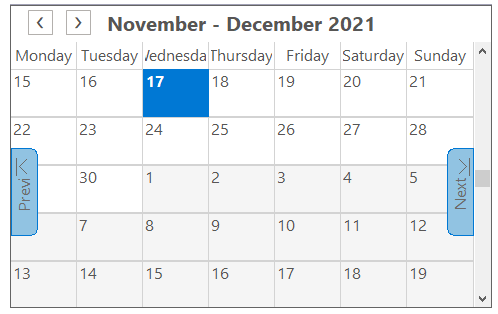
The Schedule control with default Visual Style looks like this:
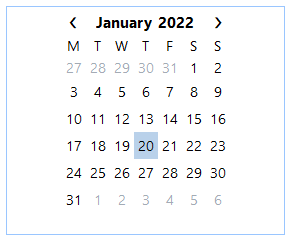
The Calendar control with System Visual Style looks like this:
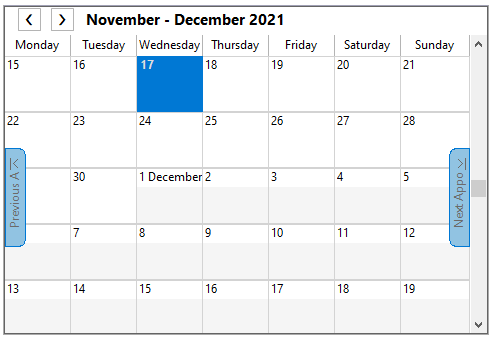
The Schedule control with System Visual Style looks like this:
Also, in .Net, the Scheduler control provides the ScheduleTheme that can be edited from the property grid as depicted below:
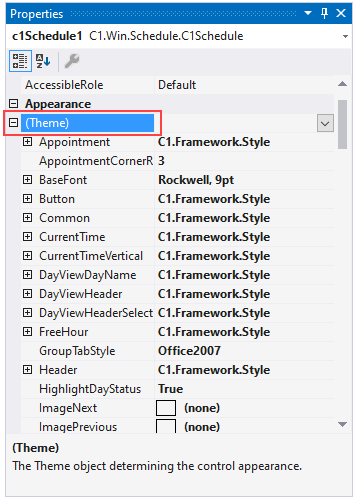
With the ScheduleTheme class, you can change the Appointment, AppointmentCornerRadius, BaseFont, CurrentPalette, CurrentTime, CurrentTime, VerticalDay, ViewDayName, DayViewHeader, DayViewHeaderSelected etc.
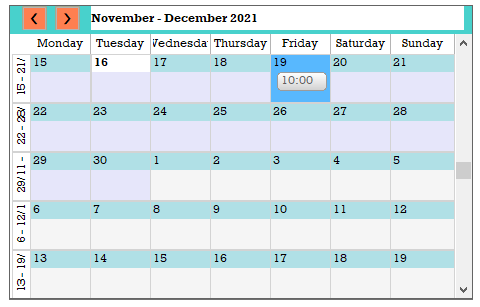
The following image depicts the Scheduler control with the following properties modified using ScheduleTheme in the Properties grid:
Properties | Values |
|---|---|
Appointment BackColor2 | OrangeRed |
BaseFont | Rockwell |
Button | Coral |
Common BackColor | Lavender |
MonthDayHeader | PowderBlue |
Also, in .Net Core, the Calendar control provides the CalendarTheme that can be edited from the property grid as depicted below:
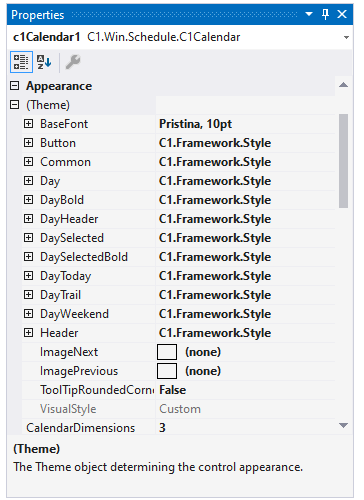
With the CalendarTheme class, you can change the BaseFont, Day, DayBold, DayHeader, DaySelected, DaySelectedBold, DayToday, DayTrail, DayWeekend, Header properties etc.
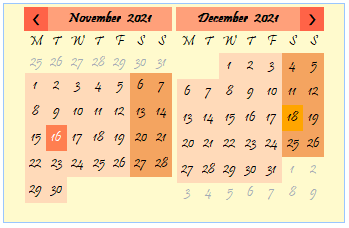
The following image depicts the Calendar control with the following properties modified using CalendarTheme in the Properties grid:
Properties | Values |
|---|---|
BaseFont | Pristina |
Button | Red |
Common Backcolor | LemonChiffon |
Day BackColor | PeachPuff |
.NET FRAMEWORK
There are several predefined Visual Styles for .NET framework:
Visual Style | Description |
|---|---|
System | Uses the current desktop settings. |
Office 2007 Black | Mimics the Microsoft Office 2007 Black theme. |
Office 2007 Blue | Mimics the Microsoft Office 2007 Blue theme. |
Office 2007 Silver | Mimics the Microsoft Office 2007 Silver theme. |
Office 2010 Black | Mimics the Microsoft Office 2010 Black theme. |
Office 2010 Blue | Mimics the Microsoft Office 2010 Blue theme. |
Office 2010 Silver | Mimics the Microsoft Office 2010 Silver theme. |
Visual Styles can be set in the smart designers, smart tags, or in code. You cannot edit predefined Visual Styles, but you can create new Visual Styles. At design-time, Visual Styles can be saved to an XML file or previously saved Visual Styles can be loaded.
Note: Clicking the Save button will save all of the custom Visual Styles added to the Visual Style dialog box to an XML file. Clicking the Load button will load all of the custom Visual Styles in the XML file.System Visual Style
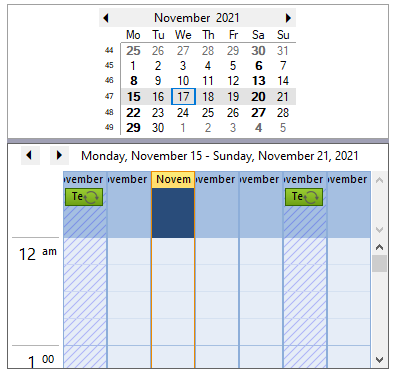
The following image displays the System Visual Style:
Office 2007 Black Visual Style
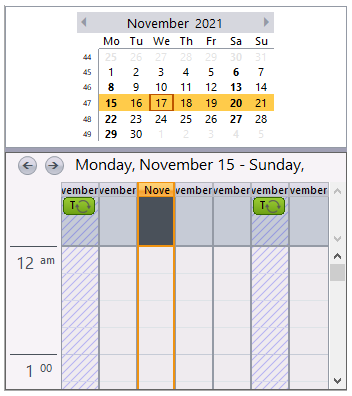
The following image displays the Office 2007 Black Visual Style:
Office 2007 Blue Visual Style
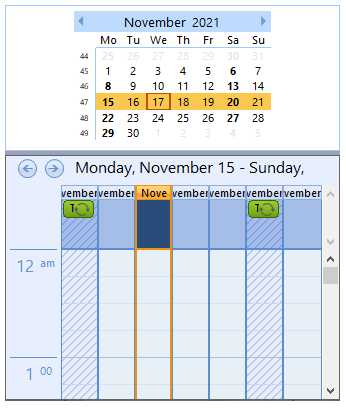
The following image displays the Office 2007 Blue Visual Style:
Office 2007 Silver Visual Style
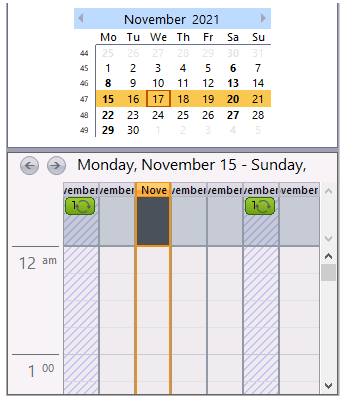
The following image displays the Office 2007 Silver Visual Style:
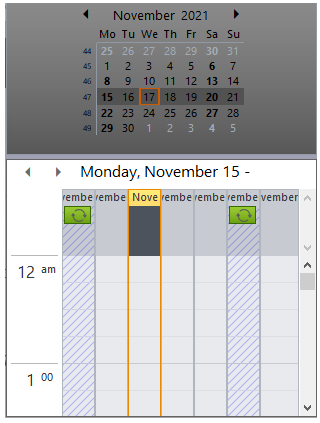
Office 2010 Black Visual Style
The following image displays the Office 2010 Black Visual Style:
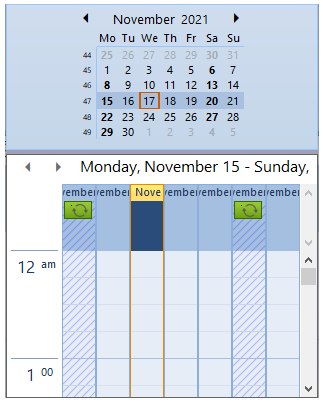
Office 2010 Blue Visual Style
The following image displays the Office 2010 Blue Visual Style:
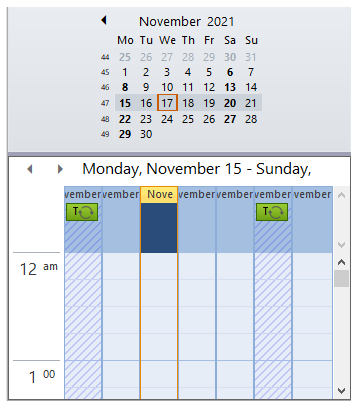
Office 2010 Silver Visual Style
The following image displays the Office 2010 Silver Visual Style:
Predefined Styles
You can define a Visual Style by setting the VisualStyle property for both the Calendar and Schedule controls either in the smart designers, tasks menu, or in code. For descriptions of the available Visual Styles, see Visual Styles.
In the Smart Designer
To set the VisualStyle property using the smart designers, complete the following steps:
On the C1Calendar Smart Designer, click the Visual Style button. For more information on accessing the C1Calendar Smart Designer, see C1Calendar Smart Designer.
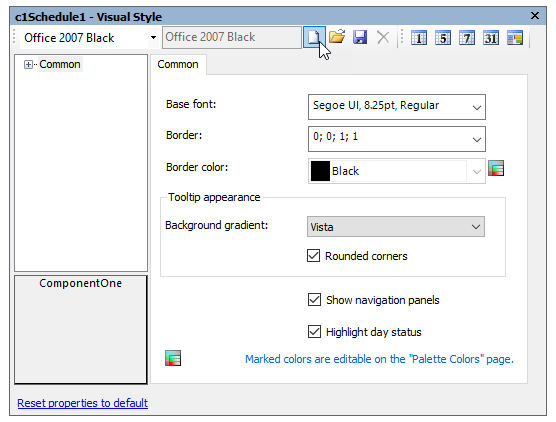
In the Visual Style dialog box, select Office 2007 Black in the drop-down box.
Close the dialog box.
On the C1Schedule Smart Designer, click the Visual Style button. For more information on accessing the C1Schedule Smart Designer, see C1Schedule Smart Designer.
In the Visual Style dialog box, select Office 2007 Black in the drop-down box.
Close the dialog box.
In the Tasks menu
To set the VisualStyle property using the Tasks menu, complete the following steps:
Open the C1Calendar Tasks menu. For more information on accessing the C1Calendar Tasks menu, see C1Calendar Tasks Menu.
Click the drop-down arrow in the Visual Style box, and select Office 2007 Black.
Close the C1Calendar Tasks menu.
Open the C1Schedule Tasks menu. For information on accessing the C1Schedule Tasks menu, see C1Schedule Tasks Menu.
Click the drop-down arrow in the Visual Style box, and select Office 2007 Black.
Close the C1Schedule Tasks menu.
In Code
Add the following code to the Form_Load event to set the visual styles for the C1Calendar and C1Schedule controls to Office2007Black:
this.c1Calendar1.VisualStyle = C1.Win.C1Schedule.UI.VisualStyle.Office2007Black;Custom Styles
Creating Custom Style
To create a custom Visual Style, add a copy of the selected Visual Style in the Visual Style dialog box:
Note: Selecting Customize from the drop-down menu in the C1Schedule Tasks menu, C1Calendar Tasks menu, or the Properties window opens the Visual Style dialog box.
In the Visual Style dialog box, click the Add a Copy button to add a copy of the selected Visual Style.
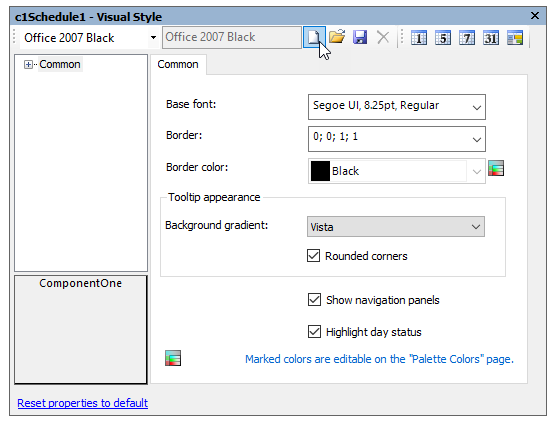
Enter a new name for the Visual Style in the text box or leave the name as (modified).
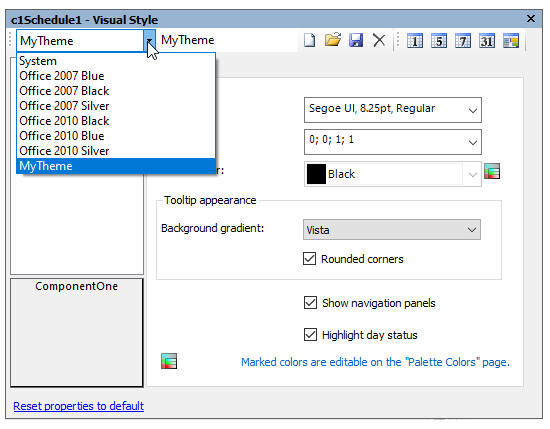
The new Visual Style will now appear in the Visual Style drop-down list.
Saving Custom Style
To save a custom Visual Style, click the Save button in the Visual Style dialog box.
Note: This will save all of the custom Visual Styles added to the Visual Style dialog box to an XML file.
Load Styles
To import a saved Visual Style, click the Load button in the Visual Style dialog box.
Note: This will load all of the custom Visual Styles in the XML file.
Deleting Styles
To delete a custom Visual Style, click the Delete button in the Visual Style dialog box.
Note: This will delete the current Visual Style. Predefined Visual Styles cannot be deleted.