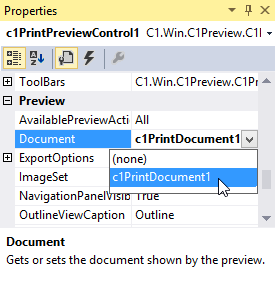
This topic illustrates the basics of setting up a table with three rows and three columns. Complete the following steps:

To write code in Visual Basic
| Visual Basic |
Copy Code
|
|---|---|
| Dim table As C1.C1Preview.RenderTable = New C1.C1Preview.RenderTable(Me.C1PrintDocument1) | |
To write code in C#
| C# |
Copy Code
|
|---|---|
| C1.C1Preview.RenderTable table = new C1.C1Preview.RenderTable(this.c1PrintDocument1); | |
To write code in Visual Basic
| Visual Basic |
Copy Code
|
|---|---|
' Add 3 rows.
Dim r As Integer = 3

' Add 3 columns.
Dim c As Integer = 3

Dim row As Integer
Dim col As Integer

For row = 0 To r - 1 Step +1
    For col = 0 To c - 1 Step +1
        Dim celltext As C1.C1Preview.RenderText = New C1.C1Preview.RenderText(Me.C1PrintDocument1)

        ' Add empty cells.
        celltext.Text = String.Format("", row, col)
        table.Cells(row, col).RenderObject = celltext
    Next
Next
|
|
To write code in C#
| C# |
Copy Code
|
|---|---|
// Add 3 rows.
const int r = 3;

// Add 3 columns.
const int c = 3;

for (int row = 0; row < r; ++row)
{
    for (int col = 0; col < c; ++col)
    {
        C1.C1Preview.RenderText celltext = new C1.C1Preview.RenderText(this.c1PrintDocument1);
        celltext.Text = string.Format("", row, col);

        // Add empty cells.
        table.Cells[row, col].RenderObject = celltext;
    }
}
|
|
Note also that while we added columns "directly" to the table, rows were added to the table's body. That is because a RenderTable always consists of 3 "bands": Header, Body and Footer. Any of the three bands may be empty in the table. If you just want a simple table you can add rows to the body as we do in this example.
To write code in Visual Basic
| Visual Basic |
Copy Code
|
|---|---|
table.Height = New C1.C1Preview.Unit(15, C1.C1Preview.UnitTypeEnum.Cm) table.Width = New C1.C1Preview.Unit(15, C1.C1Preview.UnitTypeEnum.Cm) |
|
To write code in C#
| C# |
Copy Code
|
|---|---|
table.Height = new C1.C1Preview.Unit(15, C1.C1Preview.UnitTypeEnum.Cm); table.Width = new C1.C1Preview.Unit(15, C1.C1Preview.UnitTypeEnum.Cm); |
|
To write code in Visual Basic
| Visual Basic |
Copy Code
|
|---|---|
table.Style.GridLines.All = New C1.C1Preview.LineDef(Color.DarkGray) |
|
To write code in C#
| C# |
Copy Code
|
|---|---|
table.Style.GridLines.All = new C1.C1Preview.LineDef(Color.DarkGray); |
|
To write code in Visual Basic
| Visual Basic |
Copy Code
|
|---|---|
Me.C1PrintDocument1.Body.Children.Add(table) Me.C1PrintDocument1.Generate() |
|
To write code in C#
| C# |
Copy Code
|
|---|---|
this.c1PrintDocument1.Body.Children.Add(table); this.c1PrintDocument1.Generate(); |
|
Your application will appear similar to the image below at run time: