-
Spread Windows Forms Product Documentation
- Getting Started
- Developer's Guide
-
Spread Designer Guide
- Introduction
- Spread Designer User Interface
-
Spread Designer Dialogs
- Cell Type Dialog
- Conditional Formatting Dialog
- Cell Styles Dialog
- Custom File Options Dialog
- Forecast Sheet Dialog
- Goal Seek Dialog
- Go To Cell Dialog
- Insert Function Dialog
- Name Manager Dialog
- Row Height or Column Width Dialog
- Row or Column Insert or Delete Dialogs
- Shape Properties Dialog
- Shape Shadow Properties Dialog
- Sheet Settings Dialog
- Sheet Print Settings Dialog
- Sort Dialog
- Spread Settings Dialog
- Unhide Specific Row or Column Dialogs
- Zoom Dialog
- Spread Designer Editors
- Designing in the Data Area
- Working with the Design
- Designing Shapes
- Using the Chart Designer
- Using the Pivot Table Designer
- Applying and Customizing Themes
- Assembly Reference
- Import and Export Reference
- Version Comparison Reference
Cell Styles Dialog
You can set cell-specific styles in a worksheet using the Spread Designer. The cell styles dialog is located in the Home tab under the Styles ribbon group.

Adding a Style
You can apply a style in a cell by clicking on a style in the Styles group or clicking on the “More” dropdown arrow in the style gallery to choose from additional style formats.
Removing a Style
You can remove an applied style by first selecting the cell which needs to change back to default. Choose the "Normal" style from the styles gallery.
Creating a New Style
You can create a new style by choosing the “New Cell Styles” option at the bottom of the style gallery.
The option opens a Style dialog where you can select various style properties. The “Format” button opens the "Format cells" dialog where you can select the formats for the new style.
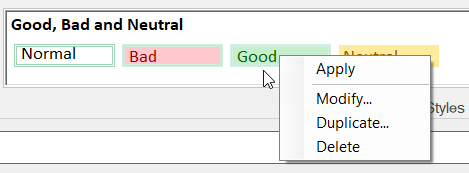
Style Context Menu
You can perform additional operations on a style by accessing its context menu. When you right-click on a cell style, the context menu displays the following items to choose from.
Apply: Choose to apply the style on the selected cell.
Modify: Choose to modify the selected style. The style dialog is shown where formatting properties can be chosen as well as the format can be modified.
Duplicate: Choose to create a duplicate of the selected style. The style dialog is shown where a new style name can be entered as well as any existing formatting property can be modified.
Delete: Choose to delete the selected style. Every style can be deleted except the "Normal" style.