- Document Solutions for PDF Overview
- Key Features
- Getting Started
- Product Architecture
- Features
- Access Primitive and High-Level PDF Objects
- Render HTML to PDF
- Save PDF as Image
- Barcodes in PDF
- Best Practices
- Walkthrough
- Tutorials
- Samples
- API Reference
- Release Notes
- Document Solutions PDF Viewer Overview
Checkbox and Radio Button
Checkbox and Radio Button Appearance
DsPdfViewer allows you to render the customized appearance of radio and checkbox buttons. It provides three appearance rendering types which can be configured by using the fieldsAppearance option.
Custom
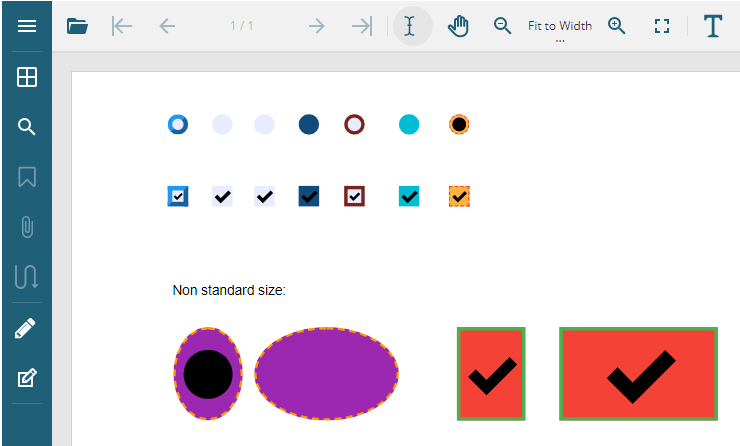
This is the default appearance type and is close to the styles defined in the PDF document. As can be observed in the below image, it supports background color and border styles as well:

Web
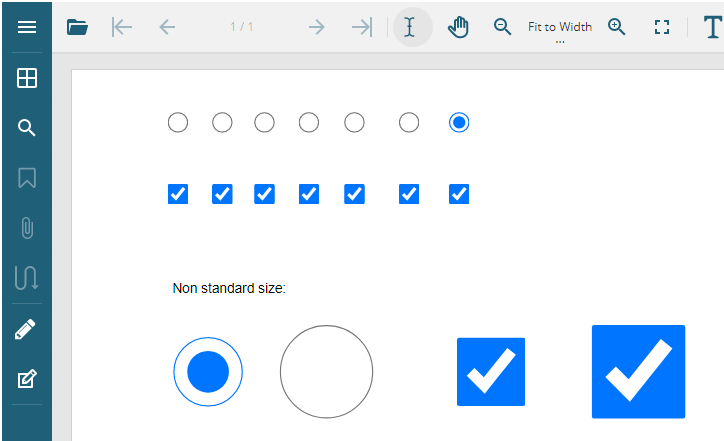
This is the standard form field appearance using platform-native styling. The styles depend on the OS or browser being used. Refer this for more details. The below image shows the 'Web' appearance of radio and checkbox buttons in a PDF document:

var viewer = new DsPdfViewer("#root", { fieldsAppearance: { radioButton: "Web", checkBoxButton: "Web" } });Predefined
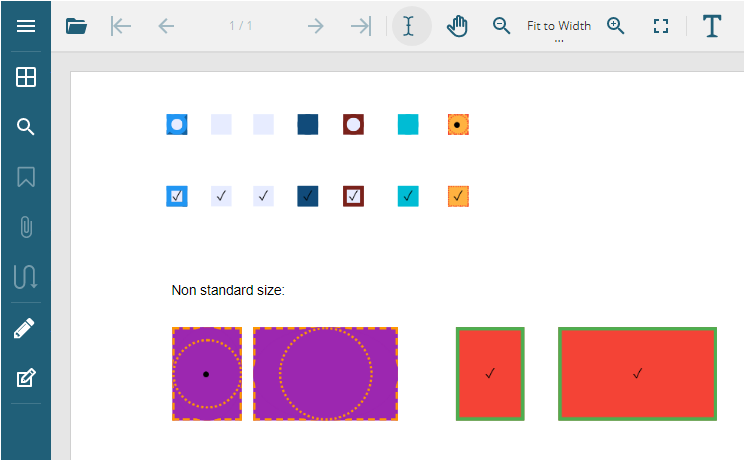
This appearance type renders the radio and checkbox buttons exactly as defined in the PDF. The Predefined appearance streams from the PDF document when available, otherwise the custom appearance is used. The below image shows the 'Predefined' appearance of radio and checkbox buttons in a PDF document:

var viewer = new DsPdfViewer("#root", { fieldsAppearance: { radioButton: "Predefined", checkBoxButton: "Predefined" } });Set Checkbox Behavior as Radio Button
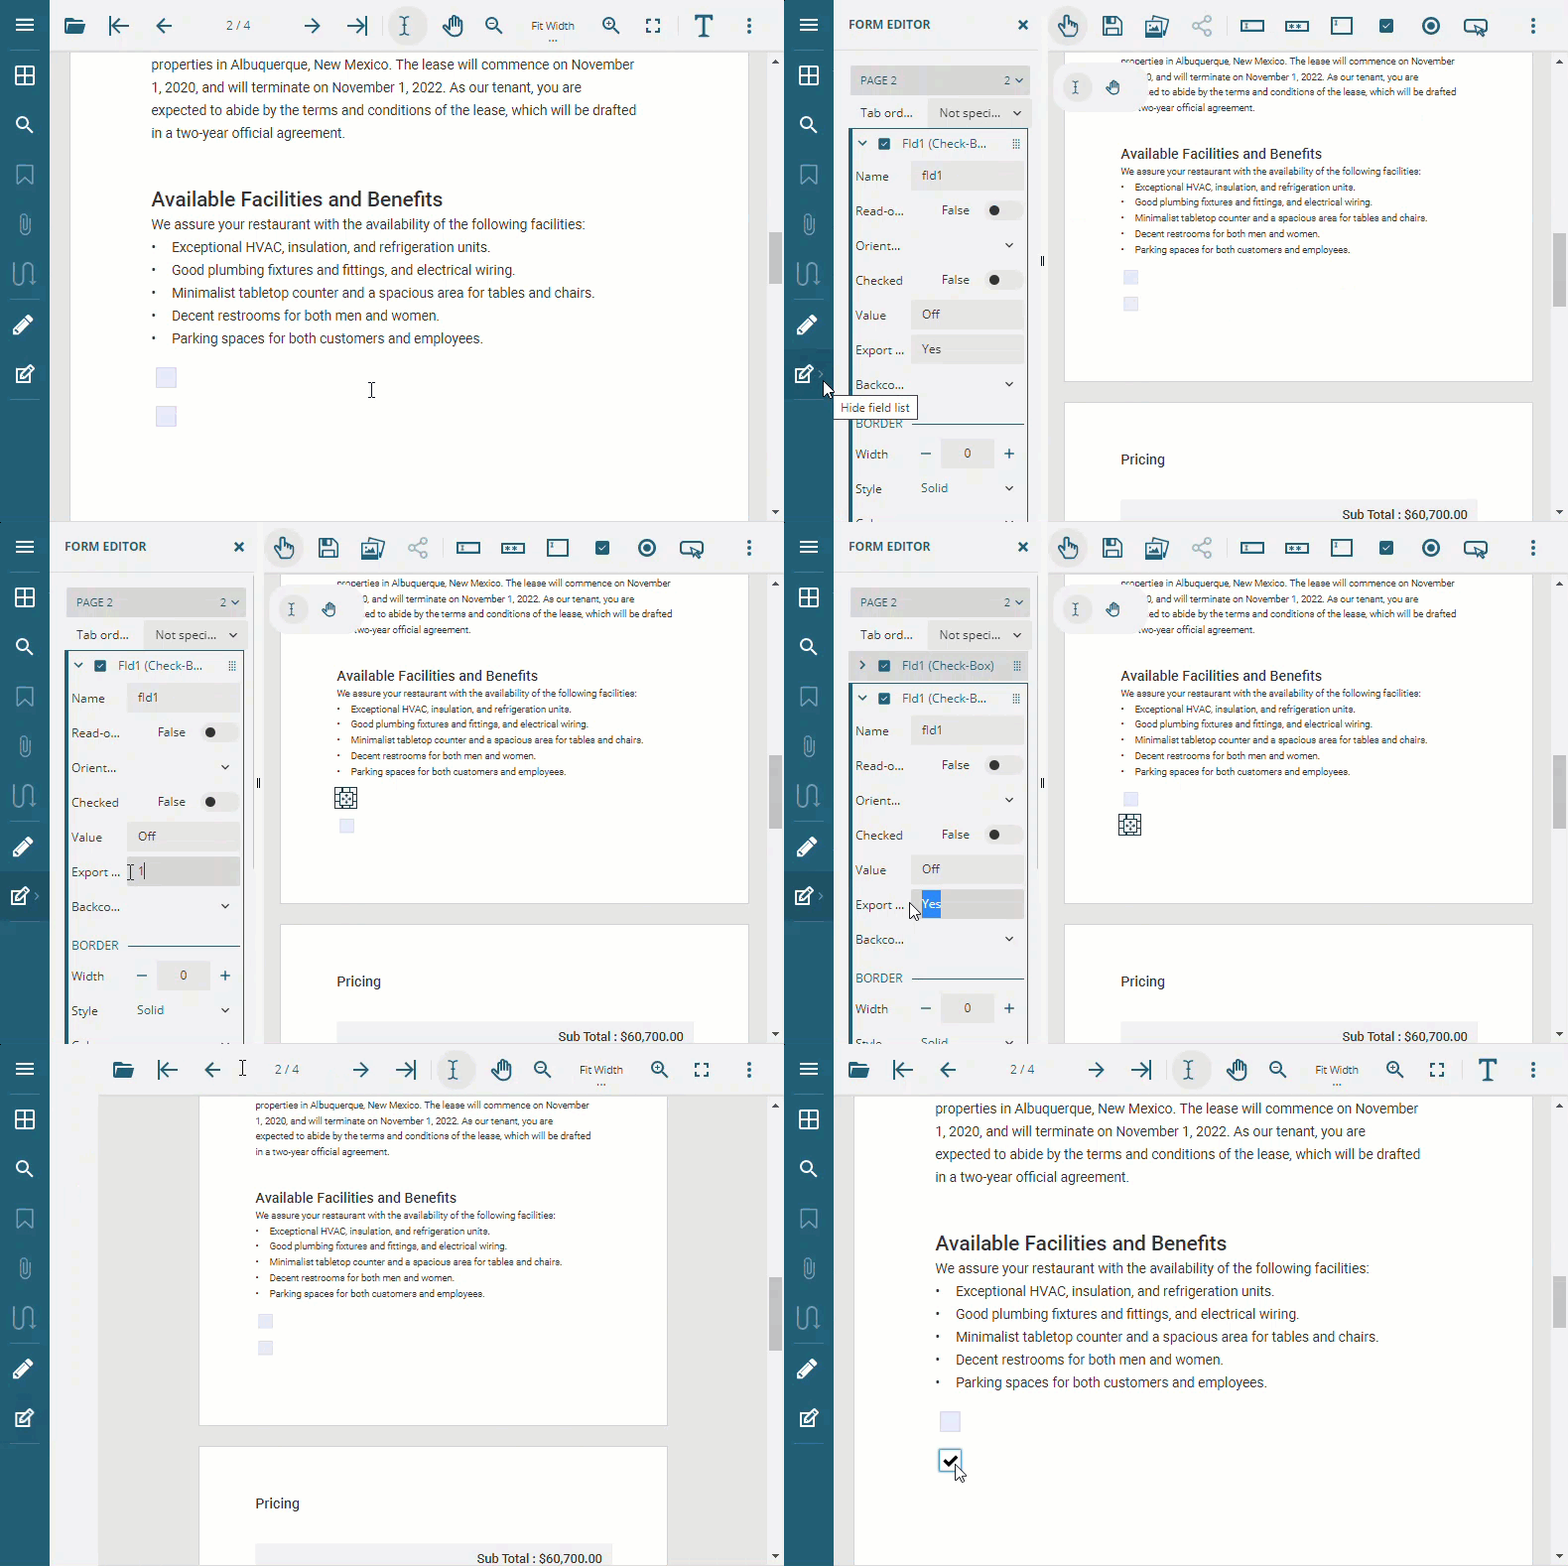
When you create checkboxes with the same names, DsPdfViewer allows you to set the behavior of each checkbox, enabling you to check only one checkbox at a time using the Value and Export Value properties. The Value property refers to the fieldValue in client script code. This property is shared between checkboxes with the same name. The Export Value property refers to the exportValue property in the client script code. The checkbox is considered to be checked when the values of the Value and Export Value properties are equal. The Value property is set equal to the Export Value property as soon as the user checks a checkbox. Hence, if we assign a unique value to the Export Value property of each checkbox having the same name, then only one of them will be checked at a time.
For example, if there are two checkboxes with the same name, Fld1, the initial value of the Value property is set to Off, and the value of the Export Value property is set to Yes for the checkboxes. When you check a checkbox, the value of Value property of the checkbox becomes equal to the value of Export Value property, i.e. Yes. Since the checkboxes with the same name share the Value property, the value of Value property of the other checkbox is set to Yes, i.e., equivalent to the value of Export Value property, and all the checkboxes become checked.
So, to achieve Radio Button like behavior, set the value of Export Value property of each checkbox to 1 and 2, respectively, and then checking one checkbox sets the value of Value property of both the checkboxes to 1. But the value of Value property is equivalent to the value of Export Value property only for the first checkbox. Hence, only the checkbox you checked remains checked, while the other checkbox remains unchecked. This happens because as soon as you check any of the checkboxes, the value of Value property of all the checkboxes is set to be equivalent to the value of Export Value property of the checked checkbox. Since each checkbox has a unique value in the Export Value property, the value assigned to the Value property of the remaining checkboxes does not match the value of Export Value property, resulting in an unchecked box.

You can also check and uncheck a checkbox via client script code. Refer to the following example code to check and uncheck a checkbox:
// Set the Export Value to Yes.
checkBox.exportValue = "Yes";

// Set the Value to equal to Export Value to check the checkbox.
checkBox.fieldValue = checkBox.exportValue;
viewer.updateAnnotation(pageIndex, checkBox);


// Set the Value to Off to uncheck the checkbox.
checkBox.fieldValue = "Off";
viewer.updateAnnotation(pageIndex, checkBox);

