
Export FlexGrid to Excel
This section shows how to call the Web API service project through a client application and add export function for exporting FlexGrid data as an excel.
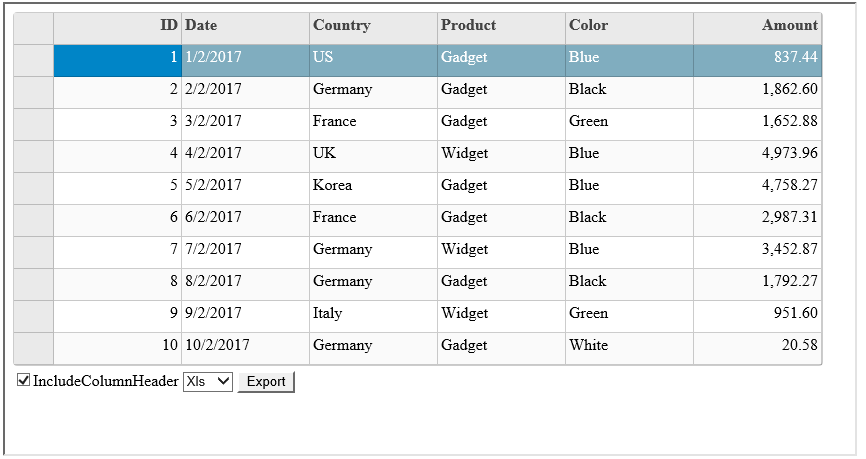
Step 2: Run the Client Project
The following image shows how the FlexGrid appears after completing the steps above:
Step 1: Call the Service
Complete the following steps to call the Web API service.
Add C1 Web API Client JavaScript file and its reference to your MVC or HTML project (For further details refer to C1 Web API Client JavaScript).
Create a function, using Client JavaScript Helper, to implement the export functionality.
MVC
Add the following code to Views|MVCFlexGrid|Index.cshtml to export FlexGrid data to excel.
<script type="text/javascript">
    function exportFlex() {
    var exporter = new c1.mvc.grid.ExcelExporter();
    fileType = document.getElementById("mySelect").value;
    var gridcontrol = wijmo.Control.getControl("#flexGrid");
    exporter.requestExport(gridcontrol,
    "http://demos.componentone.com/ASPNET/C1WebAPIService/api/export/excel", {
        fileName: "exportFlexGrid",
        type: fileType,
        });
    }
</script>
HTML
Add the following markup in <script> tags to export FlexGrid data to excel.
<script type="text/javascript">
        function exportFlex() {
        var exporter = new wijmo.grid.ExcelExporter();
        var grid = wijmo.Control.getControl("#TheFlexGrid");
        exporter.requestExport(grid,
                "https://demos.componentone.com/ASPNET/WebAPI/api/export/excel", {
        fileName: "export",
        type: wijmo.ExportFileType.Xls,
        });
}
</script>
Note: To use Wijmo 5 controls in your HTML application, you need to include references to few Wijmo files in your HTML pages. You may either download these wijmo files and copy them to appropriate folders in your application, or reference Wijmo files hosted in cloud on our Content Delivery Network (CDN). If you download and place the Wijmo script files in a folder named "Scripts", css files in a folder named "Styles", and script files specific to Wijmo controls to "Controls" folder, then add the following references within <head> tags of your HTML pages:
<script src="Controls/wijmo.min.js" type="text/javascript"></script>
<link href="Styles/wijmo.min.css" rel="stylesheet" type="text/css" />
<script src="Scripts/jquery-1.10.2.min.js" type="text/javascript"></script>
<script src="Controls/wijmo.grid.min.js" type="text/javascript"></script>
<script src="Scripts/webapiclient.min.js" type="text/javascript"></script>
Add a button and call the export functionality on its button click for initiating export request.
MVC
Add the following code in Views | MVCFlexGrid | Index.cshtml to add buttons for export functionality.
<div>
    <select id="mySelect">
        <option selected>Xls</option>
        <option>Xlsx</option>
        <option>Csv</option>
    </select>
<button onclick="exportFlex()" title="Export">Export</button>
</div>
HTML
Add the following markup within the <body> tags to create button for export function.
<button onclick="exportFlex()" title="Export">Export</button>
Step 2: Run the Client Project
MVC Application
Click Build | Build Solution to build the project.
Press F5 to run the project.
HTML Application
Save your HTML file and open it in a browser.
Export button appears along with the control, in the output. Use this button to export the data in the control to Excel format.
Explore detailed demo samples of export service for MVC and Wijmo5 FlexGrid control in: