


- SpreadJS Overview
- Getting Started
- JavaScript Frameworks
- Best Practices
-
Features
- Workbook
- Worksheet
- Rows and Columns
- Headers
- Cells
- Data Binding
- Data Manager
- TableSheet
- GanttSheet
- ReportSheet
- Data Charts
- JSON Schema with SpreadJS
- SpreadJS File Format
- Data Validation
- Conditional Formatting
- Sort
- Group
- Formulas
- What-If Analysis
- Serialization
- Keyboard Actions
- Shapes
- Floating Objects
- Barcodes
- Charts
- Sparklines
- Tables
- Pivot Table
- Slicer
- Theme
- User Management
- Culture
- AI Assistant
- SpreadJS Designer
- SpreadJS Designer VSCode Plugin
- Tutorials
- SpreadJS Designer Component
- SpreadJS Collaboration Server
- Touch Support
- Formula Reference
- Import and Export Reference
- Events
- API Documentation
- Release Notes
Sheet Binding in SpreadJS Designer
You can use SpreadJS Designer to create a cell-level binding layout visually. This helps reduce the amount of code required to build forms, detail pages, invoices, order templates, and other layouts where individual cells display fields from one data record.
A sheet binding layout uses binding paths to connect cells with fields in a binding source. The binding source can be a data object or a single record from a Data Manager table.
Open the Sheet Binding Tools
The sheet binding tools are available on the Data tab.
Open the Data tab.
Click Sheet Binding to open or close the Field List panel.

Click the drop-down arrow under Sheet Binding to open the command menu.
The sheet binding UI includes two main areas:
Sheet Binding commands on the ribbon.
The Field List panel on the right side of Designer.
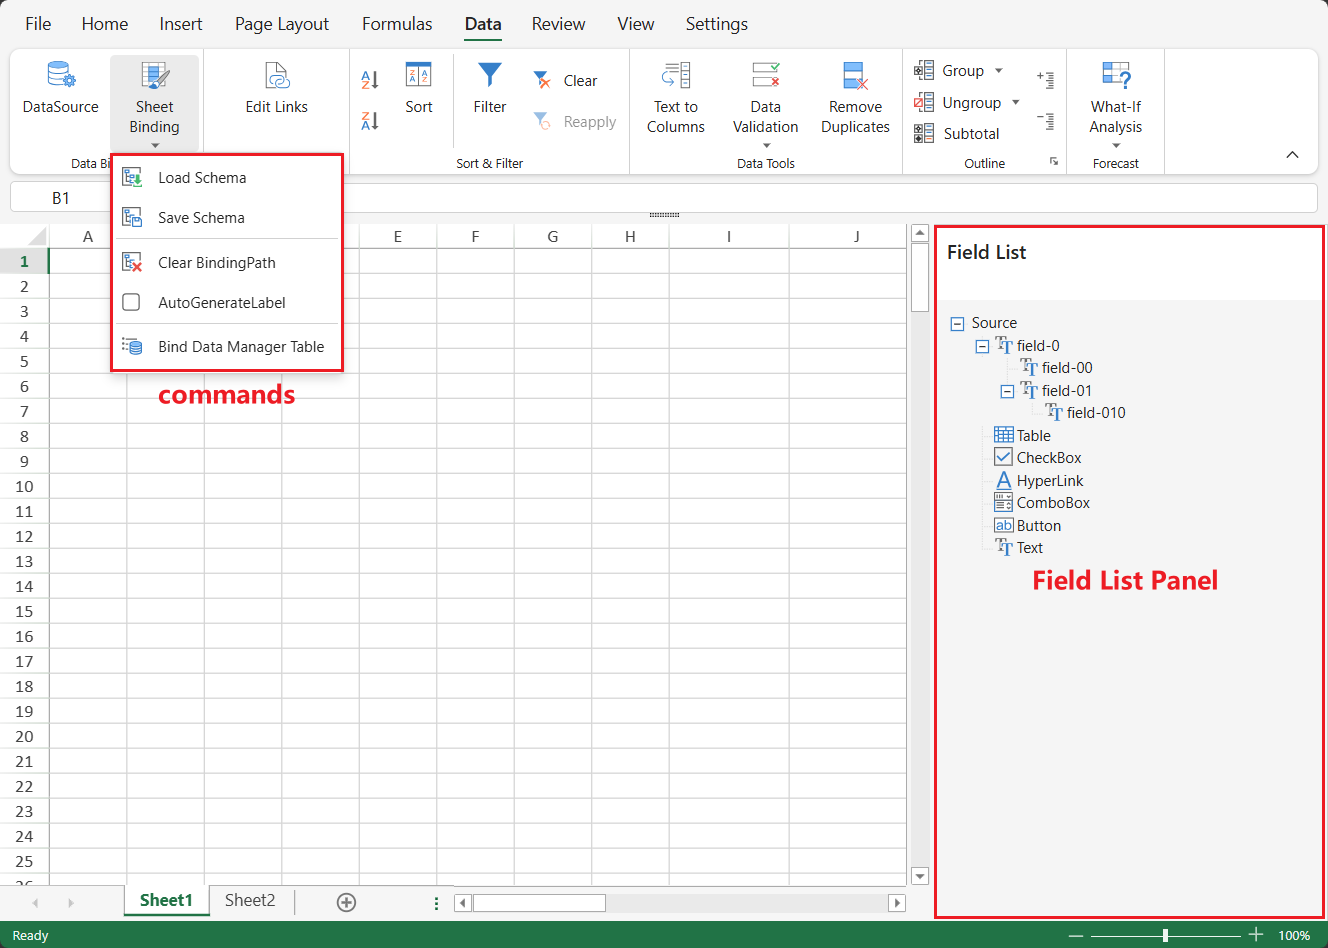
Sheet Binding Commands
The Sheet Binding drop-down provides commands for managing field definitions, binding paths, labels, and Data Manager table binding.
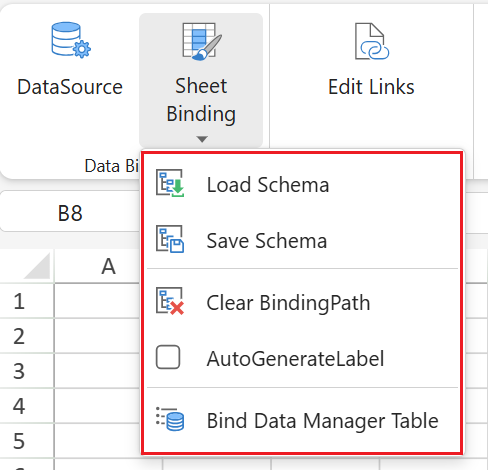
Command | Description |
|---|---|
Load Schema | Loads field definitions from a local schema file into the Field List panel. |
Save Schema | Saves the current field definitions in the Field List panel to a JSON schema file. |
Clear BindingPath | Removes binding paths from the current selection, such as selected cells, ranges, rows, columns, or the whole sheet. |
AutoGenerateLabel | Creates an editable label on the left side of the bound cell when a field is placed on the worksheet. |
Bind Data Manager Table | Binds the active sheet to one record from a Data Manager table and uses that record as the current binding source. |
Field List Panel
The Field List panel contains field nodes that can be placed on the worksheet to create binding paths.
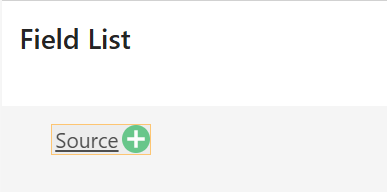
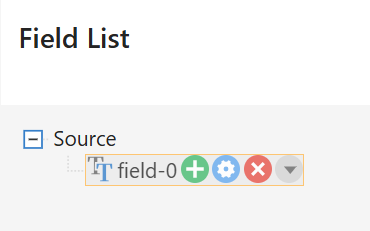
Use the controls in the Field List panel to manage field nodes.
Control | Icon | Description |
|---|---|---|
Add |
| Adds a field node. |
Rename |
| Changes the field name or display name. |
Delete |
| Removes a field node. |
Field option menu |
| Selects the field option for the field node. |


A field can use options such as Text, Table, CheckBox, HyperLink, ComboBox, and Button. When a field is placed on the worksheet, Designer creates a binding path and applies the selected field option to the generated cell or layout.
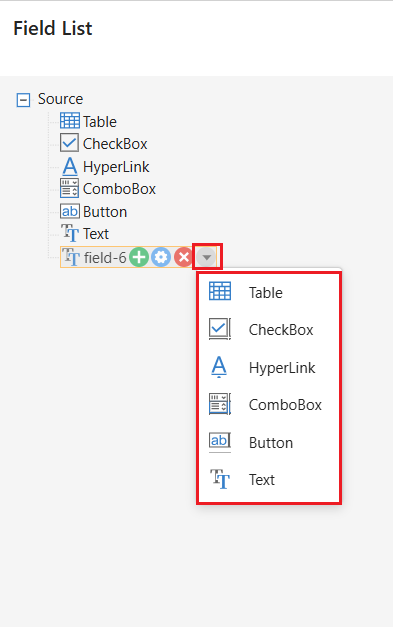
The field names in the Field List should match the fields in the data object or Data Manager table record used as the binding source.
Create or Load Field Definitions
Before placing fields on the worksheet, prepare the field definitions in the Field List panel.
You can prepare field definitions in the following ways:
Create field nodes manually in the Field List panel.
Load field definitions from a schema file.
Bind the sheet to a Data Manager table and use the fields from the selected table.
Create Field Nodes Manually
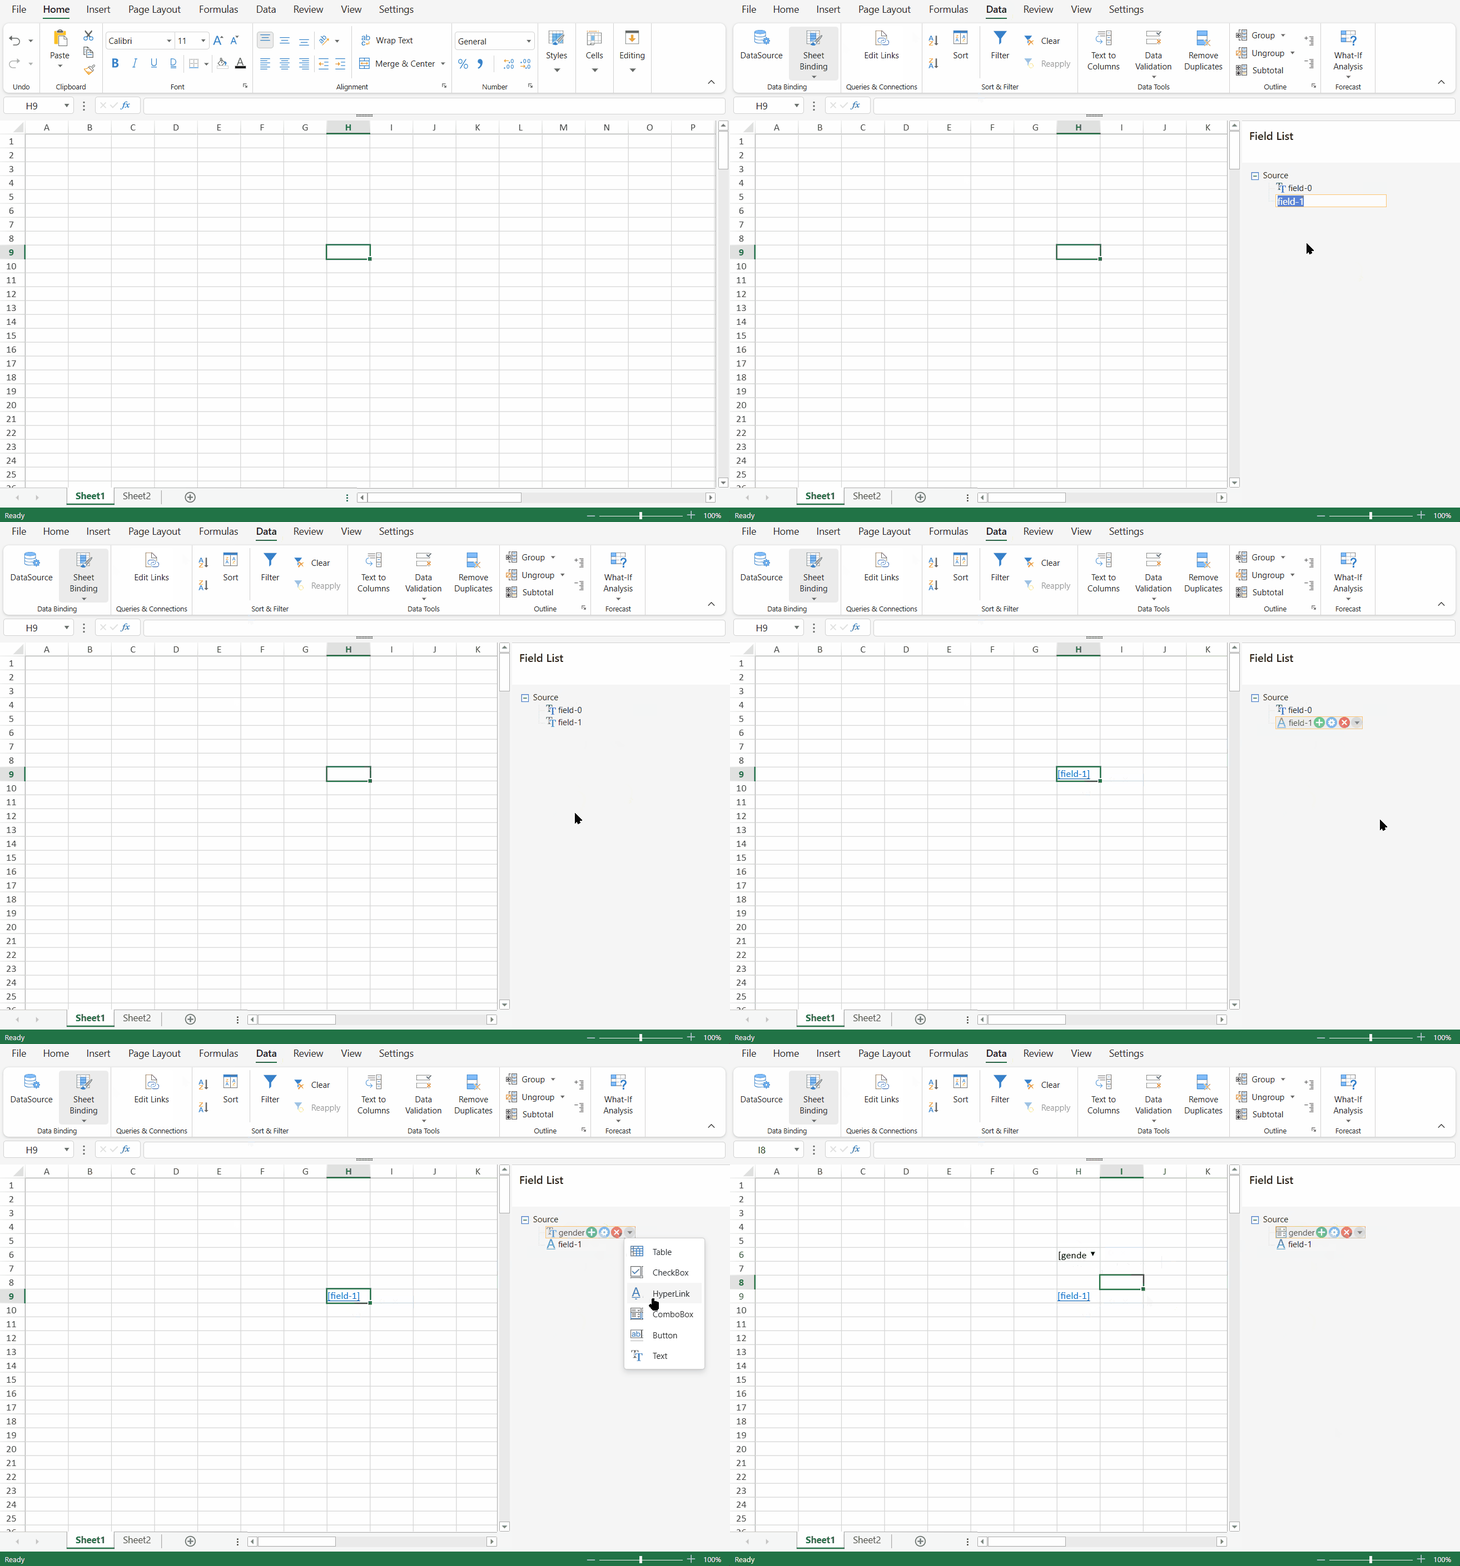
To create field nodes manually:
Open the Data tab.
Click Sheet Binding to display the Field List panel.
Click the add button in the Field List panel to add a field node.
Rename the field node as needed.
Select a field option from the field option menu.
For example, you can create fields such as
name,age,email, ormarried, and select a field option such as CheckBox for a Boolean field.
Load or Save a Schema
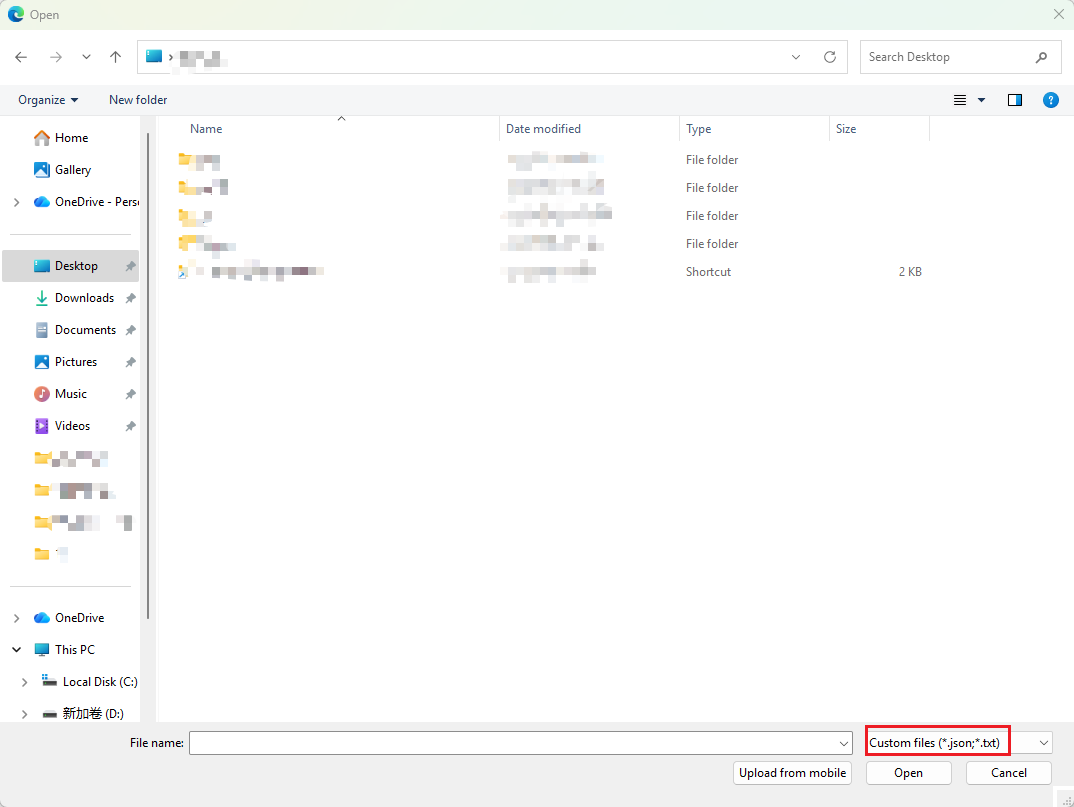
Use Load Schema to load field definitions from a local schema file into the Field List panel.
Use Save Schema to save the current field definitions in the Field List panel to a JSON schema file.
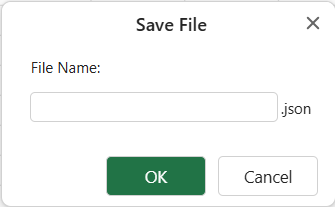
The schema file stores field definitions for the Field List. It does not save the worksheet layout, cell values, or user-entered sheet data.
Place Fields in the Worksheet
Drag fields from the Field List panel to cells in the worksheet to create a binding layout.
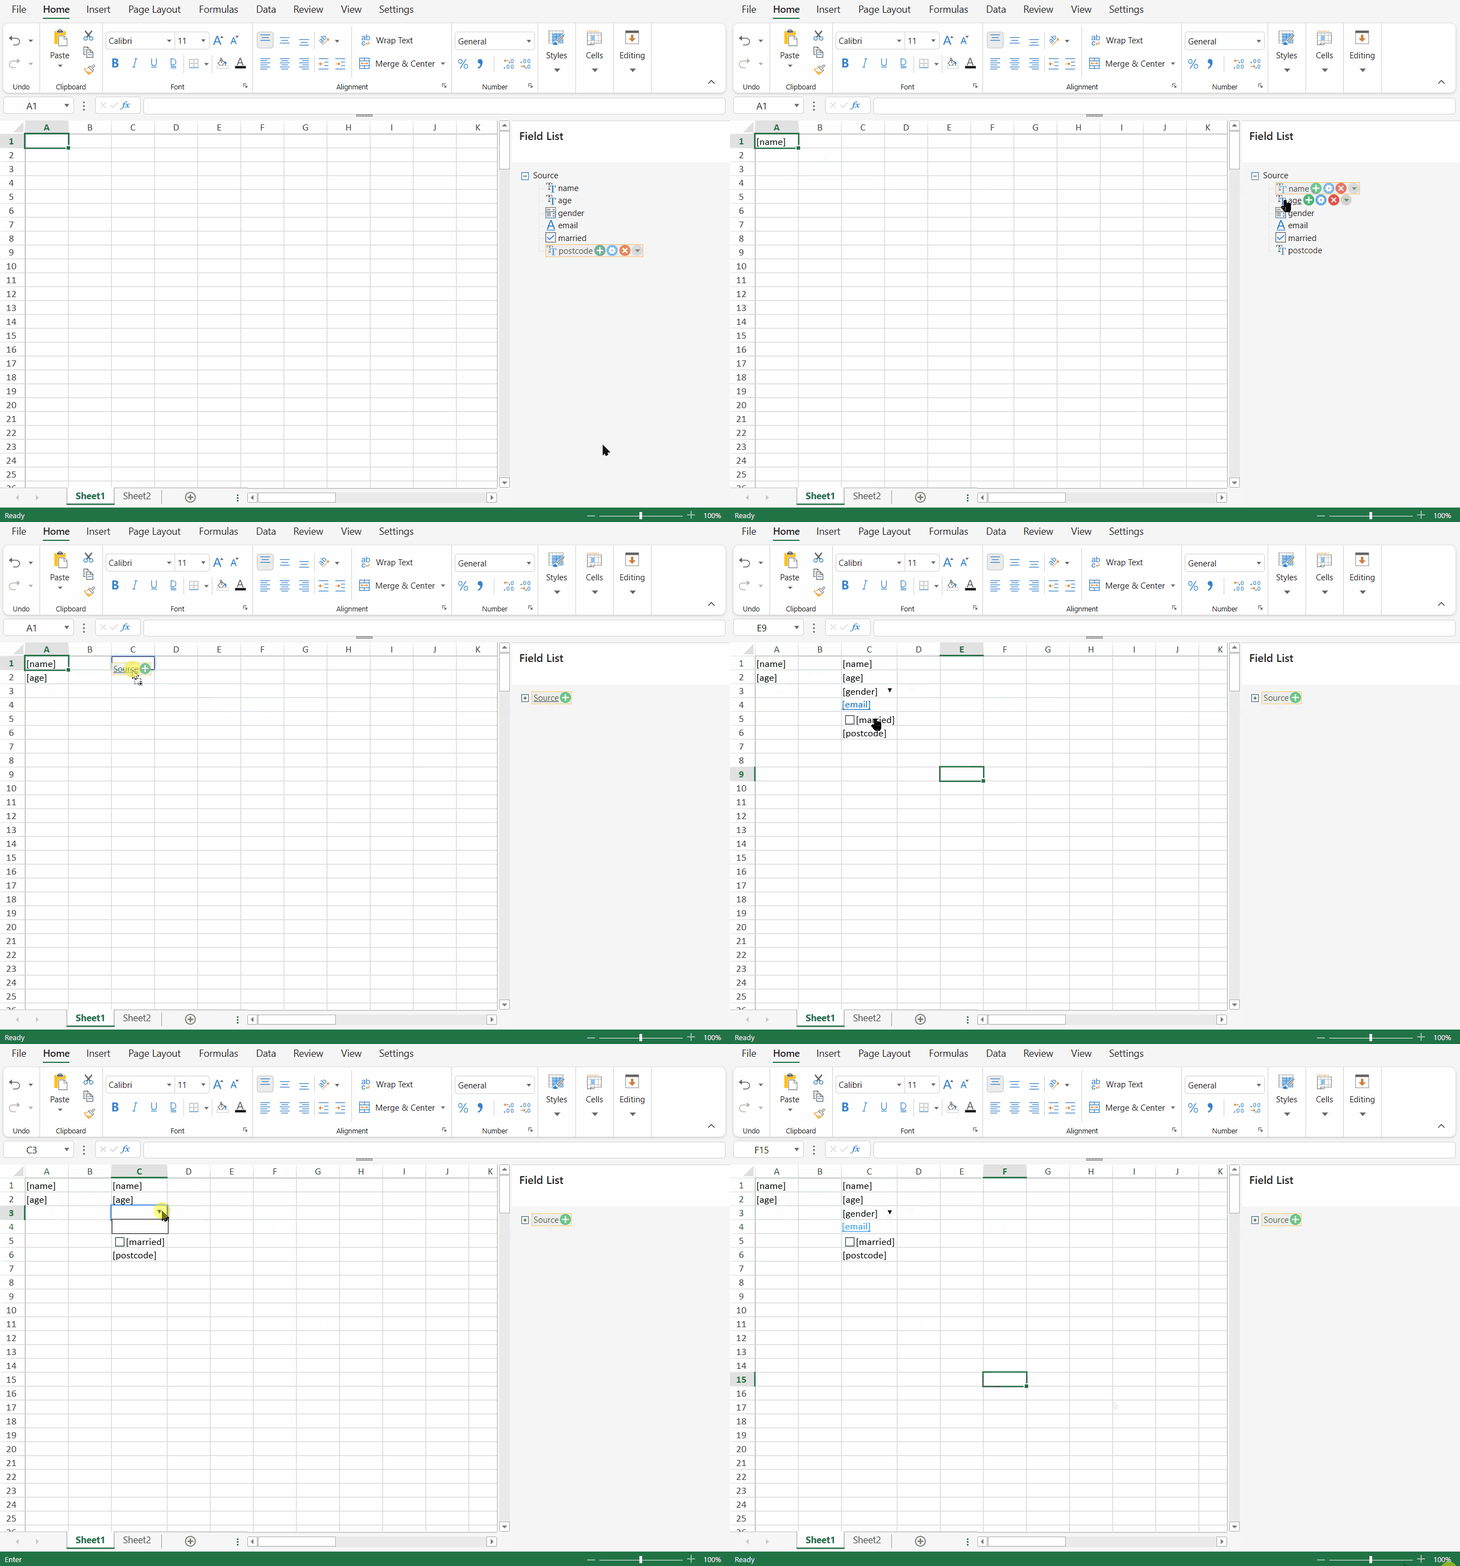
When a field is placed on the worksheet, Designer creates a binding path for the target cell. In design mode, bound cells can display placeholders in square brackets, such as [name], [email], or [married]. These placeholders indicate that the cells have binding paths.
Nested fields use dot notation in the binding path. For example, the following object contains a nested postcode field:
{
    name: "Bob",
    age: "35",
    gender:"male",
    email:"bob@example.com",
    married:"yes",
    address: {
        postcode: "710075"
    }
}
A cell can bind to the nested field by using the following binding path:
address.postcodeThe corresponding placeholder appears as:
[address.postcode]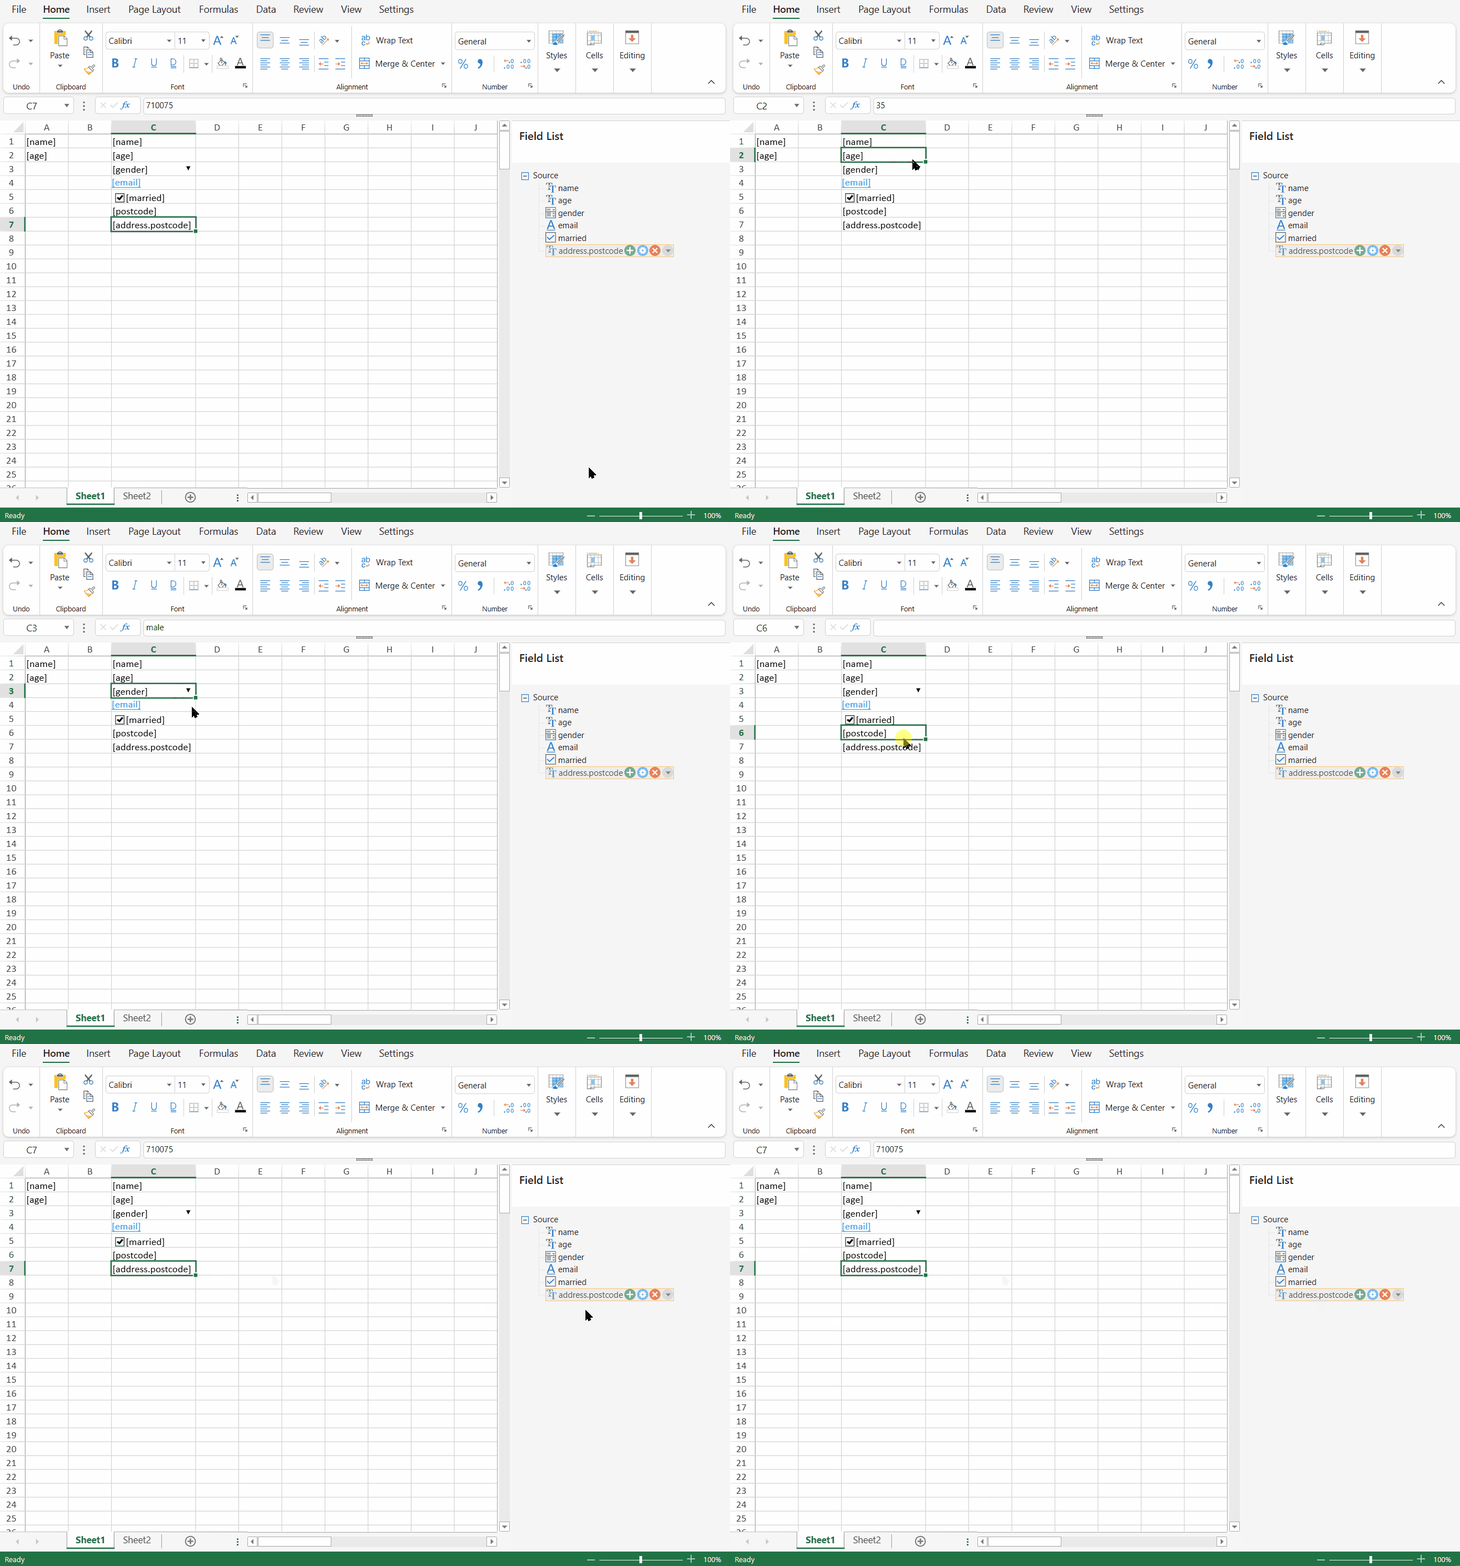
Generate Labels Automatically
The AutoGenerateLabel option automatically creates a label when you place a field on the sheet.
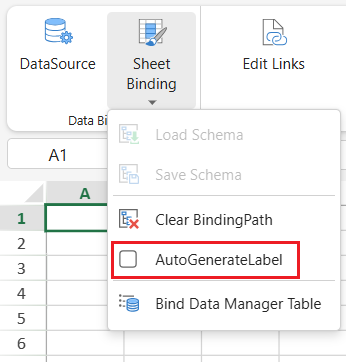
For example, when you drag the orderId field to a cell, Designer can create a label such as orderId next to the bound cell.
Use this option when you want to quickly create a form-like layout from table fields.
Clear Binding Paths
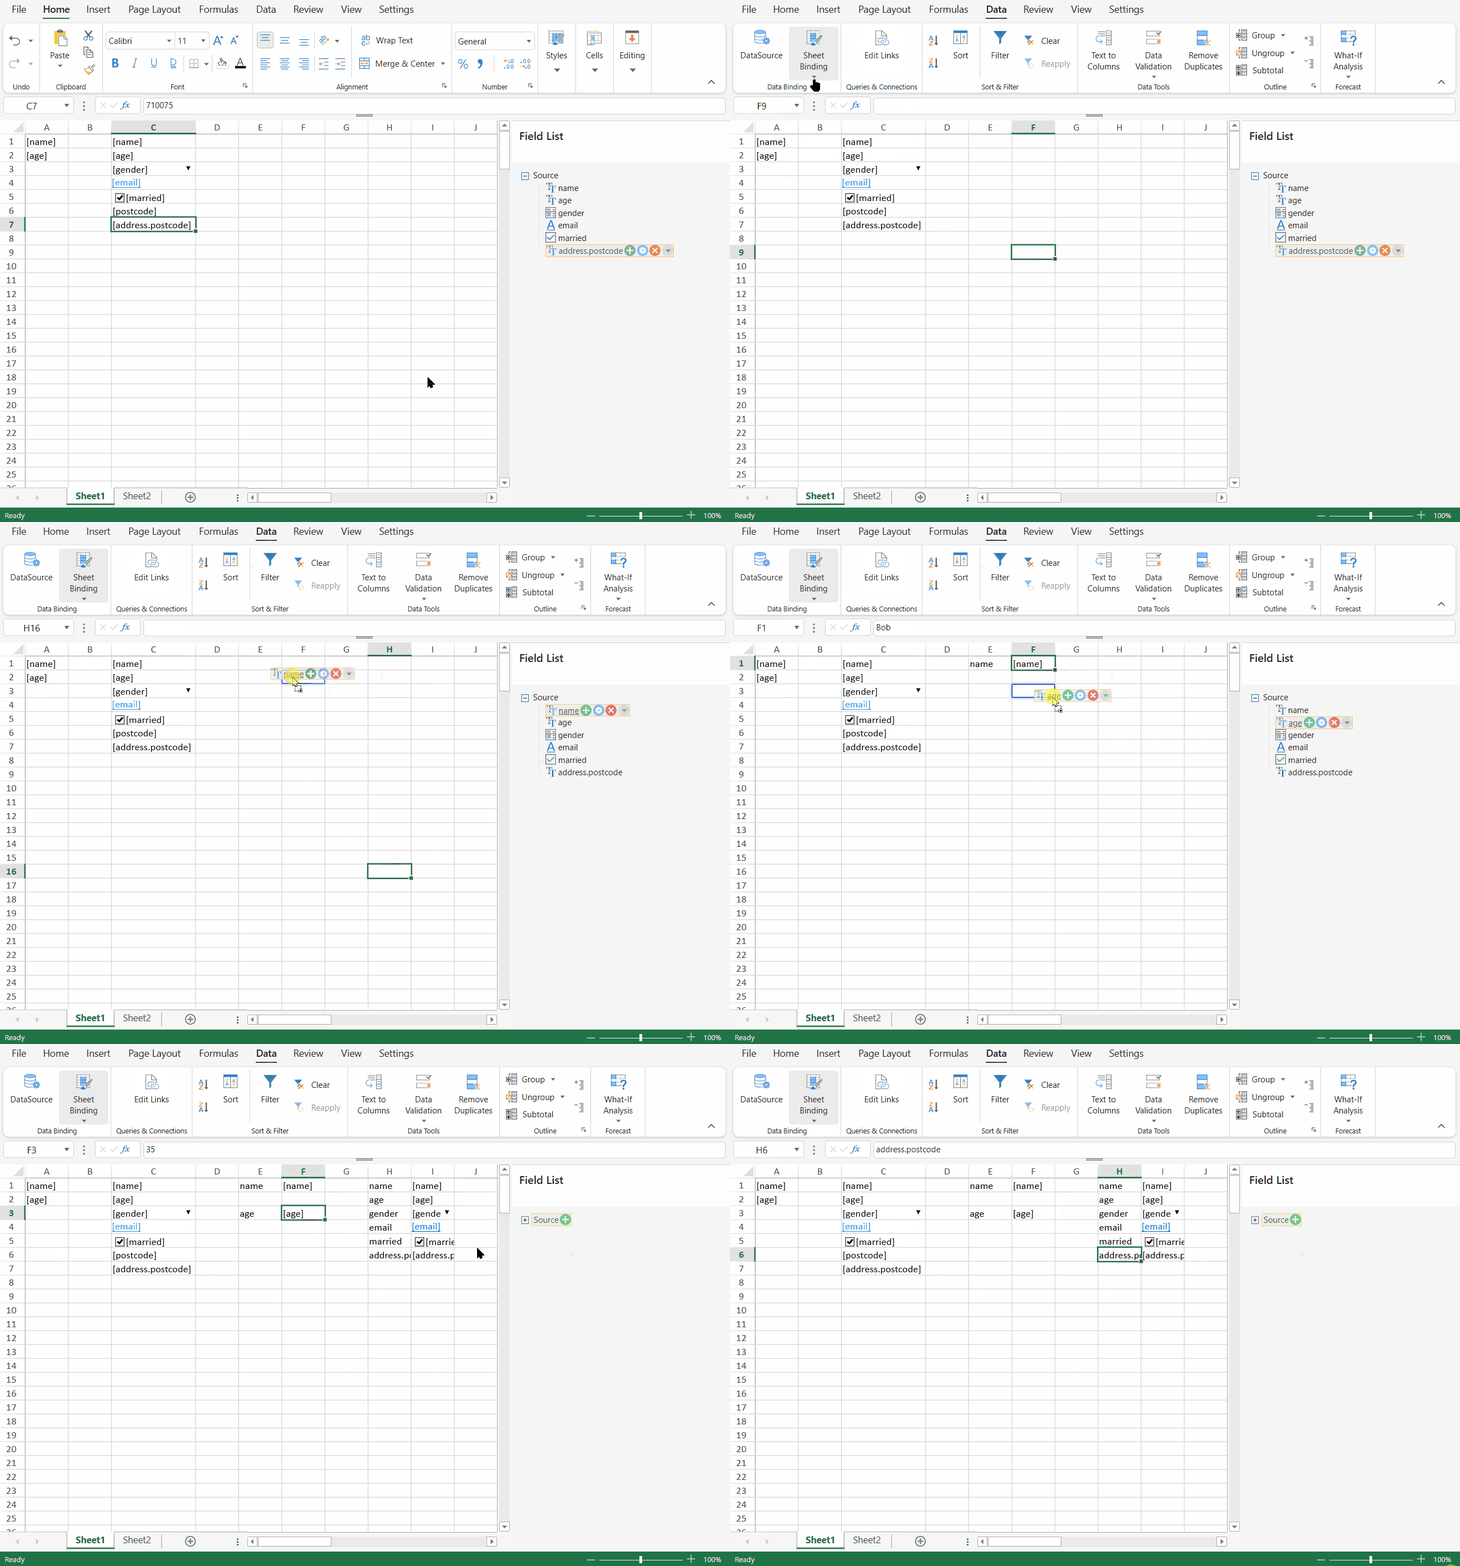
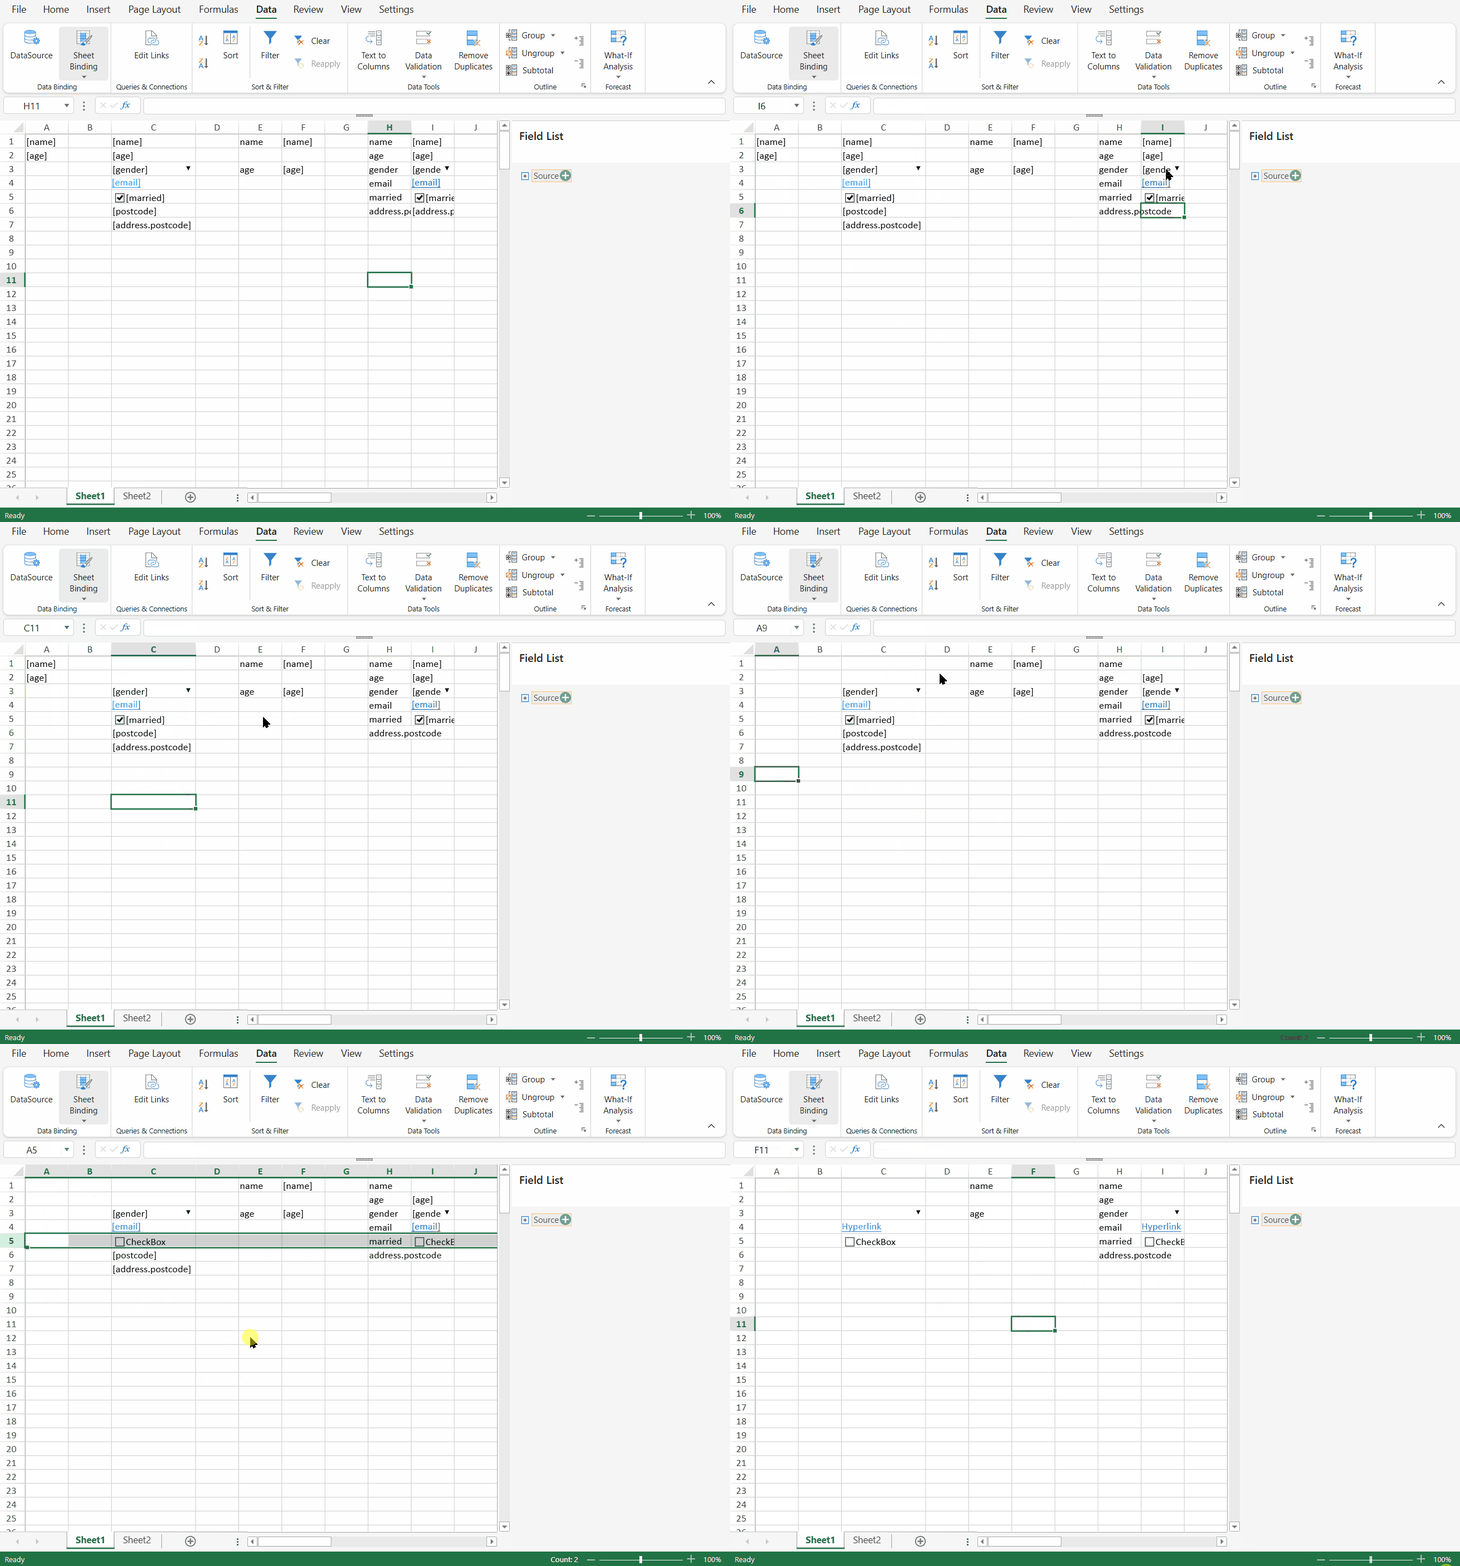
Use Clear BindingPath to remove binding paths from cells.
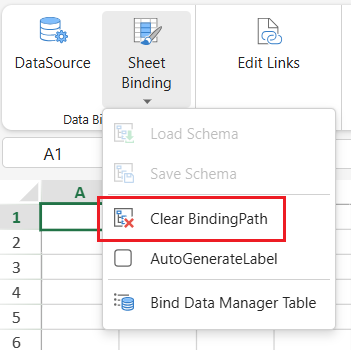
This operation clears the cell binding path information from the selected cells or sheet area, depending on the current selection. The displayed values and formatting behavior may depend on the current sheet state.
Bind the Sheet to a Data Manager Table
You can bind the active sheet to a Data Manager table from Designer. This lets the sheet use one record from the selected Data Manager table as the current cell binding source.
Before binding the sheet, create or configure the Data Manager table in the DataSource panel.
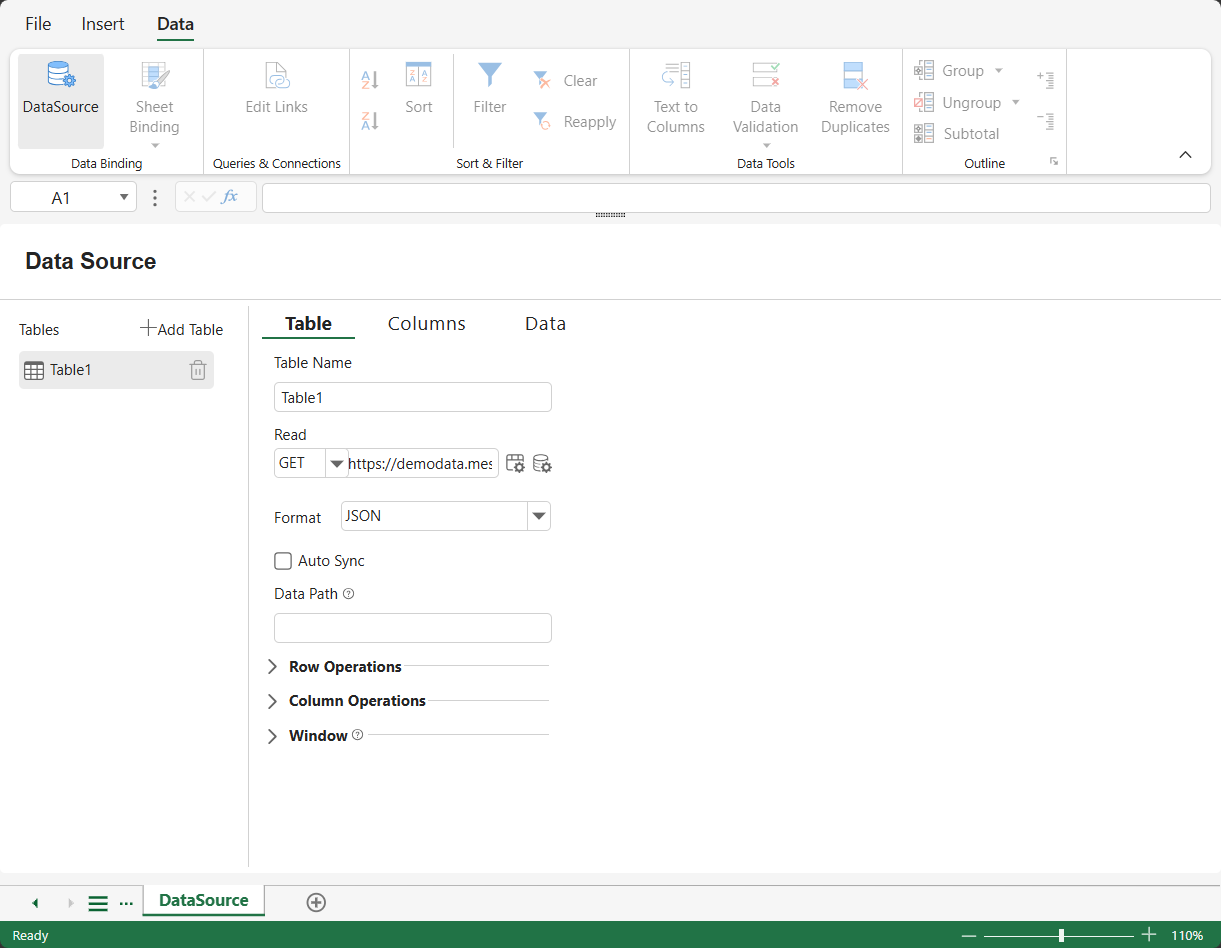
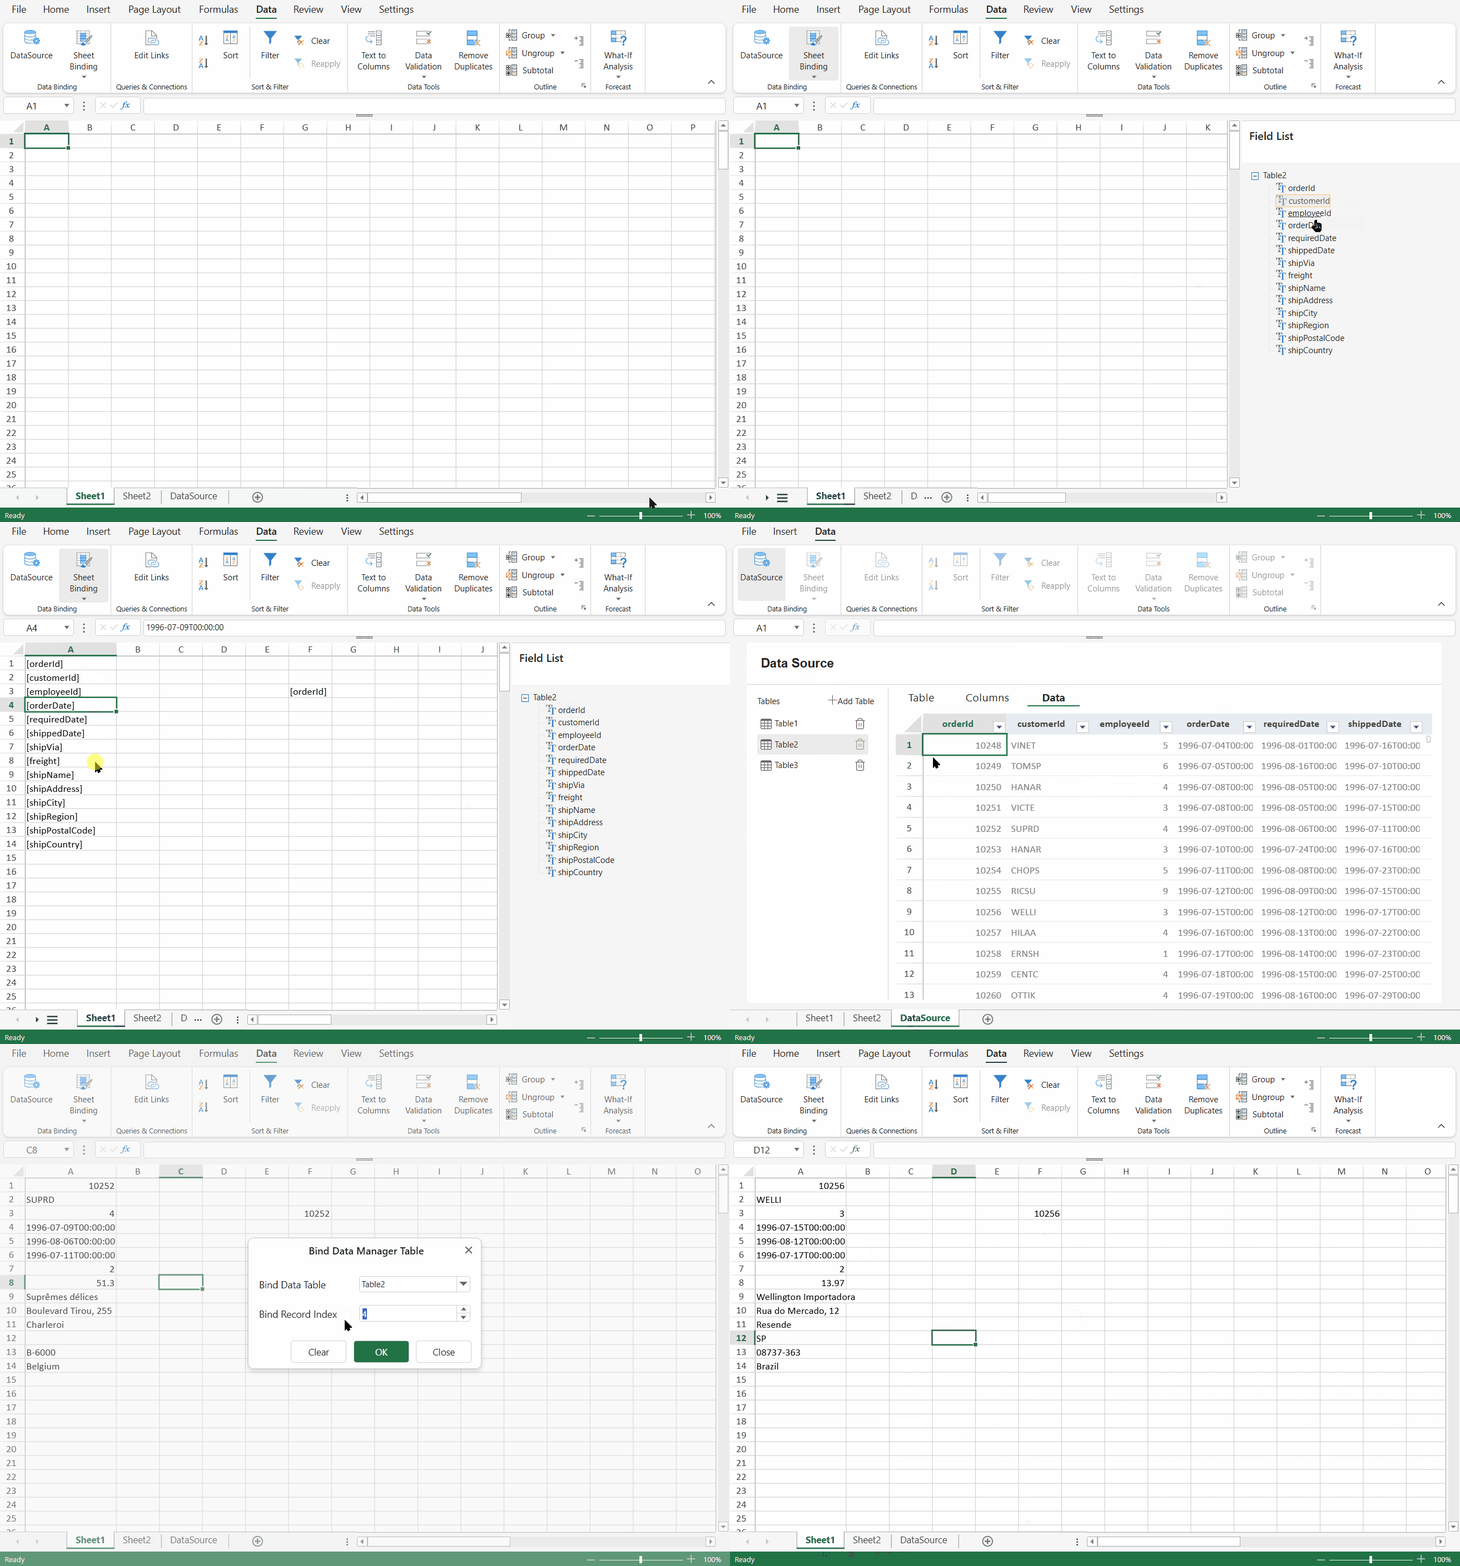
To bind the sheet to a Data Manager table:
Open the Data tab.
Click Sheet Binding.
Select Bind Data Manager Table.
In the Bind Data Manager Table dialog, select a table from Bind Data Table.
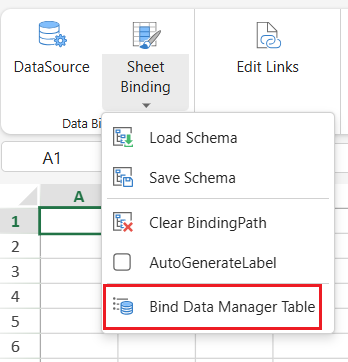
Enter the record index in Bind Record Index.
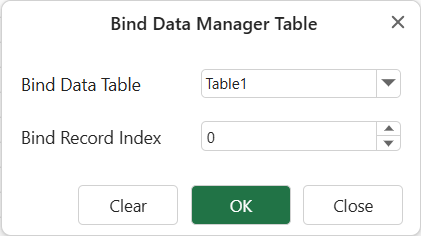
Click OK.
The selected record becomes the current binding source for the sheet. Binding paths in the sheet resolve against that record.
For example, if Bind Data Table is set to Table1 and Bind Record Index is set to 0, the sheet is bound to the first record in Table1. A cell with the binding path orderId displays the orderId value from that record.
The record index is zero-based. The first record uses index
0.
Clear the Data Manager Table Binding
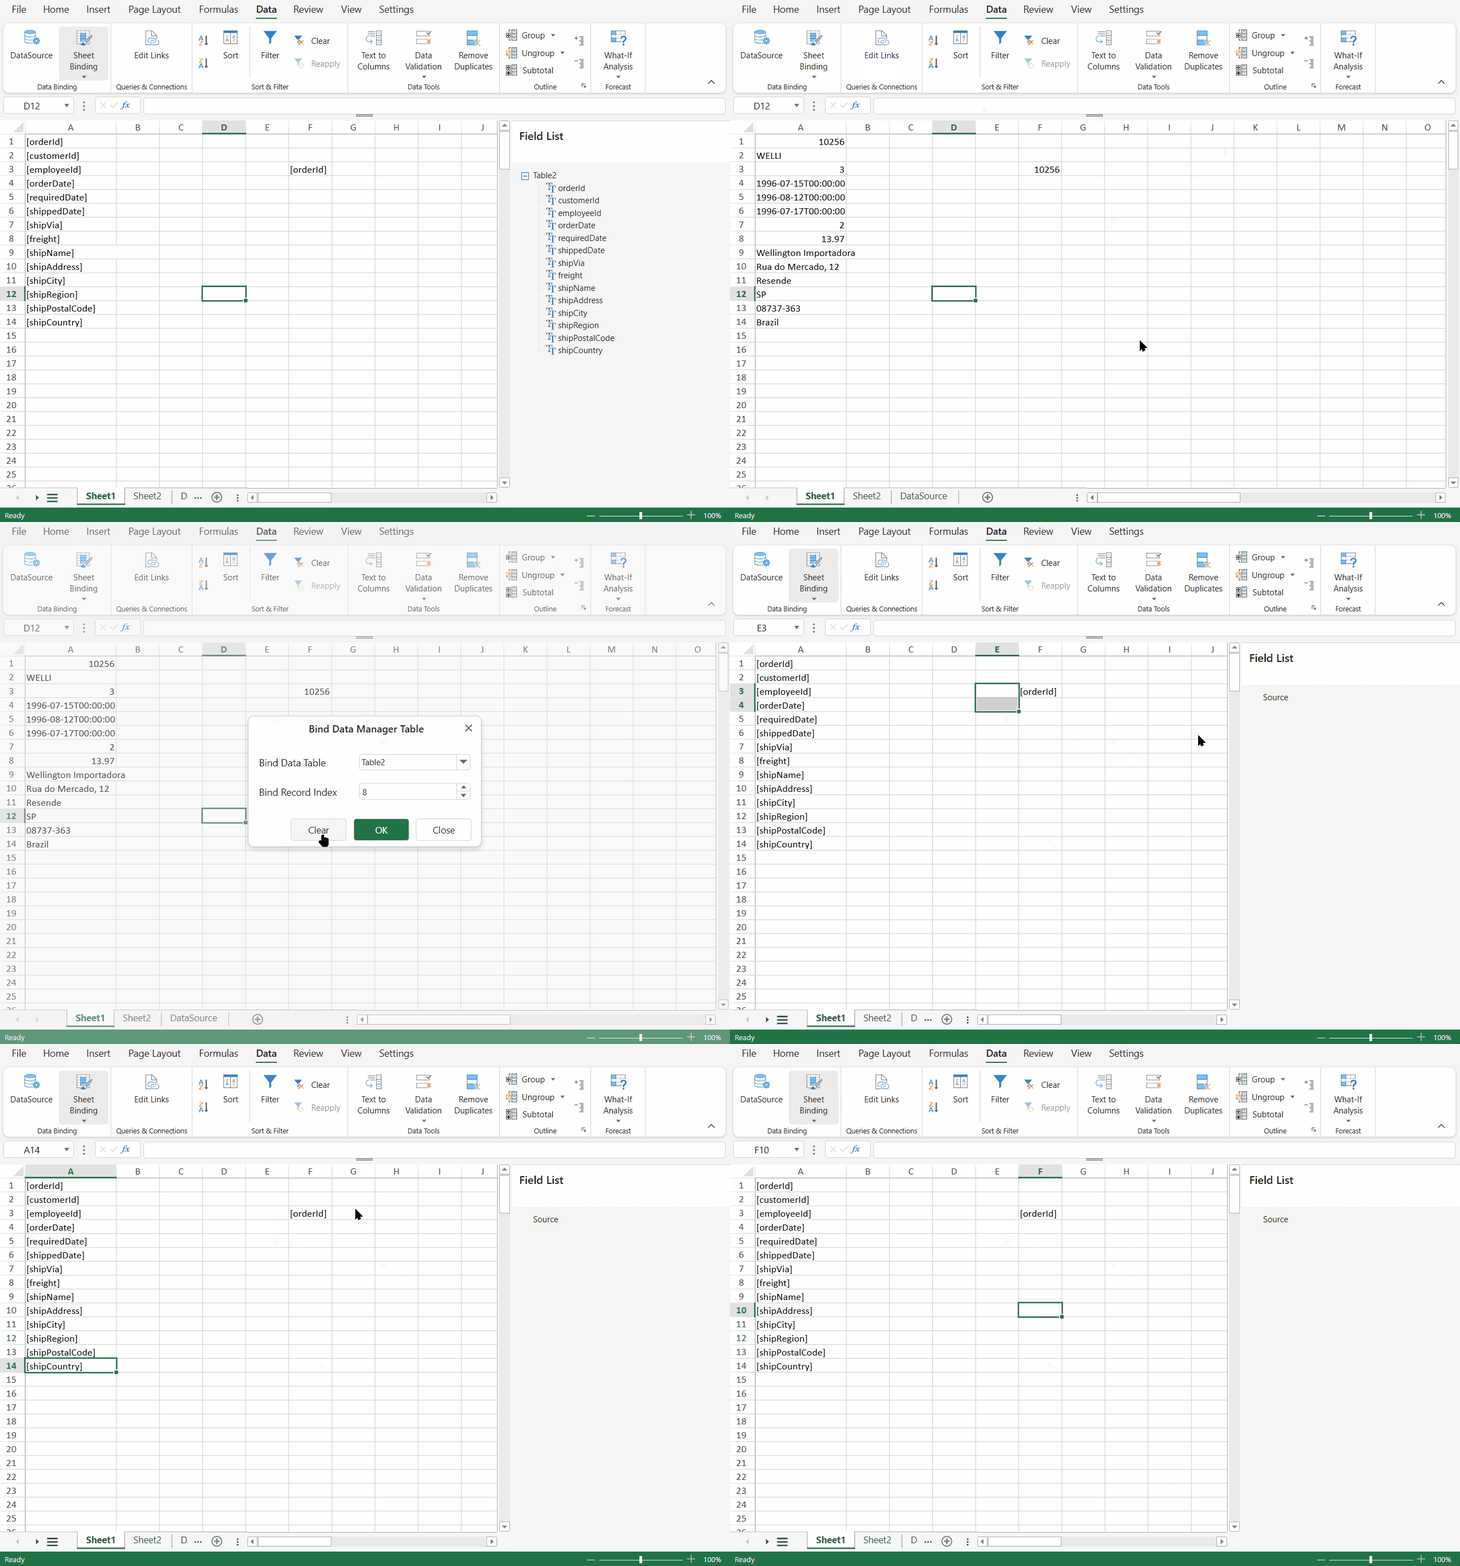
In the Bind Data Manager Table dialog, click Clear to remove the current Data Manager table binding from the sheet.
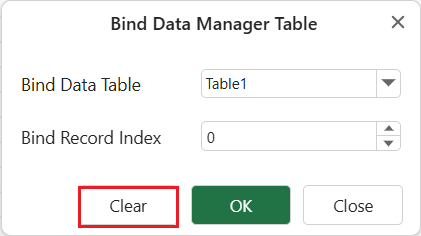
This clears the sheet's current Data Manager table binding source. Existing binding paths may remain in the layout unless they are removed separately with Clear BindingPath.
Sheet Binding Compared with Table Binding
Sheet binding and table binding are used for different scenarios.
Scenario | Recommended feature |
|---|---|
Display fields from one record in specific cells | Sheet binding |
Create a form, invoice, or detail template | Sheet binding |
Display all records from a Data Manager table as rows and columns | Table binding |
Bind a worksheet table directly to a Data Manager table | Table binding |
Save and Use the Designer Layout
After creating a sheet binding layout, save or export the workbook layout if you want to reuse it later.
This is different from Save Schema:
Operation | Saves |
|---|---|
Save Schema | Field definitions used by the Field List panel. |
Workbook save or export | Worksheet layout, binding paths, labels, cell settings, and other workbook content. |
Use the workbook save or export options under the File tab to save the designed layout.
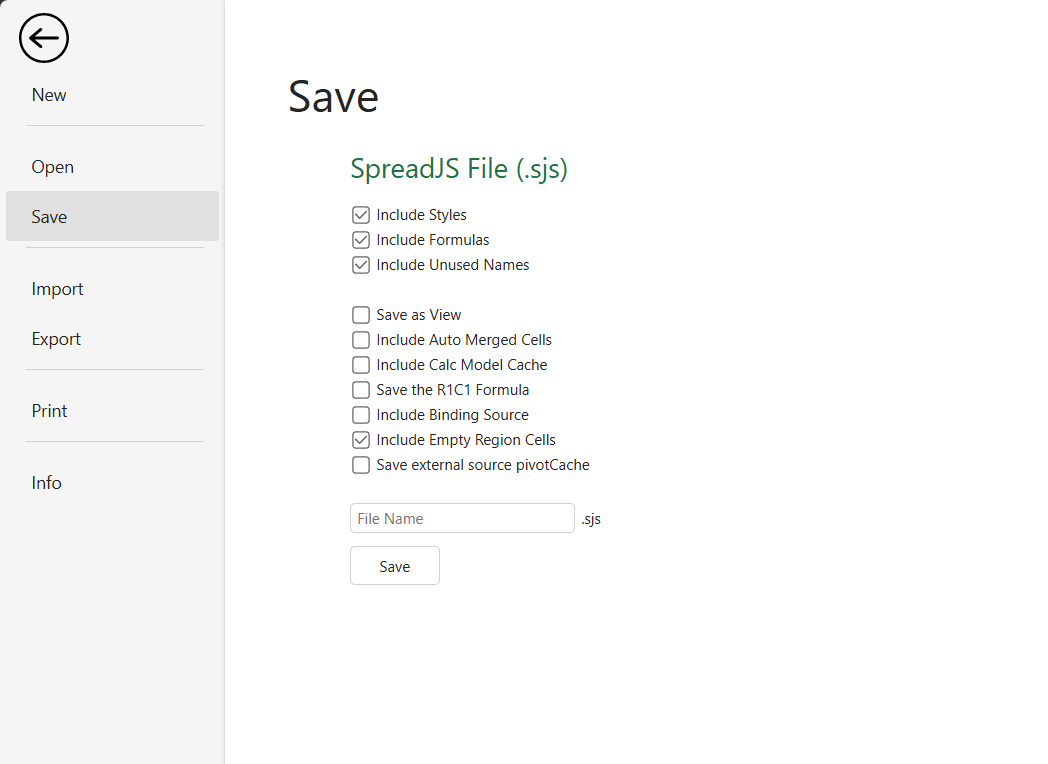
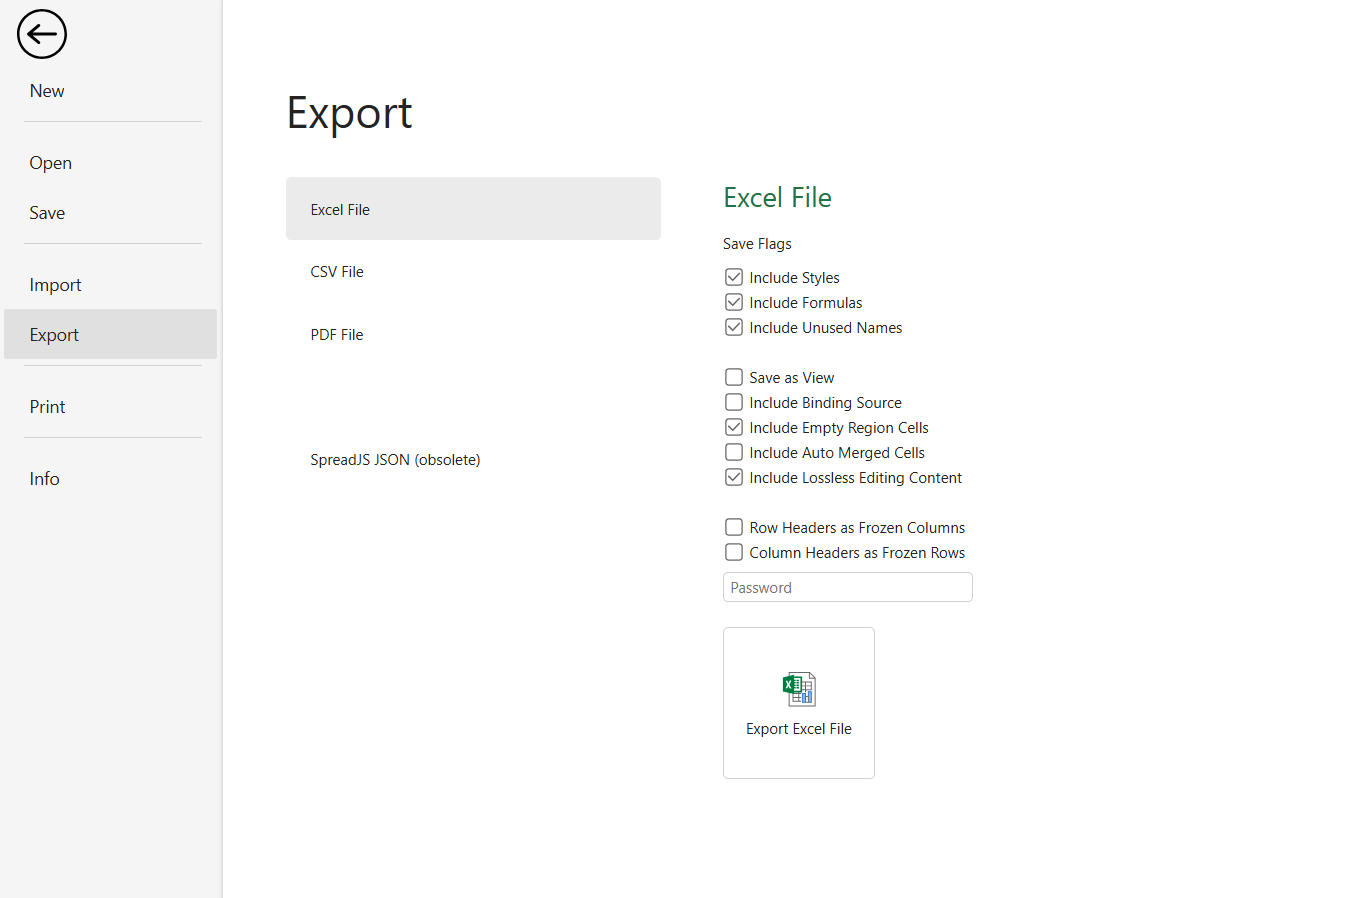
At runtime, load the designed layout and then bind the sheet to the actual data source. The following example loads a Designer-created layout and binds it to a data object by using CellBindingSource.
<!DOCTYPE html>
<html>
<head>
    <title>SpreadJS Binding</title>
    <link type="text/css" href="./css/gc.spread.sheets.x.x.x.css" rel="stylesheet" />
    <script type="text/javascript" src="./scripts/gc.spread.sheets.all.x.x.x.min.js"></script>
    <script type="text/javascript" src="binding.js"></script>
    <script type="text/javascript">
        window.onload = function () {
            var spread = new GC.Spread.Sheets.Workbook(document.getElementById("ss"), { sheetCount: 3 });

            var data = {
                name: "Bob",
                age: 20,
                gender: "Male",
                email: "bob@test.com",
                married: true
            };

            // Load the Designer-created layout.
            // In this example, the exported layout is stored in the binding variable.
            spread.fromJSON(binding);

            var sheet = spread.getActiveSheet();

            // Bind the sheet to the actual data source.
            sheet.setDataSource(new GC.Spread.Sheets.Bindings.CellBindingSource(data));
        };
    </script>
</head>
<body>
    <div id="ss" style="width: 600px; height: 250px; border: 1px solid gray"></div>
</body>
</html>
The field names used in the binding paths must match the fields in the data source. For example, a cell with the binding path name resolves to the name field in the data object.
The completed layout displays the bound data in the cells defined by the Designer-created binding paths.