This lesson illustrates how to populate a C1TreeView with site map data.
To create the Site Map and bind it to the C1TreeView control, complete the following:
The Add New Item dialog box appears.
The following default source code appears for the Web.sitemap file:
| Markup |
Copy Code
|
|---|---|
<?xml version="1.0" encoding="utf-8" ?> <siteMap xmlns="http://schemas.microsoft.com/AspNet/SiteMap-File-1.0" > <siteMapNode url="" title="" description=""> <siteMapNode url="" title="" description="" /> <siteMapNode url="" title="" description="" /> </siteMapNode> </siteMap> |
|
| Markup |
Copy Code
|
|---|---|
<?xml version="1.0" encoding="utf-8" ?> <siteMap xmlns="http://schemas.microsoft.com/AspNet/SiteMap-File-1.0" > <siteMapNode title="ComponentOne"> <siteMapNode title="Products"> <siteMapNode title="Studio Enterprise"> <siteMapNode title="Studio for WinForms" /> <siteMapNode title="Studio for ASP.NET" /> <siteMapNode title="Studio for WPF" /> <siteMapNode title="Studio for Mobile" /> <siteMapNode title="Studio for ActiveX" /> <siteMapNode title="Studio for Silverlight" /> </siteMapNode> </siteMapNode> <siteMapNode title="Support"> <siteMapNode title="Support Services" /> <siteMapNode title="HelpCentral" /> <siteMapNode title="Product Forums" /> </siteMapNode> <siteMapNode title="Company"> <siteMapNode title="About Us" /> <siteMapNode title="Partners" /> <siteMapNode title="Contact Us" /> <siteMapNode title="Join Us" /> <siteMapNode title="Press Center" /> <siteMapNode title="Governance" /> </siteMapNode> <siteMapNode title="Store"> <siteMapNode title="Buy Now" /> <siteMapNode title="Resellers" /> </siteMapNode> </siteMapNode> </siteMap> |
|
SiteMapDataSource1 is added to your project.
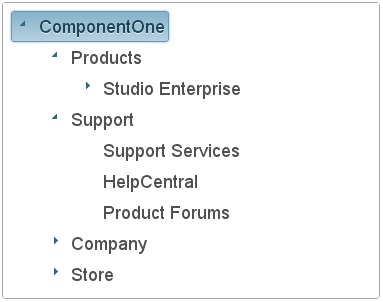
The data from the Web.sitemap file is reflected in the C1TreeView control.

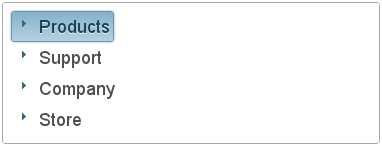
Observe that the control opens with the top-level node, ComponentOne. In the next step, you'll learn how to remove the top-level node so that you just expose the second-level nodes in the C1TreeView.
