
Headers
Headers are located at the top of each printed page or in the top section of a worksheet. You can perform various operations on both row and column headers, such as hiding them, adding multiple headers, customizing their appearance, and more.
The following sections explain various operations on headers that you can perform in Spread for WPF.
Add Multiple Headers
You can add multiple rows to column headers or multiple columns to row headers to create multi-level headers. You can display letters, numbers, or custom text in these headers. When a user clicks a header, the corresponding row or column is selected by default. To add multiple headers, use the RowCount and ColumnCount properties of the IColumnHeader and IRowHeader interfaces.
Refer to the following example code to add multiple headers as shown in the above image.
C#
// Add three rows to the column headers.
spreadSheet1.Workbook.ActiveSheet.ColumnHeader.RowCount = 3;
// Add three columns to the row headers.
spreadSheet1.Workbook.ActiveSheet.RowHeader.ColumnCount = 3;
VB
' Add three rows to the column headers.
spreadSheet1.Workbook.ActiveSheet.ColumnHeader.RowCount = 3
' Add three columns to the row headers.
spreadSheet1.Workbook.ActiveSheet.RowHeader.ColumnCount = 3
Set Column Header Height
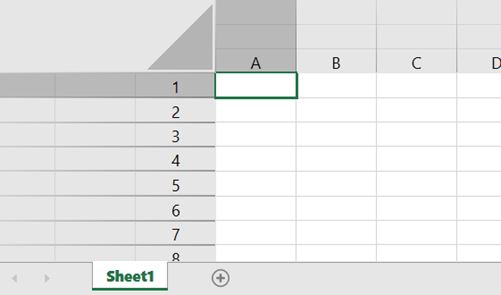
You can modify the default height of a specific row in a column header. To accomplish this, first access the worksheet's column header using the ColumnHeader property, use the Cells property to reference a specific cell of ColumnHeader, and then set its RowHeight property. Note that the row height value is set in pixels.

Refer to the following example code to set the height of the first row of column headers.
C#
// Set the row height of the column header.
spreadSheet1.Workbook.ActiveSheet.ColumnHeader.Cells["A1"].RowHeight = 54;
VB
' Set the row height of the column header.
spreadSheet1.Workbook.ActiveSheet.ColumnHeader.Cells("A1").RowHeight = 54
Set Row Header Width
You can modify the default width of a specific column in a row header. To accomplish this, first access the worksheet's row header using the RowHeader property, use the Cells property to reference a specific cell of RowHeader, and then set its ColumnWidth property. Note that the column width value is set in pixels.
Refer to the following example code to set the column width of the row header.
C#
// Set column width of the row header.
spreadSheet1.Workbook.ActiveSheet.RowHeader.Cells[0,0].ColumnWidth  = 190;
VB
' Set column width of the row header.
spreadSheet1.Workbook.ActiveSheet.RowHeader.Cells(0, 0).ColumnWidth = 190
Set Corner Header
The area at the top left of the control where the row header and column header intersect is the corner header. To set the number of rows and columns of the corner header, change the number of rows in the column header and the number of columns in the row header. The row height of the corner header corresponds to the row height of the column header, and the column width corresponds to the column width of the row header.
The following code sets the corner header by setting the RowCount property of the IColumnHeader and the ColumnCount property of the IRowHeader to 5.
GcSpreadSheet1.Workbook.ActiveSheet.ColumnHeader.RowCount = 5;
GcSpreadSheet1.Workbook.ActiveSheet.RowHeader.ColumnCount = 5;
GcSpreadSheet1.Workbook.ActiveSheet.ColumnHeader.RowCount = 5
GcSpreadSheet1.Workbook.ActiveSheet.RowHeader.ColumnCount = 5When the user clicks a column header, the corresponding column is selected; when the row header is clicked, the corresponding row is selected; and when the corner header is clicked, the entire control is selected.
Customize Header Style
By default the spreadSheet component displays letters in the column headers and numbers in the row headers. You can customize the appearance of row and column headers using different properties of IRange interface, such as cell type, text orientation, background color, text alignments, etc.
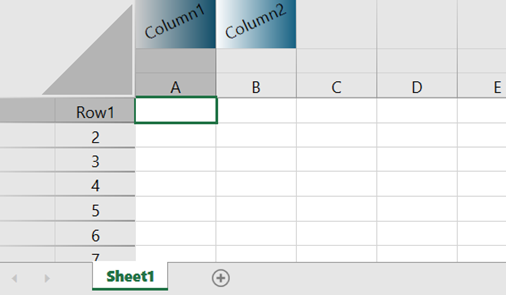
Refer to the following example code to customize headers using the CellType, Orientation, Interior, and HorizontalAlignment properties of the IRange interface.
C#
// Customize headers.
spreadSheet1.Workbook.ActiveSheet.ColumnHeader.Cells["A1:B1"].CellType = UniversalCellType.FromWorkbook(spreadSheet1.Workbook);
spreadSheet1.Workbook.ActiveSheet.ColumnHeader.Cells["A1:B1"].Orientation = 25;
spreadSheet1.Workbook.ActiveSheet.ColumnHeader.Cells["A1:B1"].Interior.Pattern = GrapeCity.Spreadsheet.PatternType.LinearGradient;
spreadSheet1.Workbook.ActiveSheet.ColumnHeader.Cells["A1:B1"].HorizontalAlignment = GrapeCity.Spreadsheet.HorizontalAlignment.Center;
spreadSheet1.Workbook.ActiveSheet.ColumnHeader.Cells["A1"].RowHeight = 44;
spreadSheet1.Workbook.ActiveSheet.ColumnHeader.Cells["A1"].Text = "Column1";
spreadSheet1.Workbook.ActiveSheet.ColumnHeader.Cells["B1"].Text = "Column2";
spreadSheet1.Workbook.ActiveSheet.RowHeader.ColumnCount = 2;
spreadSheet1.Workbook.ActiveSheet.RowHeader.Cells[0, 1].Text = "Row1";
VB
' Customize headers.
spreadSheet1.Workbook.ActiveSheet.ColumnHeader.Cells("A1:B1").CellType = UniversalCellType.FromWorkbook(spreadSheet1.Workbook)
spreadSheet1.Workbook.ActiveSheet.ColumnHeader.Cells("A1:B1").Orientation = 25
spreadSheet1.Workbook.ActiveSheet.ColumnHeader.Cells("A1:B1").Interior.Pattern = GrapeCity.Spreadsheet.PatternType.LinearGradient
spreadSheet1.Workbook.ActiveSheet.ColumnHeader.Cells("A1:B1").HorizontalAlignment = GrapeCity.Spreadsheet.HorizontalAlignment.Center
spreadSheet1.Workbook.ActiveSheet.ColumnHeader.Cells("A1").RowHeight = 44
spreadSheet1.Workbook.ActiveSheet.ColumnHeader.Cells("A1").Text = "Column1"
spreadSheet1.Workbook.ActiveSheet.ColumnHeader.Cells("B1").Text = "Column2"
spreadSheet1.Workbook.ActiveSheet.RowHeader.ColumnCount = 2
spreadSheet1.Workbook.ActiveSheet.RowHeader.Cells(0, 1).Text = "Row1"
Limitations
You cannot set borders for row and column headers.
You cannot customize automatically merged cells.
Merge Header Cells
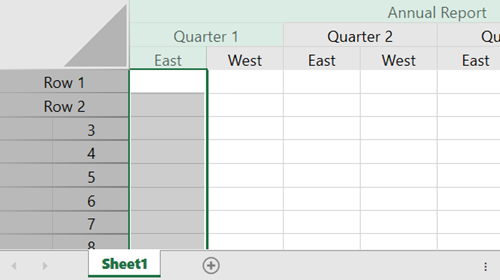
You can merge row and column header cells to span multiple rows or columns and add labels to the header cells using the Text property of the IRange interface. To merge headers with its default selection behavior, use the Merge method of the IRange interface.
By default, clicking on a header cell selects the entire column. However, you can customize the selection behavior for a merged header cell with the MergedCellSelectionPolicy enumeration.
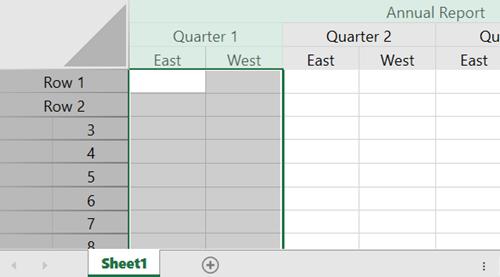
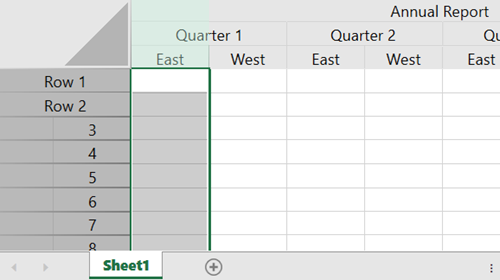
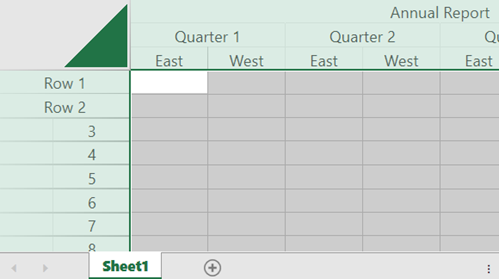
The following images illustrate the properties of the MergedCellSelectionPolicy enumeration and the selection range when the user clicks the cell in the second row and first column of the column header ("Quarter 1" cell).
Default | Contained | Ignore | Intersected |
|---|---|---|---|
Select only the column (row) from which the join originates. This is the default value. |
Select a cell that fits within the header area. |
Selects only the column (row) that is clicked. |
Select all the cells in the header area. |
Refer to the following example code that demonstrates cell spanning in a row header with two columns and a column header with three rows.
C#
spreadSheet1.Workbook.ActiveSheet.RowCount = 20;
spreadSheet1.Workbook.ActiveSheet.ColumnCount = 8;
spreadSheet1.MergedCellSelectionPolicy = MergedCellSelectionPolicy.Default;
// Merge the ColumnHeader cells.
// Set the number of rows in the column headers.
spreadSheet1.Workbook.ActiveSheet.ColumnHeader.RowCount = 3;
// Set the number of columns in the row headers.
spreadSheet1.Workbook.ActiveSheet.RowHeader.ColumnCount = 2;
// Define labels for the merged column header cells.
spreadSheet1.Workbook.ActiveSheet.ColumnHeader.Cells["A3"].Text = "East";
spreadSheet1.Workbook.ActiveSheet.ColumnHeader.Cells["B3"].Text = "West";
spreadSheet1.Workbook.ActiveSheet.ColumnHeader.Cells["C3"].Text = "East";
spreadSheet1.Workbook.ActiveSheet.ColumnHeader.Cells["D3"].Text = "West";
spreadSheet1.Workbook.ActiveSheet.ColumnHeader.Cells["E3"].Text = "East";
spreadSheet1.Workbook.ActiveSheet.ColumnHeader.Cells["F3"].Text = "West";
spreadSheet1.Workbook.ActiveSheet.ColumnHeader.Cells["G3"].Text = "East";
spreadSheet1.Workbook.ActiveSheet.ColumnHeader.Cells["H3"].Text = "West";
spreadSheet1.Workbook.ActiveSheet.ColumnHeader.Cells["A2"].Text = "Quarter 1";
spreadSheet1.Workbook.ActiveSheet.ColumnHeader.Cells["C2"].Text = "Quarter 2";
spreadSheet1.Workbook.ActiveSheet.ColumnHeader.Cells["E2"].Text = "Quarter 3";
spreadSheet1.Workbook.ActiveSheet.ColumnHeader.Cells["G2"].Text = "Quarter 4";
spreadSheet1.Workbook.ActiveSheet.ColumnHeader.Cells["A1"].Text = "Annual Report";
// Define the merge for the column header cells.
spreadSheet1.Workbook.ActiveSheet.ColumnHeader.Cells["A1:H1"].Merge();
spreadSheet1.Workbook.ActiveSheet.ColumnHeader.Cells["A2:B2"].Merge();
spreadSheet1.Workbook.ActiveSheet.ColumnHeader.Cells["C2:D2"].Merge();
spreadSheet1.Workbook.ActiveSheet.ColumnHeader.Cells["E2:F2"].Merge();
spreadSheet1.Workbook.ActiveSheet.ColumnHeader.Cells["G2:H2"].Merge();
// Merge the RowHeader cells.
spreadSheet1.Workbook.ActiveSheet.RowHeader.Cells["A1"].Text = "Row 1";
spreadSheet1.Workbook.ActiveSheet.RowHeader.Cells["A2"].Text = "Row 2";
spreadSheet1.Workbook.ActiveSheet.RowHeader.Cells["A1:B1"].Merge();
spreadSheet1.Workbook.ActiveSheet.RowHeader.Cells["A2:B2"].Merge();
VB
spreadSheet1.Workbook.ActiveSheet.RowCount = 20
spreadSheet1.Workbook.ActiveSheet.ColumnCount = 8
spreadSheet1.MergedCellSelectionPolicy = MergedCellSelectionPolicy.[Default]
' Merge the ColumnHeader cells.
' Set the number of rows in the column headers.
spreadSheet1.Workbook.ActiveSheet.ColumnHeader.RowCount = 3
' Set the number of columns in the row headers.
spreadSheet1.Workbook.ActiveSheet.RowHeader.ColumnCount = 2
' Define labels for the merged column header cells.
spreadSheet1.Workbook.ActiveSheet.ColumnHeader.Cells("A3").Text = "East"
spreadSheet1.Workbook.ActiveSheet.ColumnHeader.Cells("B3").Text = "West"
spreadSheet1.Workbook.ActiveSheet.ColumnHeader.Cells("C3").Text = "East"
spreadSheet1.Workbook.ActiveSheet.ColumnHeader.Cells("D3").Text = "West"
spreadSheet1.Workbook.ActiveSheet.ColumnHeader.Cells("E3").Text = "East"
spreadSheet1.Workbook.ActiveSheet.ColumnHeader.Cells("F3").Text = "West"
spreadSheet1.Workbook.ActiveSheet.ColumnHeader.Cells("G3").Text = "East"
spreadSheet1.Workbook.ActiveSheet.ColumnHeader.Cells("H3").Text = "West"
spreadSheet1.Workbook.ActiveSheet.ColumnHeader.Cells("A2").Text = "Quarter 1"
spreadSheet1.Workbook.ActiveSheet.ColumnHeader.Cells("C2").Text = "Quarter 2"
spreadSheet1.Workbook.ActiveSheet.ColumnHeader.Cells("E2").Text = "Quarter 3"
spreadSheet1.Workbook.ActiveSheet.ColumnHeader.Cells("G2").Text = "Quarter 4"
spreadSheet1.Workbook.ActiveSheet.ColumnHeader.Cells("A1").Text = "Annual Report"
' Define the merge for the column header cells.
spreadSheet1.Workbook.ActiveSheet.ColumnHeader.Cells("A1:H1").Merge()
spreadSheet1.Workbook.ActiveSheet.ColumnHeader.Cells("A2:B2").Merge()
spreadSheet1.Workbook.ActiveSheet.ColumnHeader.Cells("C2:D2").Merge()
spreadSheet1.Workbook.ActiveSheet.ColumnHeader.Cells("E2:F2").Merge()
spreadSheet1.Workbook.ActiveSheet.ColumnHeader.Cells("G2:H2").Merge()
' Merge the RowHeader cells.
spreadSheet1.Workbook.ActiveSheet.RowHeader.Cells("A1").Text = "Row 1"
spreadSheet1.Workbook.ActiveSheet.RowHeader.Cells("A2").Text = "Row 2"
spreadSheet1.Workbook.ActiveSheet.RowHeader.Cells("A1:B1").Merge()
spreadSheet1.Workbook.ActiveSheet.RowHeader.Cells("A2:B2").Merge()
Hide Headers
By default, both column and row headers are visible in a worksheet. However, you can hide either or both by disabling the Visible property of the IColumnHeader and IRowHeader interfaces.
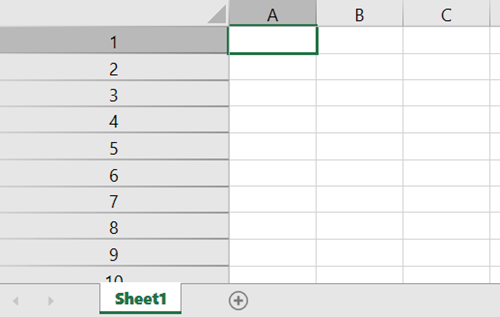
The following image shows a worksheet where both column and row headers are not visible.
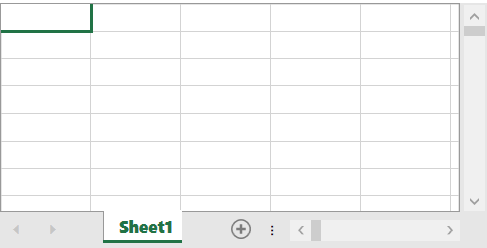
The following example code hides column and row headers as shown in the above image.
C#
// Hide the column header.
spreadSheet1.Workbook.ActiveSheet.ColumnHeader.Visible = false;
// Hide the row header.
spreadSheet1.Workbook.ActiveSheet.RowHeader.Visible = false;
VB
' Hide the column header.
spreadSheet1.Workbook.ActiveSheet.ColumnHeader.Visible = False
' Hide the row header.
spreadSheet1.Workbook.ActiveSheet.RowHeader.Visible = False