- SpreadJS Overview
- Getting Started
- JavaScript Frameworks
- Best Practices
-
Features
- Workbook
- Worksheet
- Rows and Columns
- Headers
- Cells
- Data Binding
- Data Manager
- TableSheet
- GanttSheet
- ReportSheet
- Data Charts
- JSON Schema with SpreadJS
- SpreadJS File Format
- Data Validation
- Conditional Formatting
- Sort
- Group
- Formulas
- What-If Analysis
- Serialization
- Keyboard Actions
- Shapes
- Floating Objects
- Barcodes
- Charts
- Sparklines
- Tables
- Pivot Table
- Slicer
- Theme
- User Management
- Culture
- AI Assistant
- SpreadJS Designer
- SpreadJS Designer VSCode Plugin
- Tutorials
- SpreadJS Designer Component
- SpreadJS Collaboration Server
- Touch Support
- Formula Reference
- Import and Export Reference
- Events
- API Documentation
- Release Notes
Protect Worksheet and Lock Cells
SpreadJS allows you to protect a worksheet that locks all cells and prevents other users from changing, moving, or deleting the data. However, you can still copy the data from locked cells.
The isProtected option can be set to true to protect a worksheet and the locked method can be used to lock or unlock the cells.
Unlock Cells in a Protected Worksheet
You can allow the user to edit specific cells in a protected worksheet by setting the locked method as False.
sheet.getCell(1,1, GC.Spread.Sheets.SheetArea.viewport).locked(false);
sheet.setValue(1,1,"unLocked");
sheet.getRange(-1,3, -1, 1).locked(false);
sheet.getRange(5, -1, 1, -1).locked(false);
sheet.options.isProtected = true;
Lock a Range of Cells in a Protected Worksheet
You can choose to lock a specific range of cells in a protected worksheet by following the steps below:
Unlock all the cells by creating a custom style and setting the locked method as False.
Separately lock the cell range you want to be read-only.
// Configure Workbook and Worksheet
var spread = new GC.Spread.Sheets.Workbook("ss");
var sheet = spread.getActiveSheet();
// Unlock all the cells in the worksheet via the styles
let style = new GC.Spread.Sheets.Style();
style.locked = false;
// Set style as default style for all the cells in the sheet
sheet.setDefaultStyle(style);
// Separately lock the cell range you want to be read-only
new GC.Spread.Sheets.CellRange(sheet, 0, 0, 13, 4).locked(true);
// Set sheet to be protected
sheet.options.isProtected = true;
The options.protectionOptions property can be used to specify the areas which can be changed. These areas can include resizing, dragging, inserting, or deleting rows or columns, and so on.
When the isProtected option is set to True, the following properties will take effect:
Property | Description |
|---|---|
| Allows you to perform the drag operation while inserting rows. |
| Allows you to perform the drag operation while inserting columns. |
| Allows you to insert rows. |
| Allows you to insert columns. |
| Allows you to delete rows. |
| Allows you to delete columns. |
| Allows you to select locked cells. |
| Allows you to select unlocked cells. |
| Allows you to sort ranges. |
| Allows you to filter ranges. |
| Allows you to edit floating objects. |
| Allows you to resize rows. |
| Allows you to resize columns. |
| Allows you to expand or collapse the row groups. |
| Allows you to expand or collapse the column groups. |
| Allows you to make modifications to PivotTables. |
When the isProtected option is set to false, the above protection options will not take any effect.
Enable Protection Options in a Locked Worksheet
You can protect the worksheet and enable various protection options that are available in SpreadJS.
var spread = new GC.Spread.Sheets.Workbook(document.getElementById("ss"));
var sheet = spread.getActiveSheet();
sheet.options.isProtected = true;
sheet.options.protectionOptions.allowDeleteRows = true;
sheet.options.protectionOptions.allowDeleteColumns = true;
sheet.options.protectionOptions.allowInsertRows = true;
sheet.options.protectionOptions.allowInsertColumns = true;
sheet.options.protectionOptions.allowDragInsertRows = true;
sheet.options.protectionOptions.allowDragInsertColumns = true;
sheet.options.protectionOptions.allowOutlineColumns = true;
Note: The protection options: allowInsertRows, allowInsertColumns, allowDeleteRows, and allowDeleteColumns are available only when you are performing an operation on the user interface. In other words, the value will only restrict the insertion and deletion of rows and columns commands in the context menu.
Set Alert Message for Protected Groups
By default, you cannot expand or collapse the outline row or column groups in a protected worksheet. An invalidOperation event is triggered which you can also bind to display an alert message as shown below:
// Set alert message
spread.bind(GC.Spread.Sheets.Events.InvalidOperation, (e, args) => {
    if(args.invalidType === GC.Spread.Sheets.InvalidOperationType.groupProtected){
    args.message="Expand or Collapse operation is not allowed for a protected worksheet.";
    alert(args.message)
    }
});
Protect Sheet with Password
You can choose to set the password while protecting the worksheet using the protect method. However, on invoking the protect method, the isProtected option will be set to true automatically.
//Protect the worksheet
var password = 'AddedPassword';
activeSheet.protect(password);
You can further unprotect the worksheet by providing the password as a parameter to the unprotect method.
//unprotect the worksheet with a password
if(activeSheet.hasPassword()) {
    activeSheet.unprotect(password);
} else {
    activeSheet.unprotect();
}
Hide Formula in a Protected Worksheet
You can control the visibility of formula cells in a protected sheet by using either the hidden property of the Style class or the hidden method of the CellRange class. By default, the hidden attribute is set to false, indicating that the formulas are not hidden. Additionally, it supports export and import of SSJSON, SJS, and XLSX.
The hidden attribute is useful in the cases like generating KPI data or year-end bonus based on employee self-assessment and supervisor evaluation, wherein the employer wants to hide the relevant formulas and protect the evaluation system.
The following code sample shows how to a hide cell using the hidden property in GC.Spread.Sheets.Style type.
// Sets whether the cell formula is visible when the sheet is protected.
activeSheet.options.isProtected = true;

// Create a style with hidden property true
var style = new GC.Spread.Sheets.Style();
style.hidden = true;
activeSheet.setStyle(1, 1, style, GC.Spread.Sheets.SheetArea.viewport);

// Apply style to a cell containing formula
activeSheet.setFormula(1, 1, "=SUM(1,2)");
Alternatively, this code sample uses the hidden method in GC.Spread.Sheets.CellRange type.
// Sets whether the cell formula is visible when the sheet is protected.
activeSheet.options.isProtected = true;
activeSheet.setFormula(1, 3, "=SUM(10,20)");
activeSheet.getRange(1, 3, GC.Spread.Sheets.SheetArea.viewport).hidden(true);
The following SpreadJS functionalities are affected by hidden attributes:
The Formula bar and Formula Editor panel do not display any formula when the hidden property is set on cells.
The default data in the Input Editor is empty when the hidden cell is in the edit mode.
Hidden cells do not copy formulas, only results, but cuts always contain formulas.
However, you can prevent this by setting the locked property to true.
The showFormulas property does not display the formulas of hidden cells.
FORMULATEXT() method cannot get the cells’ formula if the hidden property has taken effect.
Note that the hidden and locked properties mutually influence each other’s functionality as explained in the given table:
Case | locked | hidden | Result |
|---|---|---|---|
Sheet is not protected | True/False | True/False | Both locked and hidden do not take effect. |
Sheet is protected | False | False | The cell can be edited, and the formula is displayed normally. |
True | False | The cell is locked and cannot be edited, but the formula is displayed normally. | |
False | True | The cell can be edited, but the formula is hidden. In the edit mode, the input box shows a null as the default value. | |
True | True | The cell is locked and cannot be edited, and the formula is hidden. |
Limitations
TableSheet, GanttSheet, and ReportSheet do not support hidden attributes.
Hidden attributes do not affect the formulas accessed through the APIs.
Enable PivotTable Use in a Protected Worksheet
SpreadJS enables limited PivotTable interactions in protected worksheets through the allowUsePivotTable property.
When set to
true, users can make modifications to PivotTables.When set to
false, most editing actions are restricted, though some basic operations remain available.
Notes:
Protection of PivotTables applies to UI-level actions only. API-based modifications (made programmatically through code) remain unrestricted.
The
allowUsePivotTableoption takes effect only when worksheet protection is enabled (isProtected = true).If you need to make protected PivotTable changes through the UI, temporarily disable protection, perform the updates, and then reapply protection.
Tip:
The
allowUsePivotTableproperty itself can be changed at runtime, letting developers adjust interactivity without fully reinitializing the sheet.
The following section provides a code example and a detailed table listing which PivotTable features are enabled under protection.
var spread = new GC.Spread.Sheets.Workbook(document.getElementById("ss"));
var sheet = spread.getActiveSheet();
sheet.options.isProtected = true;
sheet.options.protectionOptions.allowUsePivotTable = true;
Editable Features in Protected Mode
The following PivotTable actions remain available when the worksheet is protected (isProtected = true and allowUsePivotTable = true).
Feature | Description |
|---|---|
Change PivotTable Name | Rename the PivotTable instance. |
Change Subtotal Type | Modify subtotal calculation mode. |
Show No Data | Control display behavior for empty cells. |
Field Subtotal Position | Adjust the location of subtotals for individual fields. |
Set Field Area and Index | Rearrange field positioning within PivotTable zones. |
Collapse & Expand | Expand or collapse grouped items. |
Clear Filter | Remove applied filters. |
Filter | Apply value or label filters. |
Sort | Change field sorting options. |
Drag & Drop Fields | Move fields within allowed PivotTable areas. |
Unavailable Features (Automatically Disabled)
These operations require unprotected mode to modify PivotTable data or structure.
Layout and Display Configuration
All PivotTable Options
Layout & Style Configurations
Repeating Field Labelscv
Format Field
Show Data As
PivotTable Subtotal Position
Theme
Grand Totals
Calculation and Field Operations
Calculate Fields
Calculate Items
Conditional Formatting
Data and Structural Operations
Update or Change Data Source
Clear All
Group
Delete PivotTable
Slicer and Timeline (filter controls)
Using Designer
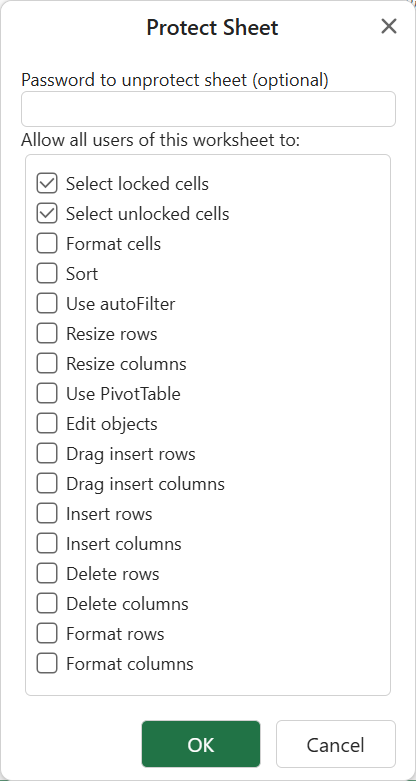
To access the Protect Sheet dialog, navigate to the Protect Sheet option by right-clicking on the sheet name displayed on the Tab strip.
Steps to protect and unprotect the worksheet using Protect Sheet Dialog
Enter the password to protect the worksheet and check/ uncheck multiple options from the available list of options in the Protect Sheet dialog box.
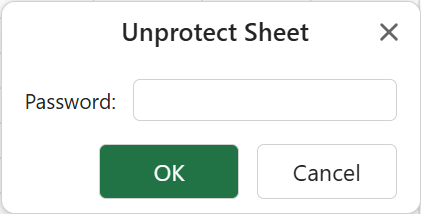
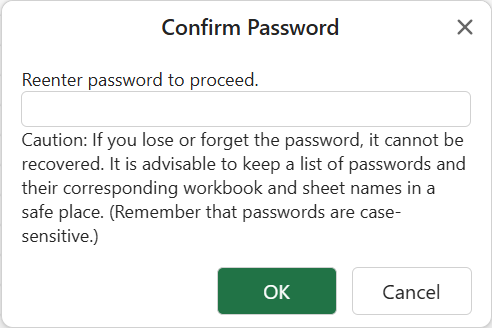
When you enter the password to protect the worksheet, another dialog confirms the password.
Once a password is successfully set, you can access the protected worksheet, but cannot make any changes to the sheet. To unprotect the worksheet, enter the set password using the Unprotect Sheet dialog.