
- Getting Started with WPF Edition
- End-User License Agreement
- Free and Open Source Software (FOSS) License
- Licensing Information
- Technical Support
- Redistributable Files
- About this Documentation
- Theming
- XAML and XAML Namespaces
- Creating a Microsoft Blend Project
- Creating a WPF Project in Visual Studio
- Adding NuGet Packages to your App
- Adding the WPF Edition Components
- Localization
- UI Automation and Accessibility
- VS Suggested Actions
- Section 508 Compliance
Using Visual Studio Templates
Complete the following steps to create a WPF project in Visual Studio using Visual Studio templates:
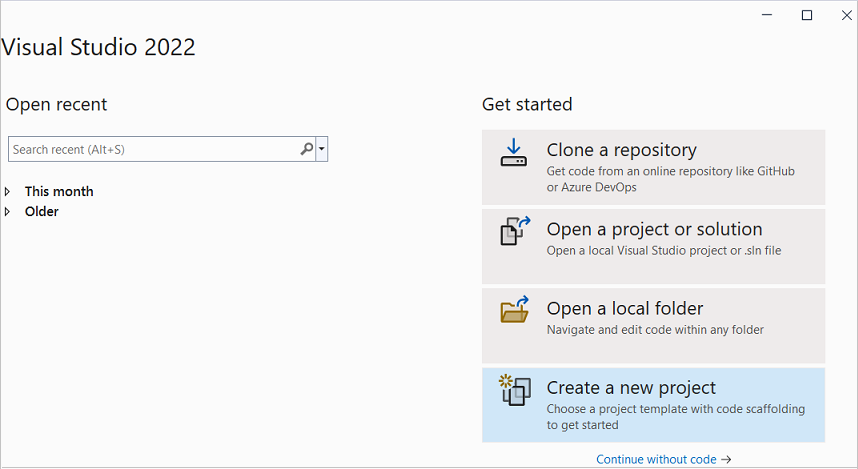
Open Visual Studio 2022.
Select the Create a new project option from the Get started pane.
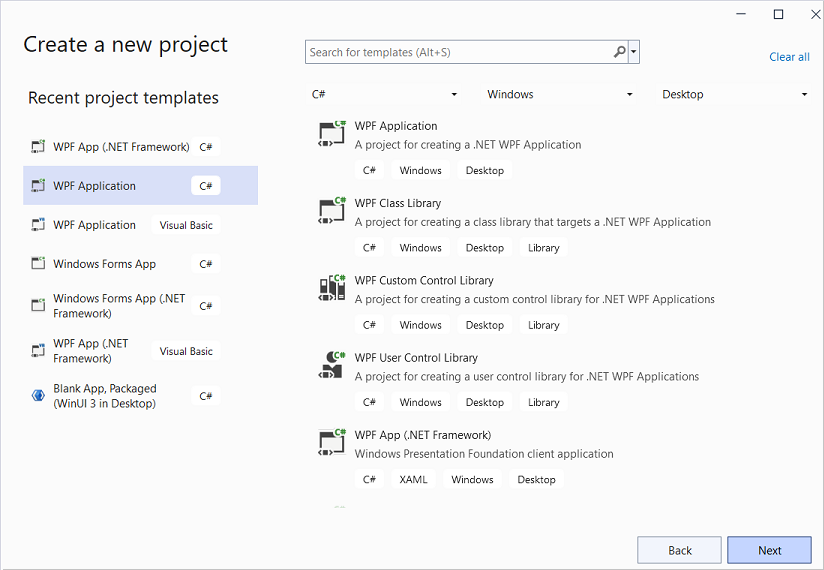
Select the programming language from the languages drop-down list, as per your requirements, such as C# or Visual Basic.
Select Windows from the platforms drop-down list to view the associated templates.
Select WPF Application template from the list of installed templates and click Next to create .NET application in WPF. On the other hand, you can create .NET Framework application in WPF by selecting the WPF App (.NET Framework) template from the list of installed templates.
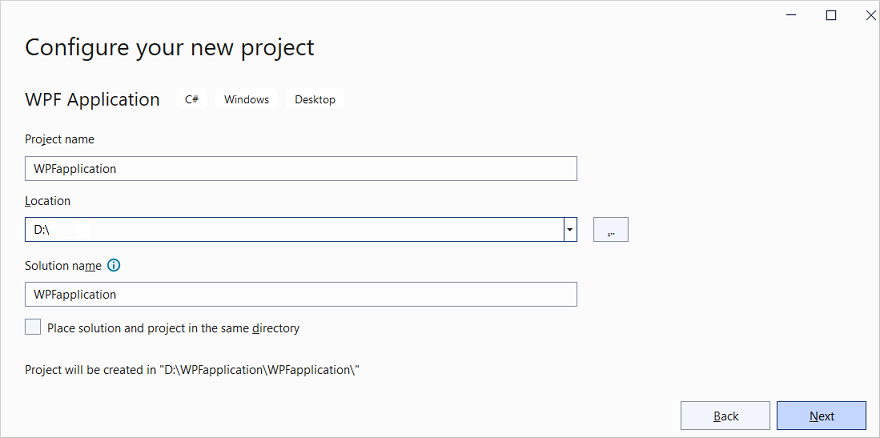
Type the name of project in the Project name text box.
Set the location of project in the Location drop-down list using the Browse button and click Next.
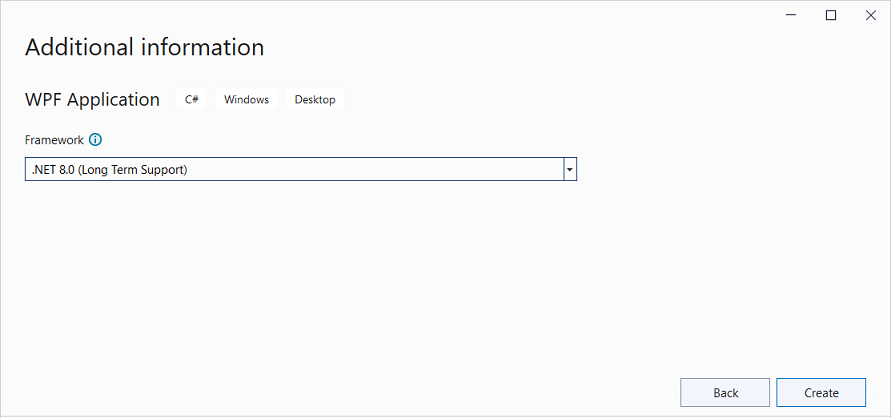
Select the framework for the WPF application as .NET 8.0 (Long Term Support) in the Framework drop-down list and click Create to get started with a new WPF project.
type=note
Note: You can create WPF application in Microsoft Expression Blend and Visual Studio. However, Microsoft Expression Blend only provides the design-time environment to visually design XAML documents.