Assign Categories to an Appointment
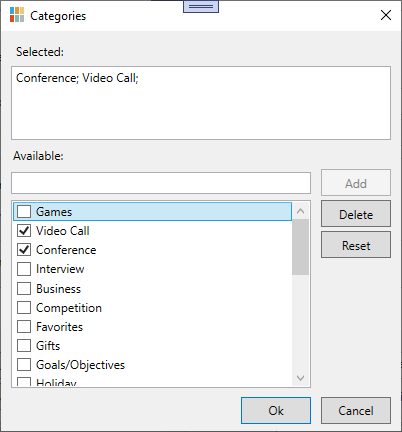
At run time, assigning a category or multiple categories to an appointment can be done through the Categories dialog box. By default, there is a list of twenty predefined categories. For more information on how to add categories to the Categories dialog box, see Add Categories to the Categories List.
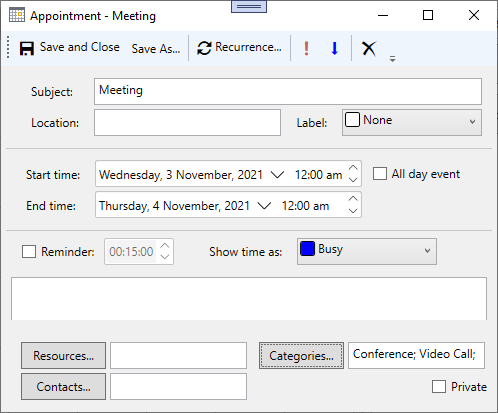
The categories appears next in the Categories text box as shown in the following image.

To assign a category to an appointment at run time:
- Click the Categories button in the Appointment dialog box.
- Select the check box next to the desired category and click Ok. The categories appears next to the Categories text box. Note that you can assign multiple categories to an appointment.

To assign a category to an appointment programmatically, use the following code:
//Create Appointments
Appointment app = new Appointment(DateTime.Now.Date, DateTime.Now.Date.AddDays(1));
app.Subject = "Meeting";
sched1.DataStorage.AppointmentStorage.Appointments.Add(app);
//Add new Categories to the CategoryList
sched1.DataStorage.CategoryStorage.Categories.Add(new Category() { MenuCaption = "Conference" });
sched1.DataStorage.CategoryStorage.Categories.Add(new Category() { MenuCaption = "Video Call" });
sched1.DataStorage.CategoryStorage.Categories.Add(new Category() { MenuCaption = "Interview" });
sched1.DataStorage.CategoryStorage.Categories.Add(new Category() { MenuCaption = "Games" });
var appointment = sched1.DataStorage.AppointmentStorage.Appointments.First(x => x.Start == DateTime.Now.Date);
var categoryList = sched1.DataStorage.CategoryStorage.Categories;
appointment.Categories.Add(categoryList.First(x => x.MenuCaption == "Conference"));
appointment.Categories.Add(categoryList.First(x => x.MenuCaption == "Video Call"));


