Quick Start
This quick start guide outlines the steps for integrating Rules Manager with the FlexGrid control and applying conditional formatting to the grid data.
Users can achieve the desired output either through the design view or code view.
Prerequisites
NuGet Packages
C1.WPF.Grid
C1.WPF.Grid.ConditionalFormatting
C1.WPF.RulesManager
Create a New Project
Open Visual Studio and create a new WPF application
Open the NuGet Package Manager
Tools > NuGet Package Manager > Manage NuGet Packages for Solution
Search C1.WPF.Grid, C1.WPF.RulesManager and C1.WPF.ConditionalFormatting and install the packages
Add FlexGrid and Rules Manager
Search Flexgrid, C1Expander and C1RulesManager from the Toolbox
Drag and drop the FlexGrid, C1Expander and C1RulesManager onto the form
Bind data using FlexGrid QuickStart
Integrate in Designer
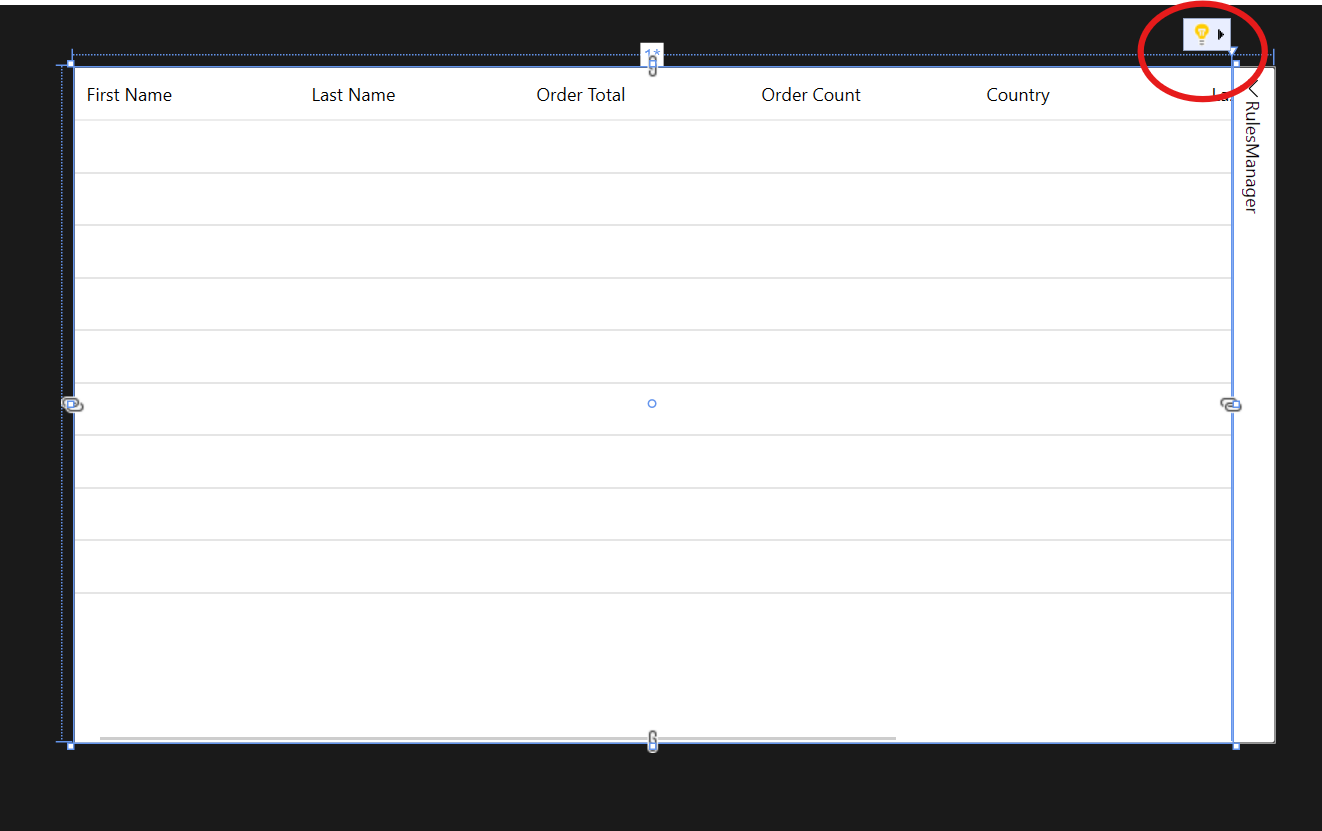
Click the smart tag of FlexGrid and click Add Behavior
Select Conditional Formatting Behavior from the drop-down menu and click Add Behavior
Upon adding the Conditional Formatting Behavior, the code will look like the following
<i:Interaction.Behaviors>
    <c1:ConditionalFormattingBehavior/>
</i:Interaction.Behaviors>
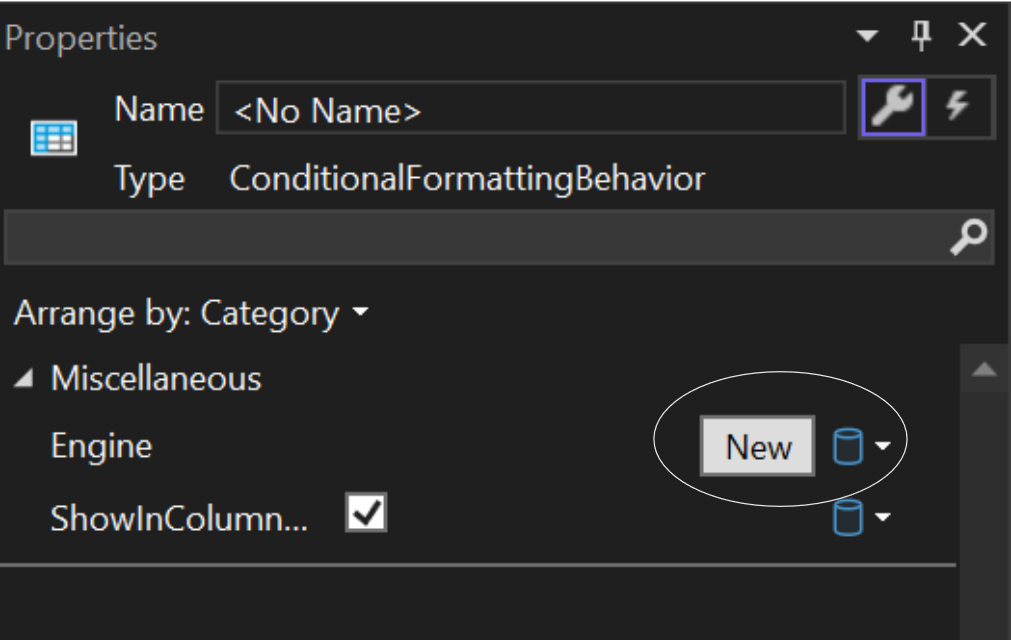
Right click on the form and select properties from the context menu
Click on the
<c1:ConditionalFormattingBehavior/>code to view rules engine from the properties windowClick on the New button to add C1RulesEngine
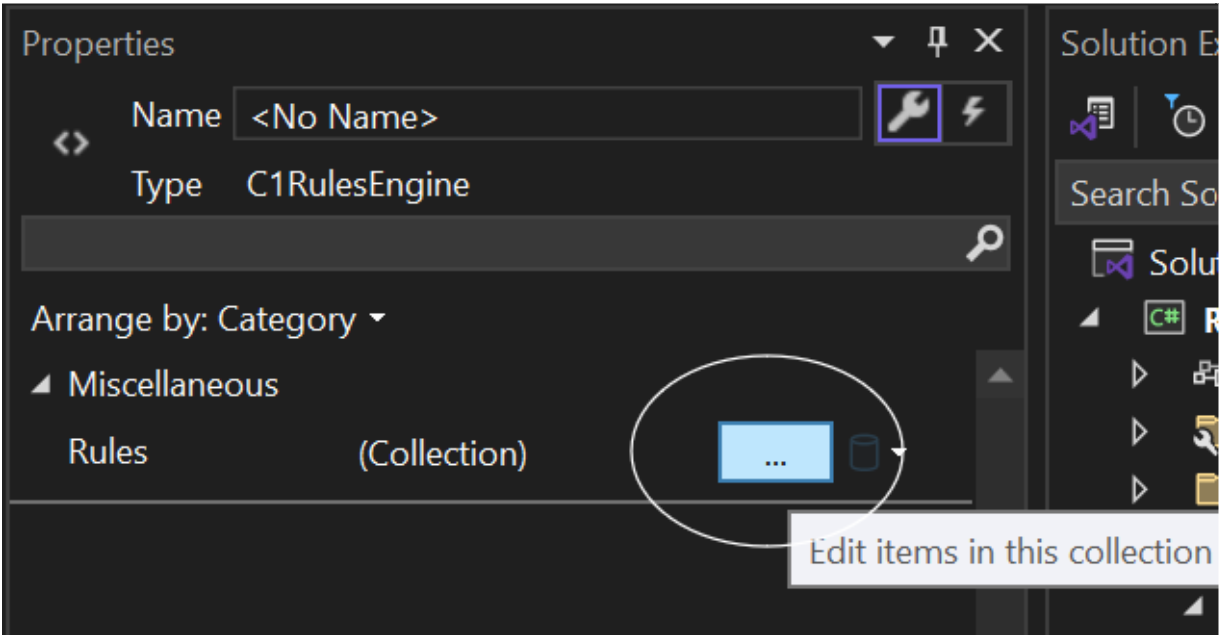
Click on the ellipsis in the properties window of C1RulesEngine to open the Rules Collection Editor
Select any rule from the Rules Collection Editor window and click Add
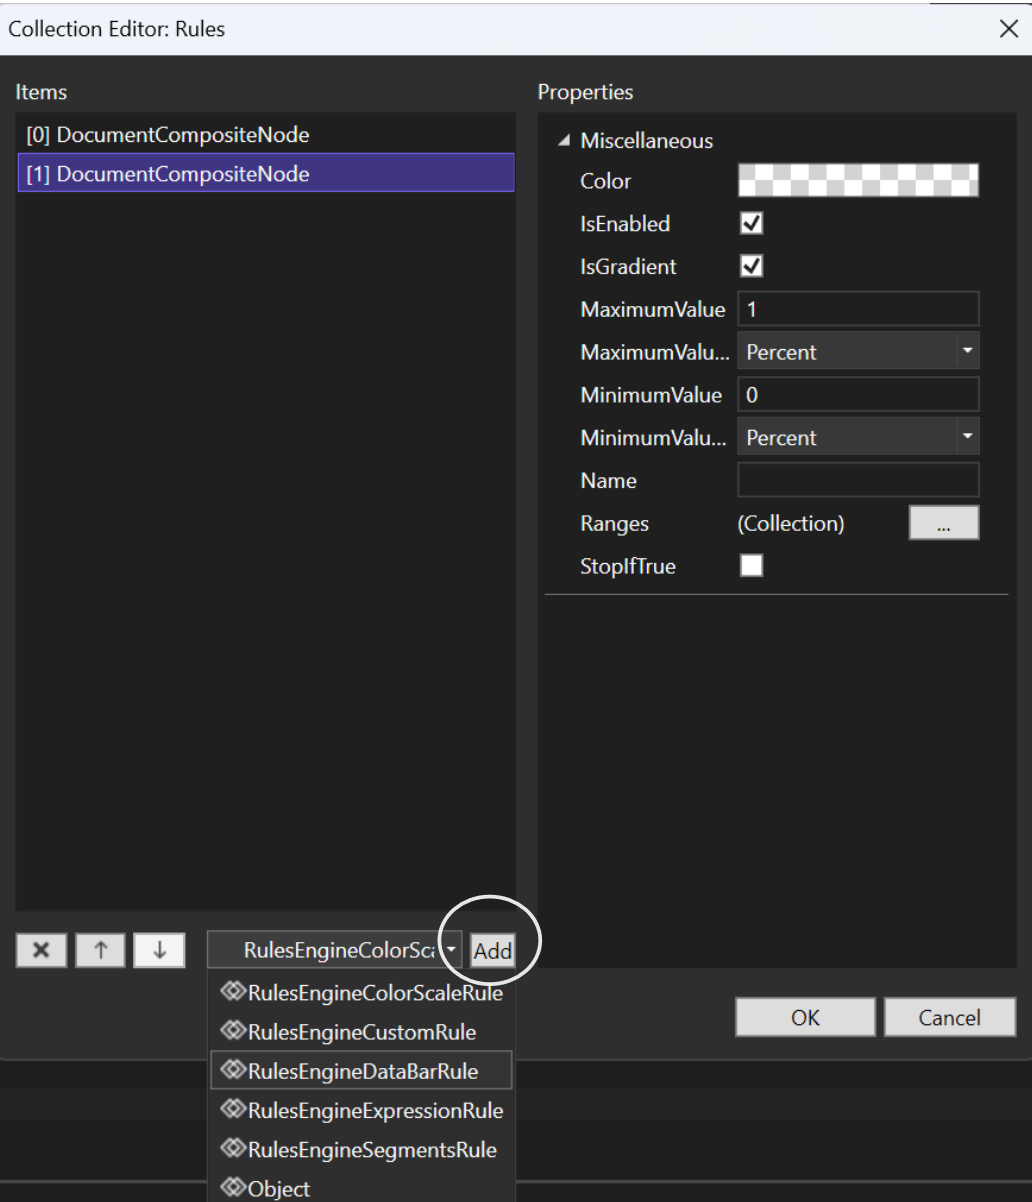
Edit the rules in the properties window of the Rules Collection Editor
Click OK to add the rules. In the example below, color scale rule and data bar rule has been added through the Rules Collection Editor, hence it gets reflected on the code
Integrate through Code
Define the Interaction.Behaviors tag using the following code. This applies conditional formatting to FlexGrid upon binding it with Rules Manager
<i:Interaction.Behaviors>
     <c1:ConditionalFormattingBehavior Engine="{Binding ElementName=rulesManager, Path=Engine}"/>
 </i:Interaction.Behaviors>
Add C1Expander to wrap the Rules Manager and make it collapsible using the following code
<c1:C1Expander Header="RulesManager" ExpandDirection="Left" ExpandIconAlignment="Left" HorizontalContentAlignment="Right" BorderThickness="0" Grid.Column="1">
    <c1:C1RulesManager x:Name="rulesManager" Width="400" RulesVisibility="All">
        <c1:C1RulesManager.Engine>
        </c1:C1RulesManager.Engine>
    </c1:C1RulesManager>
</c1:C1Expander>
Define the C1RulesEngine inside C1RulesManager
<c1:C1Expander Header="RulesManager" ExpandDirection="Left" ExpandIconAlignment="Left" HorizontalContentAlignment="Right" BorderThickness="0" Grid.Column="1">
   <c1:C1RulesManager x:Name="rulesManager" Width="400" RulesVisibility="All">
       <c1:C1RulesManager.Engine>
           <c1:C1RulesEngine>
           </c1:C1RulesEngine>
       </c1:C1RulesManager.Engine>
   </c1:C1RulesManager>
</c1:C1Expander>
Define the rules using C1RulesEngine
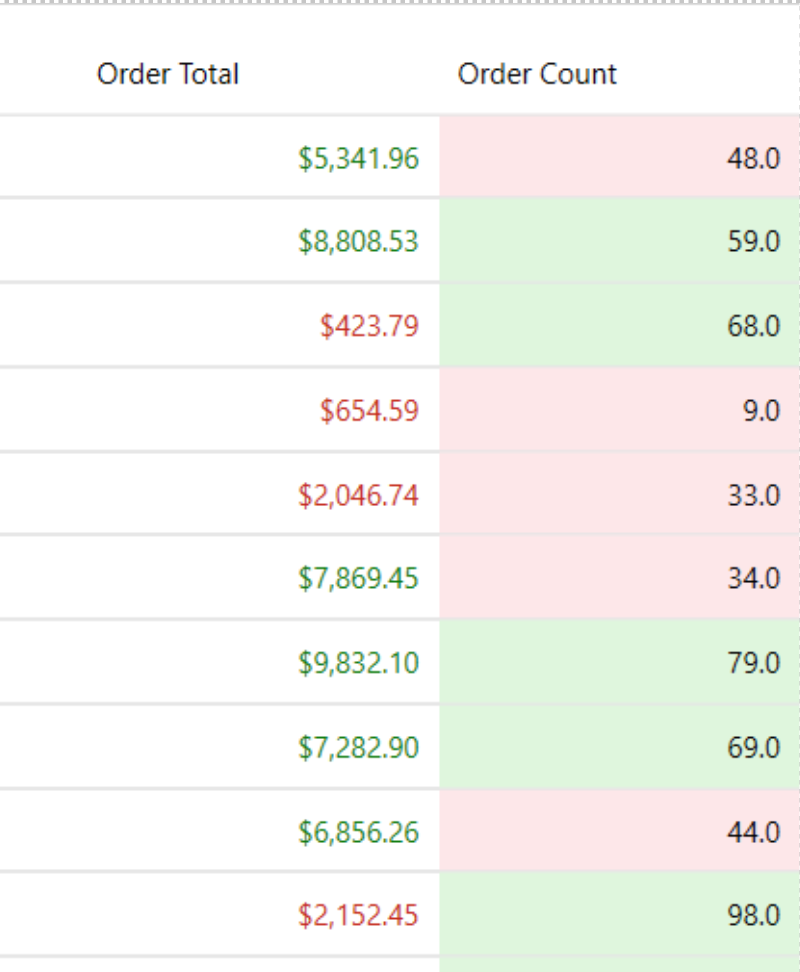
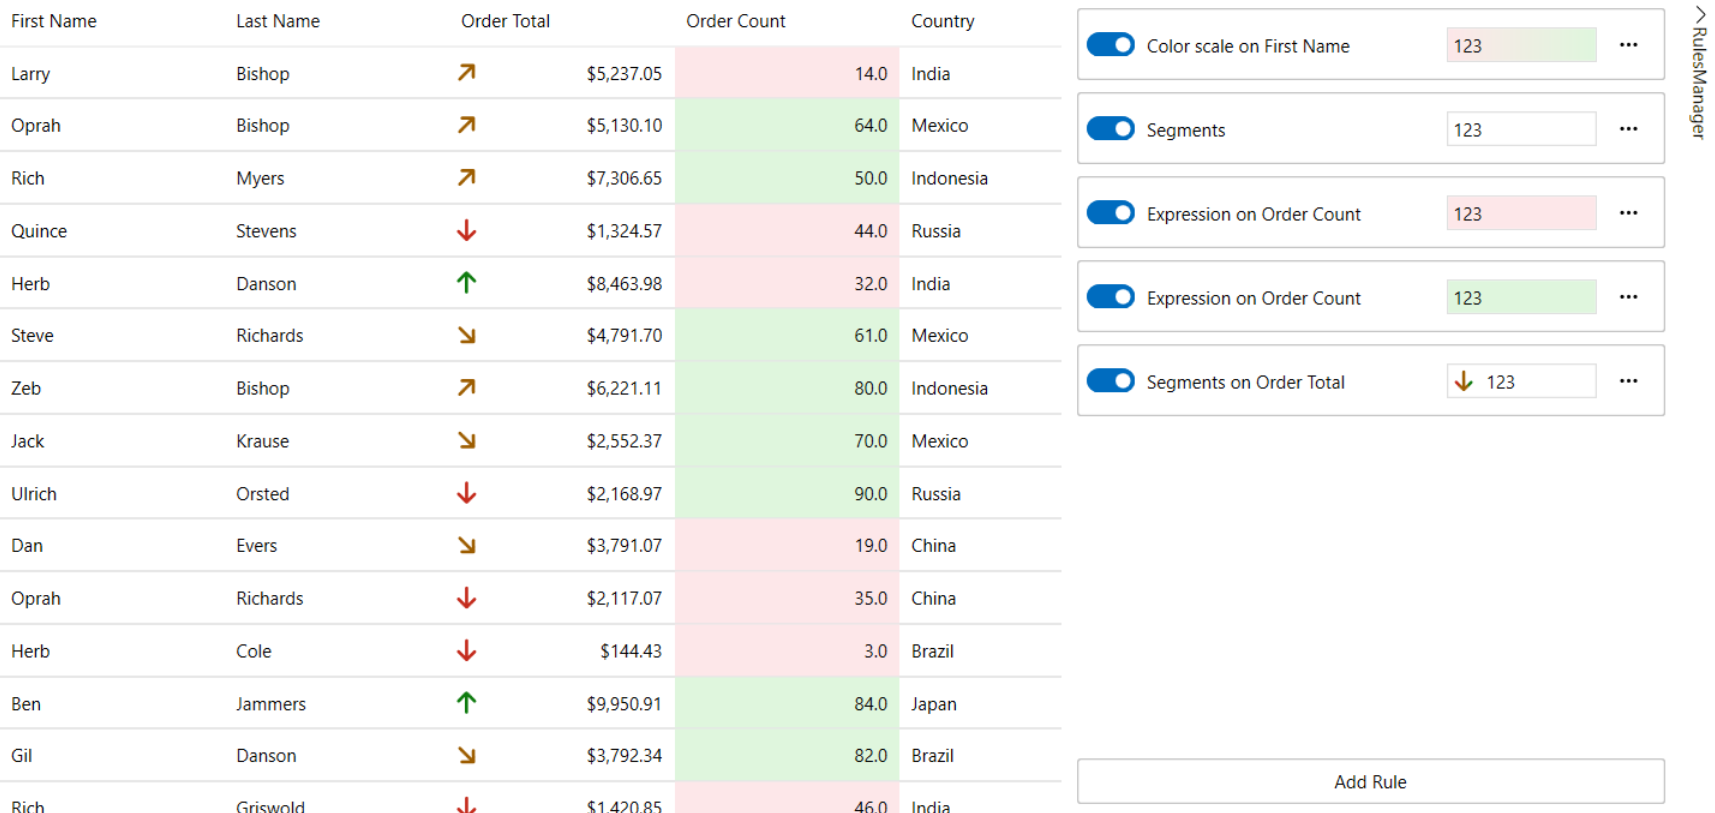
<c1:C1RulesManager.Engine> <c1:C1RulesEngine> <c1:RulesEngineCustomRule Func="GetFirstNameStyle" Ranges="[FirstName]"/> <c1:RulesEngineSegmentsRule/> <c1:RulesEngineExpressionRule Ranges="[OrderCount]" Expression="[OrderCount] < 50"> <c1:RulesEngineStyle Background="#FFFDE7E9"/> </c1:RulesEngineExpressionRule> <c1:RulesEngineExpressionRule Ranges="[OrderCount]" Expression="[OrderCount] >= 50"> <c1:RulesEngineStyle Background="#FFDFF6DD"/> </c1:RulesEngineExpressionRule> <c1:RulesEngineExpressionRule Ranges="[OrderTotal]" Expression="[OrderTotal] < 5000"> <c1:RulesEngineStyle Foreground="#FFC42B1C"/> </c1:RulesEngineExpressionRule> <c1:RulesEngineExpressionRule Ranges="[OrderTotal]" Expression="[OrderTotal] >= 5000"> <c1:RulesEngineStyle Foreground="#FF0F7B0F"/> </c1:RulesEngineExpressionRule> </c1:C1RulesEngine> </c1:C1RulesManager.Engine>
In the example above, the C1Expander containing C1RulesManager applies conditional formatting to the FlexGrid. It uses C1RulesEnginge to style the grid cells based on the conditional formatting that is: rows with OrderCount less than 50 get a light red backcolor while those that are more or equal to 50 get light green color. For OrderTotal values that are less than 5000 gets a dark red forecolor while those that are greater than or equal to 5000 gets dark green color. Additionally, a Custom Rule is defined to style the FirstName column using a user-defined function. This setup helps visually highlight important data patterns for easier analysis.