Setting the Calendar Start and End Date
You can change the dates that appear in the drop-down calendar by setting the C1DatePicker.DisplayDateStart and C1DatePicker.DisplayDateEnd properties. In this topic, you will learn how to change the start and end dates in the designer, in XAML, and in code.
In the Designer
To change the dates that appear in the calendar, complete the following steps:
- Click the C1DatePicker control once to select it.
- In the Properties window, click the DisplayDateStart drop-down arrow and select a day from the list. For this example, select 2/5/2012.
- In the Properties window, click the DisplayDateEnd drop-down arrow and select a day from the list. For this example, select 2/25/2012.
In XAML
To specify the first and last day of the calendar, place DisplayDateStart="02/05/2012" and DisplayDateEnd="02/25/2012" within the <c1:C1DatePicker> tags so that the markup resembles the following:
<c1:C1DatePicker Name="C1DatePicker1" DisplayDateEnd="02/25/2012" DisplayDateStart="02/05/2012">
In Code
To change the dates that appear in the calendar, complete the following steps:
Open the MainWindow.xaml.cs page.
Place the following code beneath the InitializeComponent() method:
Dim dateStringStart As String = "02/05/2012"
Dim dateStringEnd As String = "02/25/2012"
C1DatePicker1.DisplayDateStart = DateTime.Parse(dateStringStart)
C1DatePicker1.DisplayDateEnd = DateTime.Parse(dateStringEnd)
string dateStringStart = "02/05/2012"; string dateStringEnd = "02/25/2012"; C1DatePicker1.DisplayDateStart = DateTime.Parse(dateStringStart); C1DatePicker1.DisplayDateEnd = DateTime.Parse(dateStringEnd);Run the project.
This Topic Illustrates the Following:
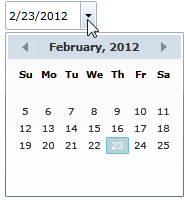
In this topic, you set the DisplayDateStart and DisplayDateEnd properties to determine the dates that appear in the drop-down calendar. The final result will resemble the following image: