
Menus and Sub-Menus
Using Menu, you can create hierarchical menu and nested sub-menus. Let us discuss how to create these menus in the following sections.
Hierarchical Menu
The Menu control allows you to create hierarchical menu so that you can easily display multi-level menu in your applications as shown in the following image.
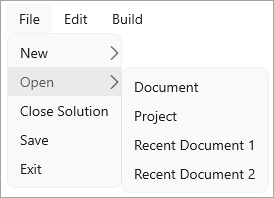
The following code showcases how you can create a hierarchical menu by adding MenuItems inside Menu:
<c1:C1MenuItem Header="File">
    <c1:C1MenuItem Header="New">
        <c1:C1MenuItem Header="Document"/>
        <c1:C1MenuItem Header="Project"/>
    </c1:C1MenuItem>
    <c1:C1MenuItem Header="Open">
        <c1:C1MenuItem Header="Document"/>
        <c1:C1MenuItem Header="Project"/>
        <c1:C1MenuItem Header="Recent Document 1">
        </c1:C1MenuItem>
        <c1:C1MenuItem Header="Recent Document 2">
        </c1:C1MenuItem>
    </c1:C1MenuItem>
    <c1:C1MenuItem Header="Close Solution"/>
    <c1:C1MenuItem Header="Save"/>
    <c1:C1MenuItem Header="Exit"/>
</c1:C1MenuItem>
Nested Submenu
The Menu control can be used to create nested menus. The nested menu consists of menu items with a submenu. These submenus are created by adding the C1MenuItems within the other C1MenuItem as shown in the following image.
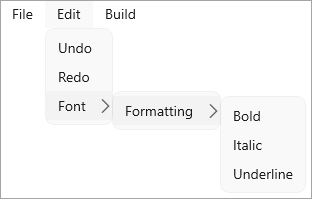
The following code can be used to create the nested submenus:
<c1:C1MenuItem Header="Edit">
    <c1:C1MenuItem Header="Undo"/>
    <c1:C1MenuItem Header="Redo"/>
    <c1:C1MenuItem Header="Font">
        <c1:C1MenuItem Header="Formatting">
            <c1:C1MenuItem Header="Bold"/>
            <c1:C1MenuItem Header="Italic"/>
            <c1:C1MenuItem Header="Underline"/>
        </c1:C1MenuItem>
    </c1:C1MenuItem>
</c1:C1MenuItem>
type=info
Tip: You can have as many nested menus as you want, although it's best not to have more than two or three submenus in a hierarchy for usability purposes.