Creating a Universal Windows Application
In This Topic
To create a Universal Windows application in Visual Studio, follow these steps:
- From the File menu in Microsoft Visual Studio, select New | Project. The New Project dialog box appears.
- Under Installed | Templates in the left pane, select either Visual Basic or Visual C#.
- Under the Visual C# or Visual Basic node, expand the Windows node and select Universal. The list of Universal application templates now appear in the center pane.
- Select the Blank App (Universal Windows) template.
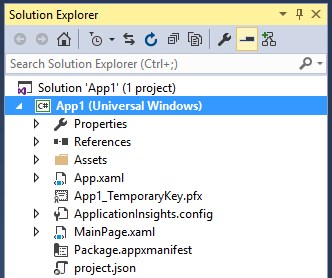
- Enter a Name of the project, set its Location, and click OK. A new Universal Windows application is created at the specified location. The following image shows a list of files created in the new application:

- Open MainPage.xaml from the Solution Explorer.
- Drag and drop the controls on the Design view and write the xaml markup to design your application.
- Add code in the Code view to provide implementation logic to the application.
- Press F5 to run the application.
