- SpreadJS Overview
- Getting Started
- JavaScript Frameworks
- Best Practices
-
Features
- Workbook
- Worksheet
- Rows and Columns
- Headers
- Cells
- Data Binding
- Data Manager
- TableSheet
- GanttSheet
- ReportSheet
- Data Charts
- JSON Schema with SpreadJS
- SpreadJS File Format
- Data Validation
- Conditional Formatting
- Sort
- Group
- Formulas
- What-If Analysis
- Serialization
- Keyboard Actions
- Shapes
- Floating Objects
- Barcodes
- Charts
- Sparklines
- Tables
- Pivot Table
- Slicer
- Theme
- User Management
- Culture
- AI Assistant
- SpreadJS Designer
- SpreadJS Designer VSCode Plugin
- Tutorials
- SpreadJS Designer Component
- SpreadJS Collaboration Server
- Touch Support
- Formula Reference
- Import and Export Reference
- Events
- API Documentation
- Release Notes
Tab Strip
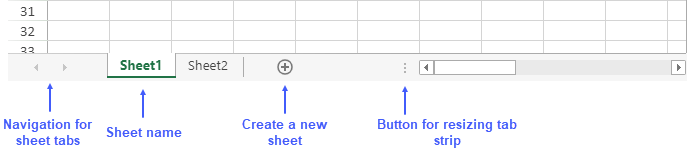
SpreadJS provides plenty of options to control the behavior of the tab strip and its elements. You can perform various operations such as changing the sheet name, setting sheet color, arranging sheets, setting the position and width of tab strip, etc. by using the properties of the Workbook.options field.
Change Sheet Name
You can change the name of a sheet from the tab strip in either of the following ways:
Double-click a sheet tab to start editing the sheet name.
Right-click a sheet tab and select Rename from the context menu.
After the sheet name enters edit mode, enter the new name and press Enter or click outside the tab to apply the change. Press Esc to cancel editing.
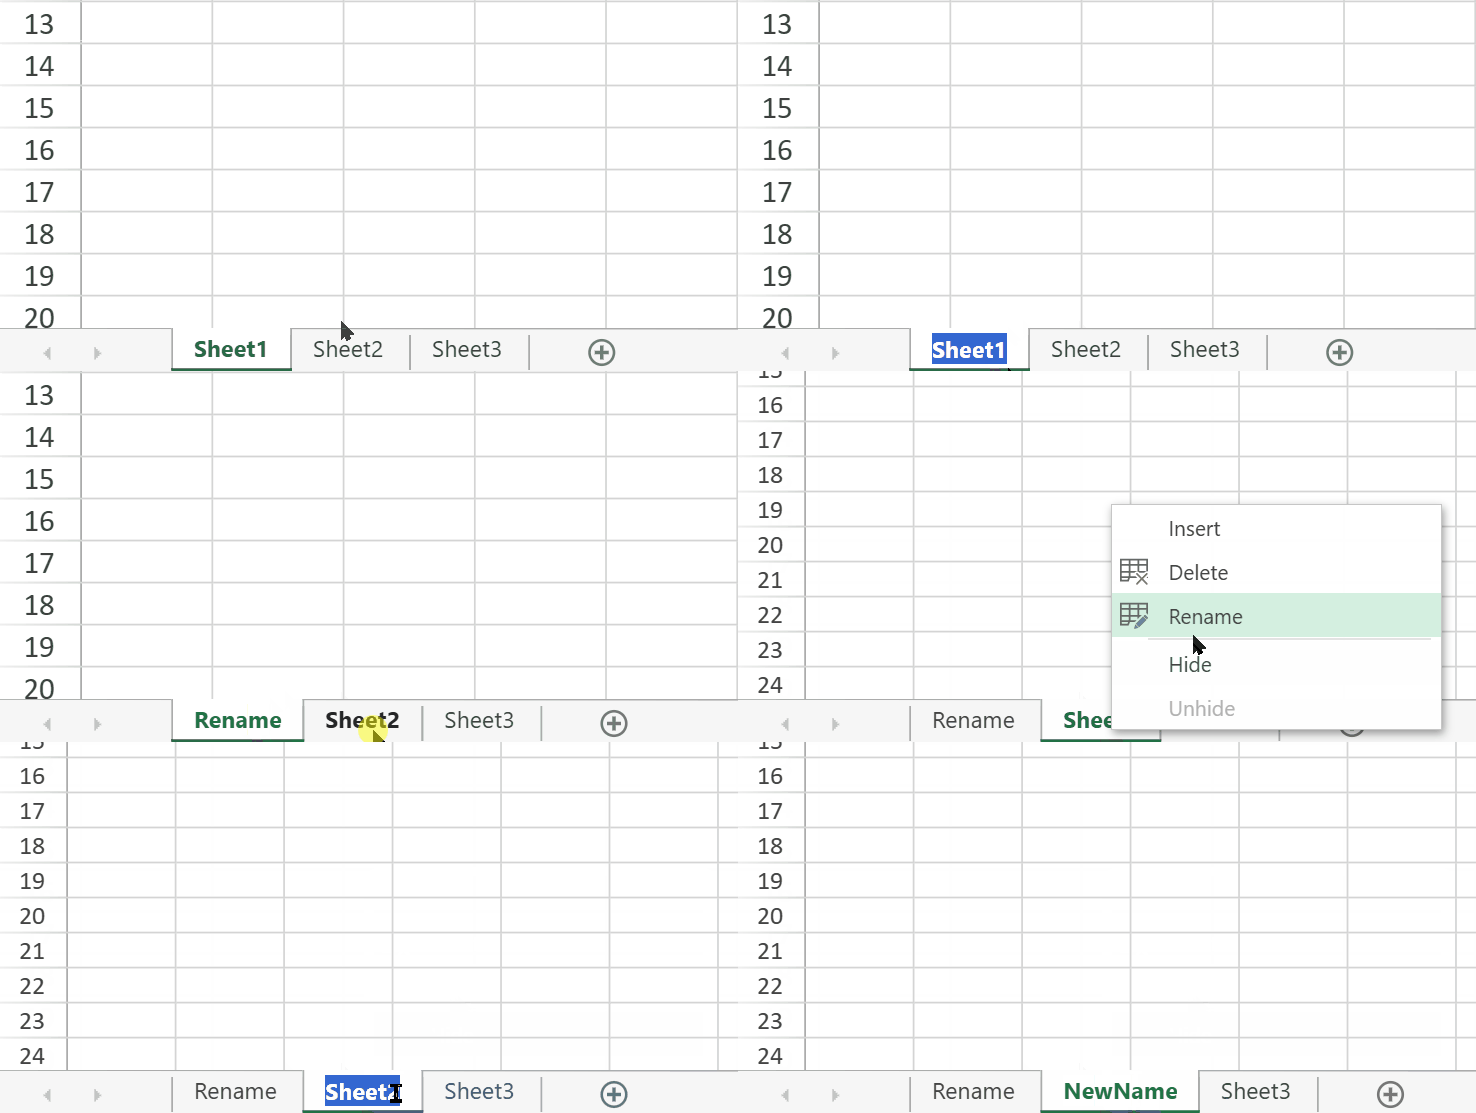
You can enable or disable the ability to edit sheet names using options.tabEditable property. The default value of this property is true.
spread.options.tabEditable = false; // false: disable, true: enableWhen options.tabEditable is set to false, users cannot start sheet name editing by double-clicking the sheet tab or by using the Rename context menu command.
The Rename command is also available from the sheet tab context menu in the SpreadJS Designer Component.
Arrange Sheet Tabs
You can arrange sheet names in the tab strip by selecting the sheet tab and dragging it between any two sheets. An indicator is displayed while dragging the sheet, as shown in the below image. Release the mouse to move the sheet.
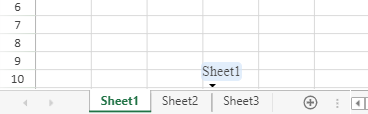
You can enable the ability to re-order the sheet tabs by setting the options.allowSheetReorder property to true.
spread.options.allowSheetReorder = true; // true: enable, false: disableThe SheetMoving and SheetMoved events occur before and after the sheet is dragged and moved respectively. To cancel the movement of the sheet, you can set the cancel parameter of SheetMoving class to true.
Set Sheet Tab Style
You can set the sheet tab styles, such as text style, background color, and icons, based on the states of the sheet tab. To set styles for sheet tabs, you can use the sheetTabStyles or defaultSheetTabStyles property of the Workbook class.
The sheetTabStyles property applies a specific state style for each sheet tab, whereas the defaultSheetTabStyles property sets the default state style of all sheet tabs.
Refer to the following image that sets the background color, fore color, and icon for different states of sheet tabs.
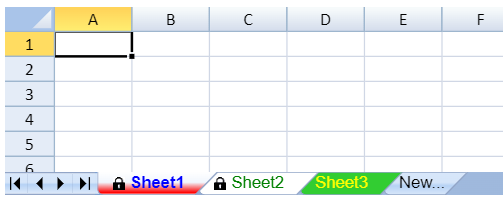
The following code sample implements styles for the sheet tabs in different states.
// Set a new style for the normal state of 'Sheet1'.
spread.sheetTabStyles.add(GC.Spread.Sheets.SheetTabState.normal, {
    icons: [{ src: '../images/img.png', width: 20, height: 20 }],
    foreColor: 'red',
    font: 'bolder',
    backColor: 'green',
}, ['Sheet1']);

// Set a default style for the protected state of all sheet tabs.
spread.options.defaultSheetTabStyles = {
    [GC.Spread.Sheets.SheetTabState.protected]: {
        icons: [{ src: '../images/lock.jpg', width: 20, height: 20 }],
        foreColor: 'blue',
        backColor: 'orange',
    }
};
SpreadJS Designer also provides support for customizing sheet tab styles through the SETTINGS tab.
To manage sheet tab styles:
Click the General button in the Sheet Settings group.
Select the SheetTab tab to define the color and styles for a specific sheet tab state.
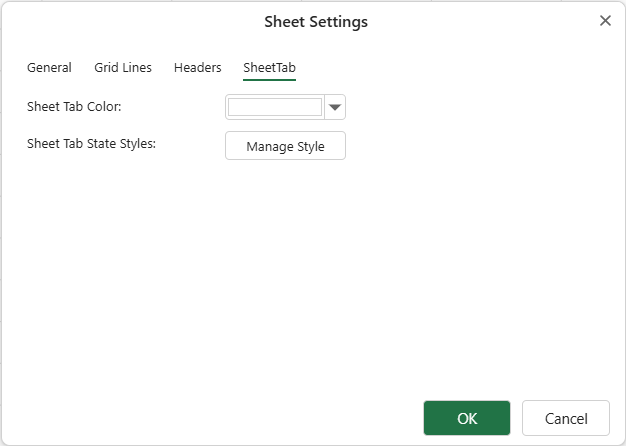
Click the Manage Style button to configure the tab state styles.
Choose the state where you want to make changes from the Tab State Style List and then click the Edit icon for that state.
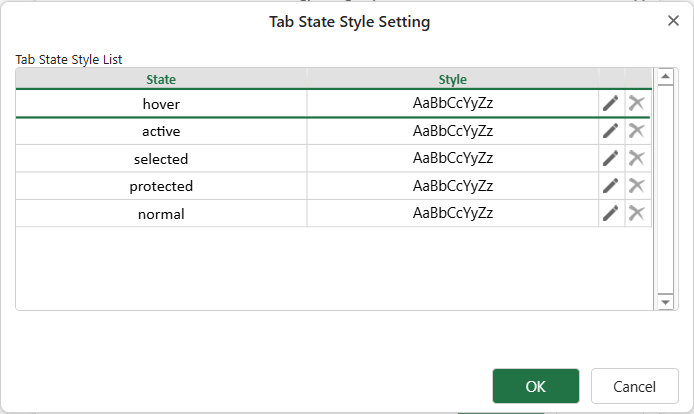
In the Tab Style Setting dialog, apply the desired font styles, background color, and icon for the selected state.
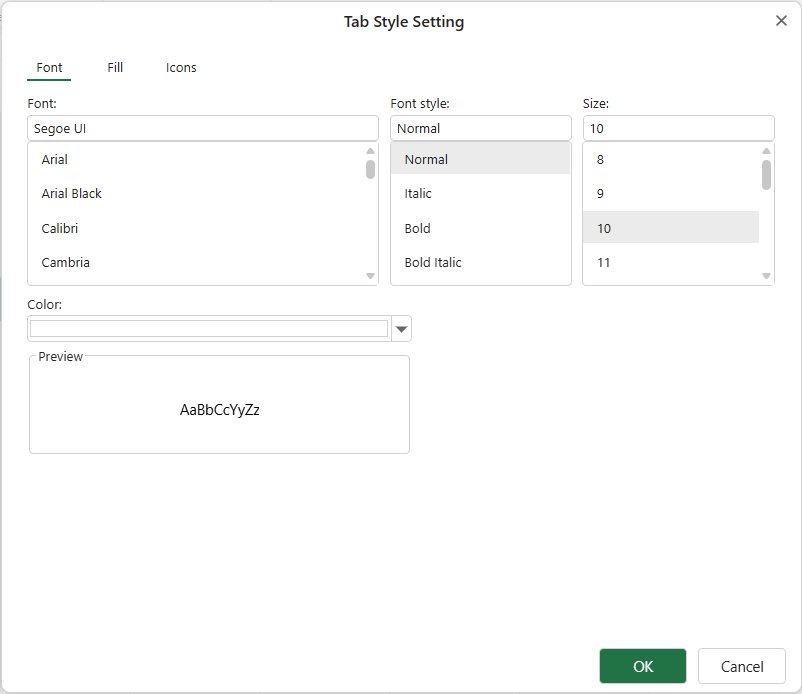
Click OK.
The changes will apply to the sheet tab.
To manage the default sheet tab styles:
Select the TabStrip button in the Spread Settings group.
This opens the Spread Settings dialog.
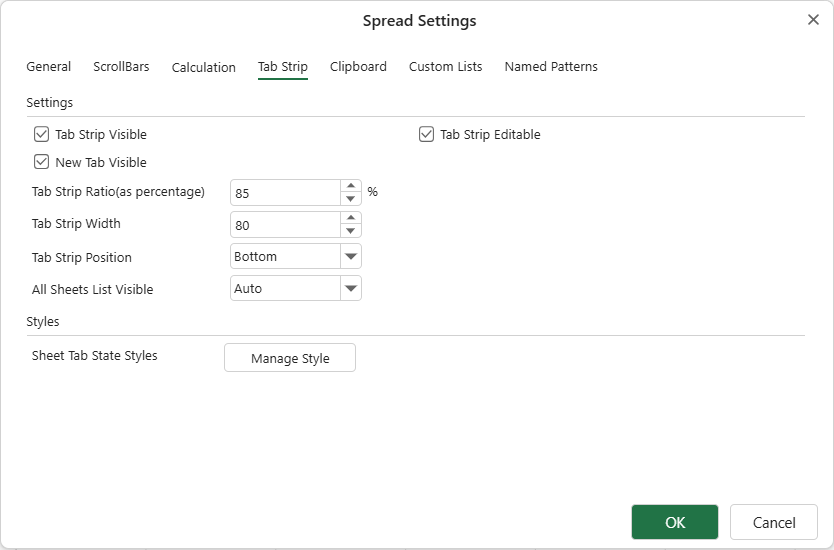
Select the Manage Style option to set sheet tab state styles.
Select the state from the Tab State Style List and click the Edit icon to make the changes.
Click OK.
This time, the changes will apply to all sheet tabs.
Support Border Radius for the Appearance of Sheet Tabs
The border appearance of the SheetTab can be customized through the border-radius style of the built-in supported CSS class.
Different SheetTab Position have corresponding CSS classes that describe their appearance.
.sjs-tab-strip-bottom-tab{
  border-radius: value;
}

.sjs-tab-strip-left-tab{
  border-radius: value;
}

.sjs-tab-strip-right-tab{
  border-radius: value;
}

.sjs-tab-strip-top-tab{
  border-radius: value;
}
The border-radius property under sjs-tab-strip-[position]-tab class only accepts values in pixels. The value must be greater than or equal to 0. If all border-radius values are set to 0, it disables the sheet tab's border radius styling.
It supports defining the radius style for each corner individually: top-left, top-right, bottom-left, and bottom-right
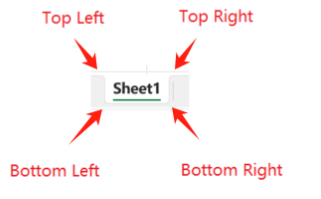
For example:
One value for border-radius indicates that all corners will use this value as the border radius.
.sjs-tab-strip-bottom-tab{
  border-radius: 4px;
}
Two values for border-radius indicate that the first value denotes the top-left and bottom-right border radius, and the second value denotes the top-right and bottom-left.
.sjs-tab-strip-bottom-tab{
  border-radius: 0px 5px;
}
Three values for border-radius indicate that the first value denotes the top-left border radius, the second value denotes the top-right and bottom-left, and the third value denotes the bottom-right.
.sjs-tab-strip-bottom-tab{
  border-radius: 0px 0px 4px;
}
Four values for border-radius indicate the top-left, top-right, bottom-right, and bottom-left border radius.
.sjs-tab-strip-bottom-tab {
    border-radius: 4px 4px 0px 0px;
}
1. The sheet tab border radius style does not support the Excel 2007 theme.
2. Be careful not to make the radius too large for the limitations of the sheet tab width and height.
Display New Tab Button
You can choose to show or hide the New Tab button by using options.newTabVisible property. This button is visible by default.

spread.options.newTabVisible = true; // false: hide, true: showDisplay Navigation Buttons
You can specify whether to show the navigation buttons in the workbook by using options.tabNavigationVisible property.

spread.options.tabNavigationVisible = false; // false: hide, true: showDisplay Tab Strip
You can hide the entire tab strip by using options.tabStripVisible property.

spread.options.tabStripVisible = true; // true: show, false: hide
spread.options.tabStripRatio = 0.5;  // percentage value that specifies the horizontal space allocated to the tab strip
Set Position and Width
You can set the position of the tab strip relative to the workbook using the tabstripPosition workbook option. These positions are supported on touch devices as well as in all SpreadJS themes. The tab strip gets separated from the scrollbar if the position is set to left, right, or top.
Position | Image |
|---|---|
Bottom (default) |
|
Left |
|
Right |
|
Top |
|
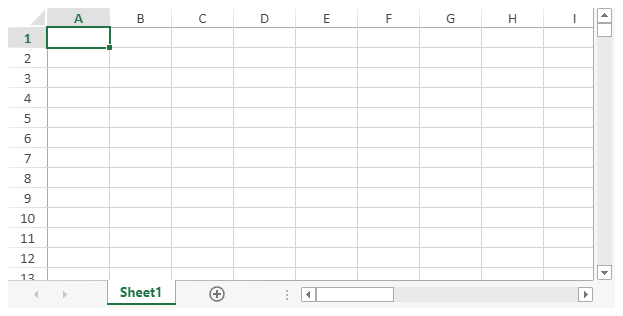
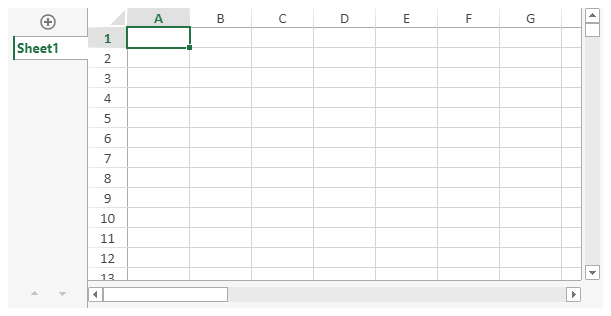
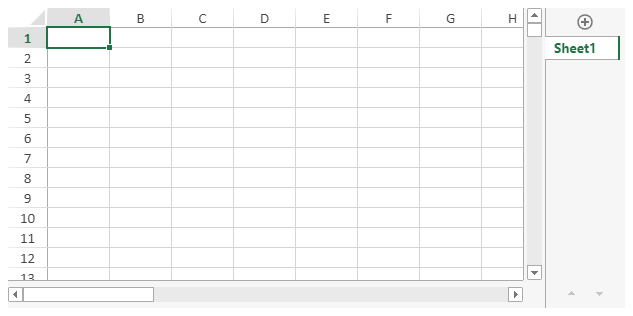
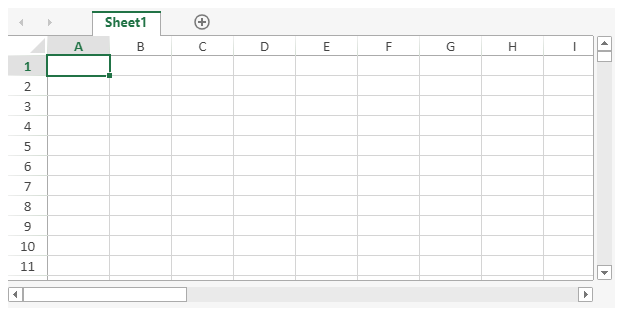
Note: The resize horizontal bar button is visible only when the position of the tab strip is set to the bottom. The tabStripRatio property is also ignored when the top, left or right position is set.
If the sheet position is set to the left or right and the sheet name is too long to be displayed, it is clipped and indicated by an ellipsis. However, you can change the width of the tab strip to show the complete sheet name by using options.tabStripWidth property. The default and minimum value of this property is 80px.
Note: The options.tabStripWidth property is ignored if the tab strip position is not set to the left or right of the workbook.
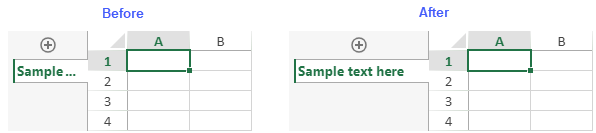
The following example code sets tab strip position and width.
// Change tab strip position when creating workbook
var spread = new GC.Spread.Sheets.Workbook(document.getElementById("ss"), {tabStripPosition: GC.Spread.Sheets.TabStripPosition.top});
// Or change tab strip position by workbook options
spread.options.tabStripPosition = GC.Spread.Sheets.TabStripPosition.top;

// Change tab strip width when creating workbook
var spread = new GC.Spread.Sheets.Workbook(document.getElementById("ss"), {tabStripWidth: 200});
// Or change tab strip width by workbook options
spread.options.tabStripWidth = 200;
The “All Sheets” button
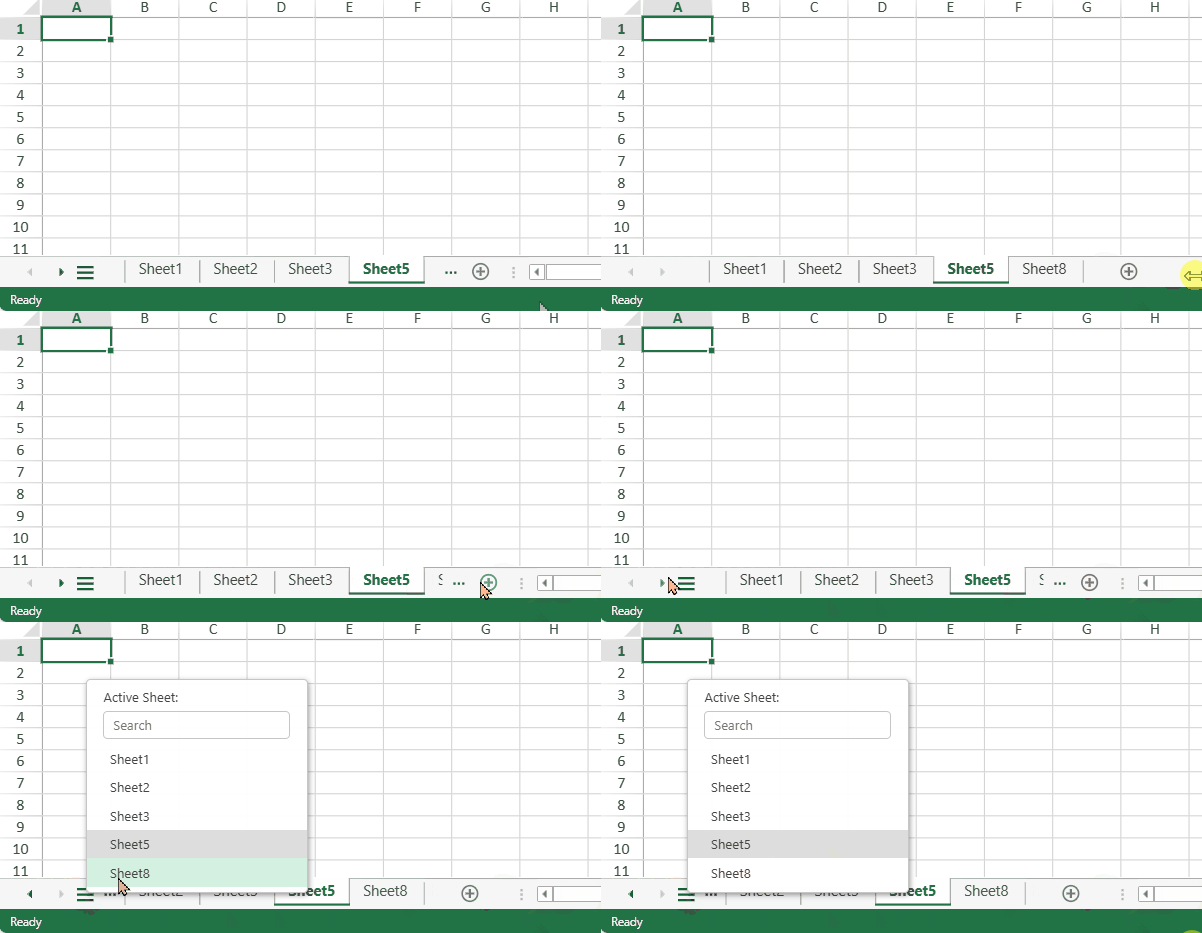
SpreadJS provides an “All Sheets” hamburger button in the tab strip that helps navigate to specific sheet(s) in a workbook more quickly. The button opens a drop-down list consisting of the available sheet(s).
The “All Sheets” button automatically appears when all the sheets cannot be displayed completely in the tab strip. It can also be displayed by resizing the bar to hide sheets.
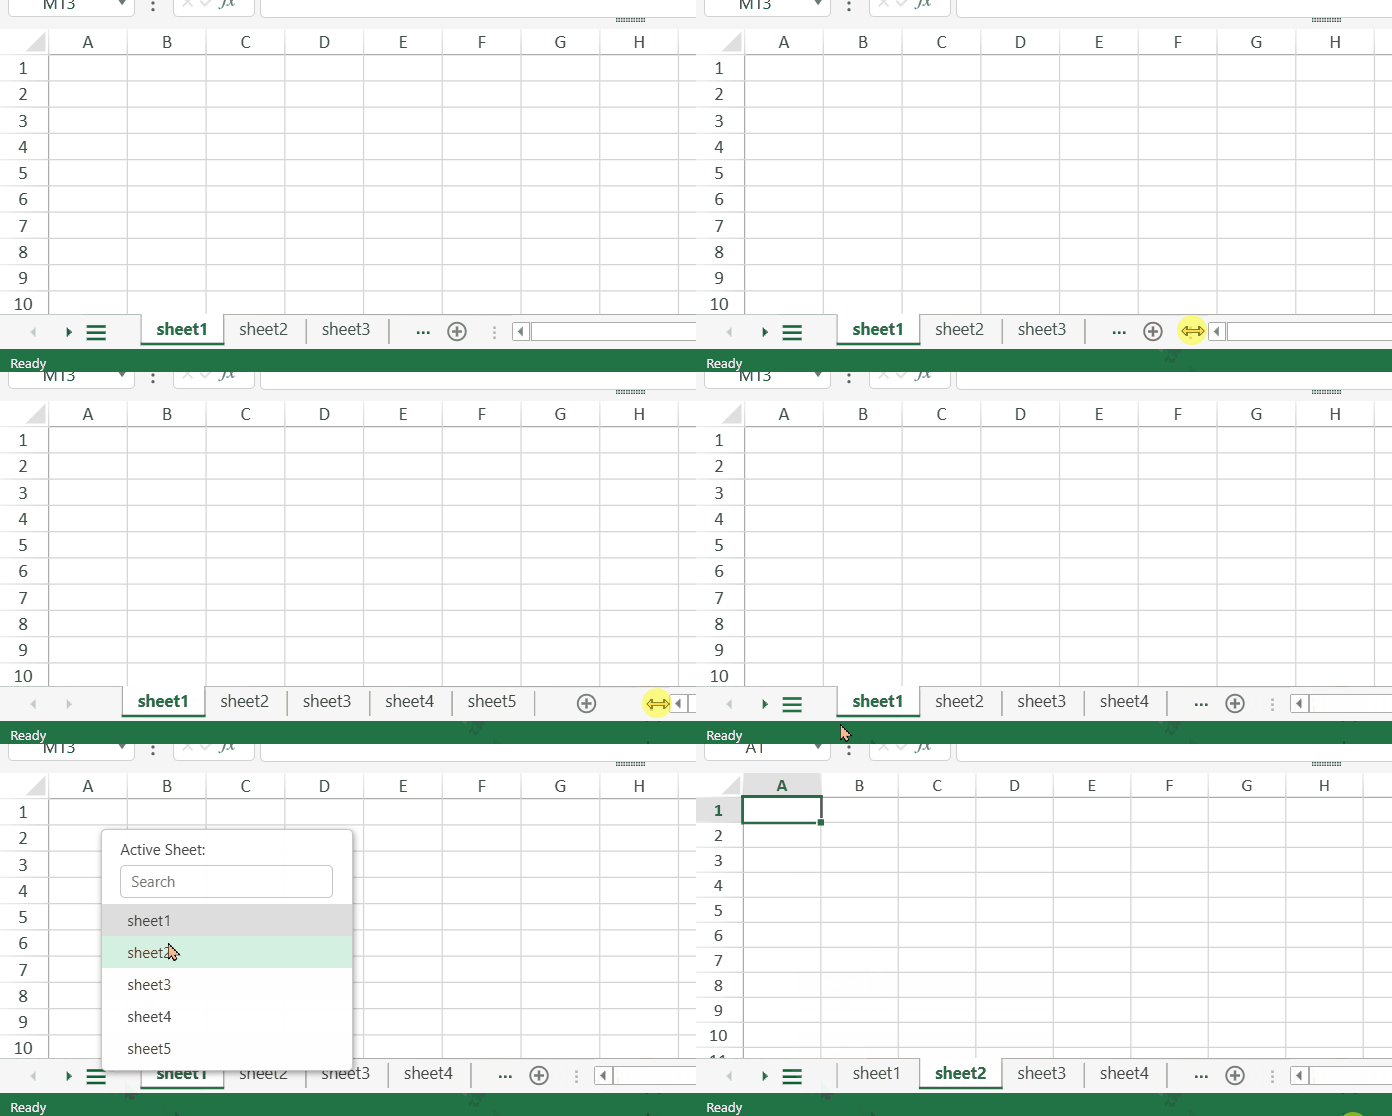
You can choose whether to display the hamburger button by setting the allSheetsListVisible option using the AllSheetsListVisibility
enumeration values such as “hide”, “show”, and “auto” (default).
// Automatically show or hide the "All Sheets" button - Default
function AutoButton(spread) {
    spread.options.allSheetsListVisible = GC.Spread.Sheets.AllSheetsListVisibility.auto;
}

// Always show the "All Sheets" button
function ShowButton(spread) {
    spread.options.allSheetsListVisible = GC.Spread.Sheets.AllSheetsListVisibility.show;
}

// Hide the "All Sheets" button
function HideButton(spread) {
    spread.options.allSheetsListVisible = GC.Spread.Sheets.AllSheetsListVisibility.hide;
}
Note: The position of the “All Sheets” hamburger button is retained irrespective of the set value in the allSheetsListVisible option.
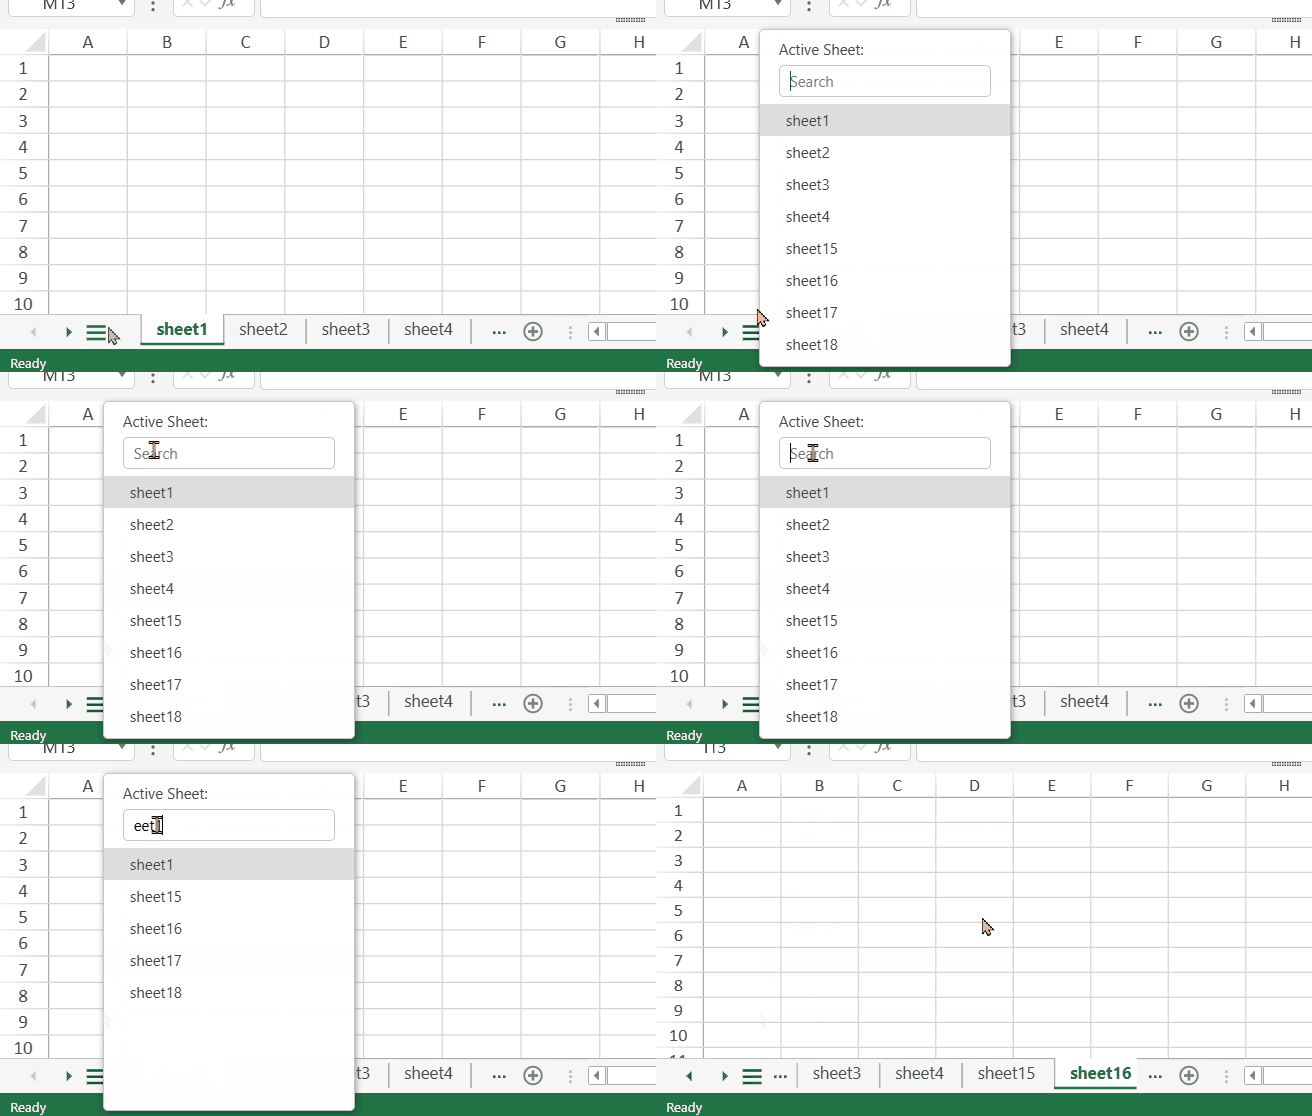
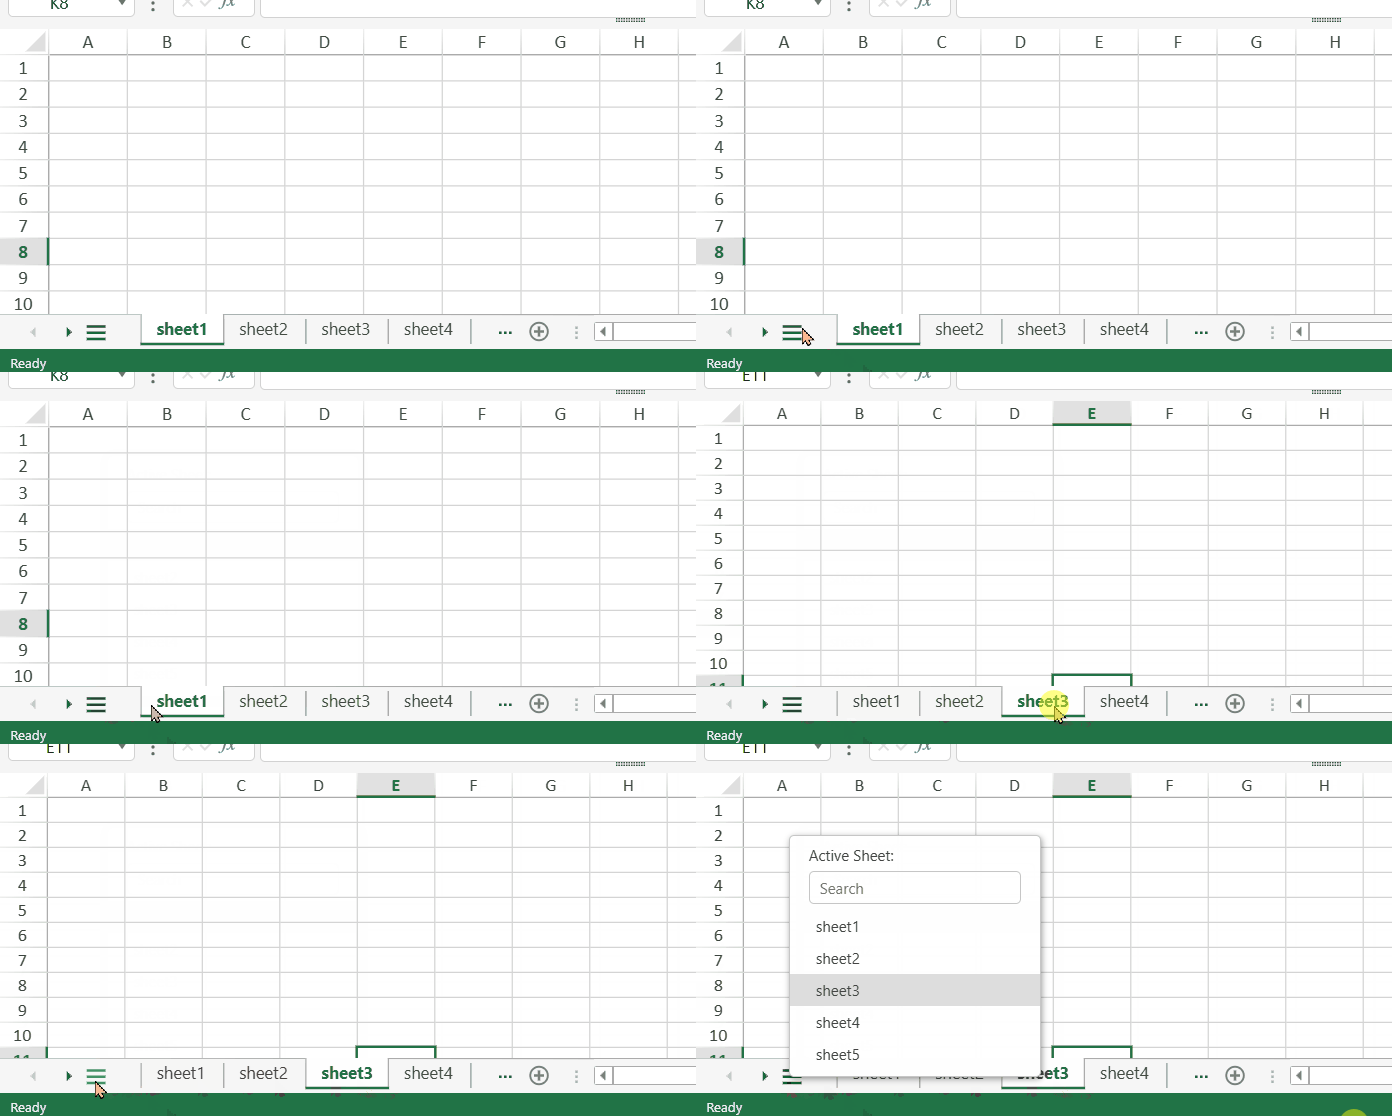
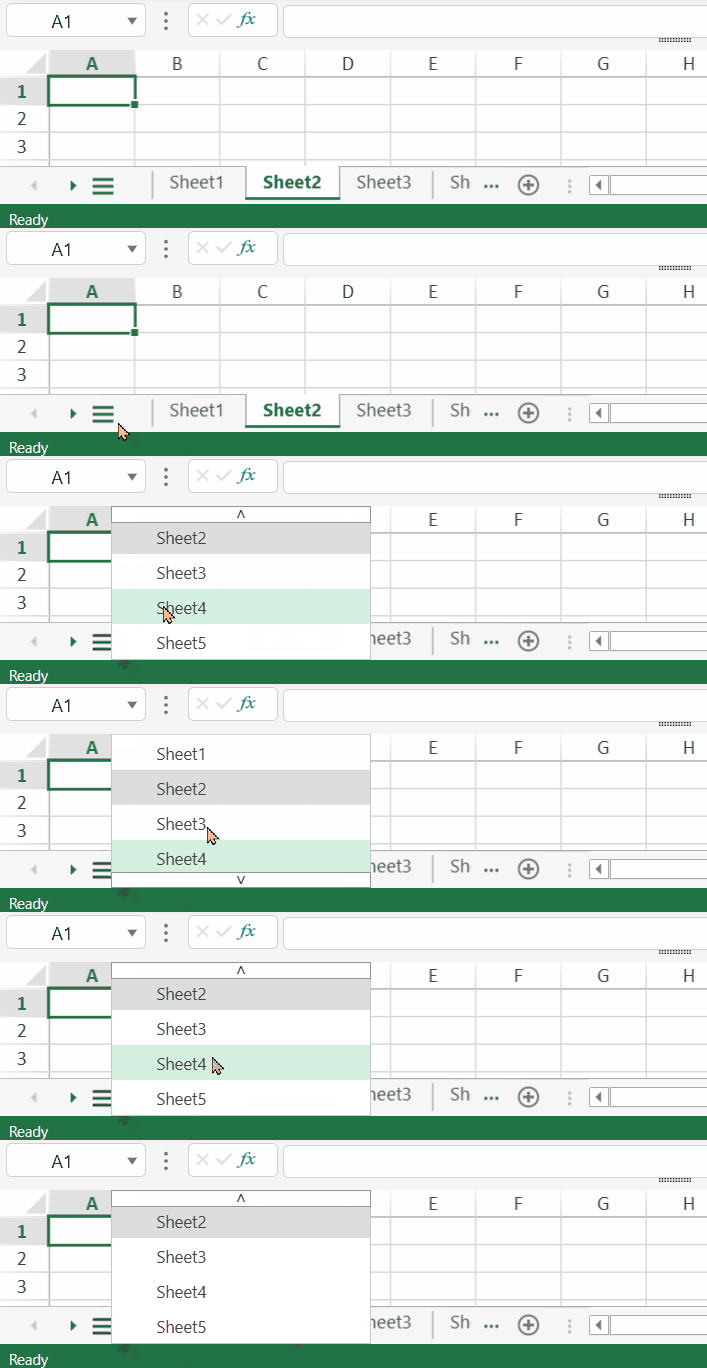
The below table depicts different scenarios associated with the “All Sheets” hamburger button.
Scenario | Example |
|---|---|
The “All Sheets” dialog highlights the active sheet and the hovered sheet. |
|
The “All Sheets” button changes color on the hover. |
|
The “All sheets” dialog highlights all the selected active sheets. |
|
The tab strip will display the selected sheet from the “All Sheets” dialog if it is not in the currently displayed area. |
|
The “All Sheets” dialog does not show hidden sheets. For example, Sheet4, Sheet6, and Sheet7 are hidden sheets in the example image. |
|
The “All Sheets” dialog shows only matched sheets and automatically selects the first matched sheet in the list when user start typing in the search box. (Matching is case-insensitive.) |
|
The “All Sheets” dialog matches the active sheet when the input value is empty. |
|
If the workbook is too short to fully display the "All Sheets" dialog, the dialog will automatically hide the search box. |
|
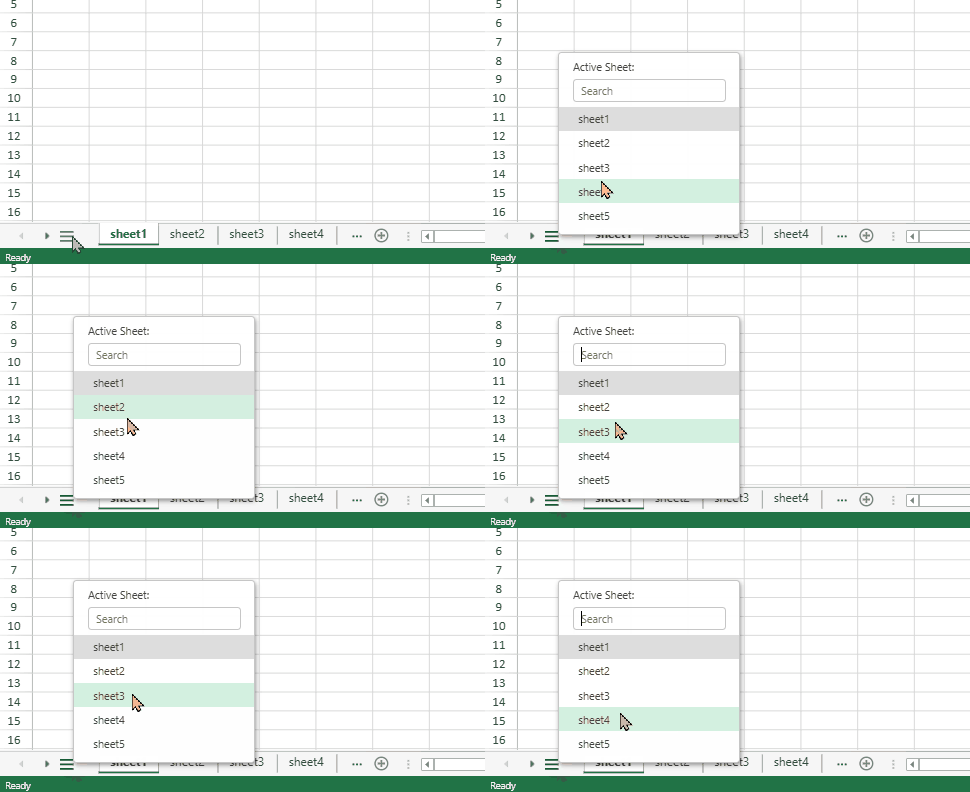
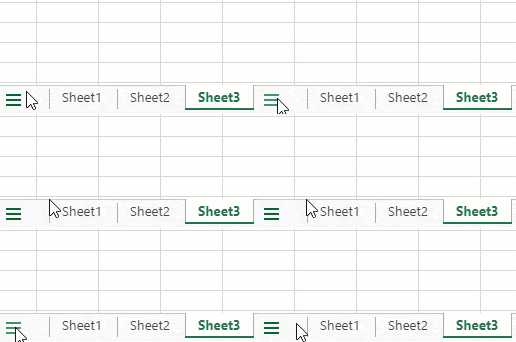
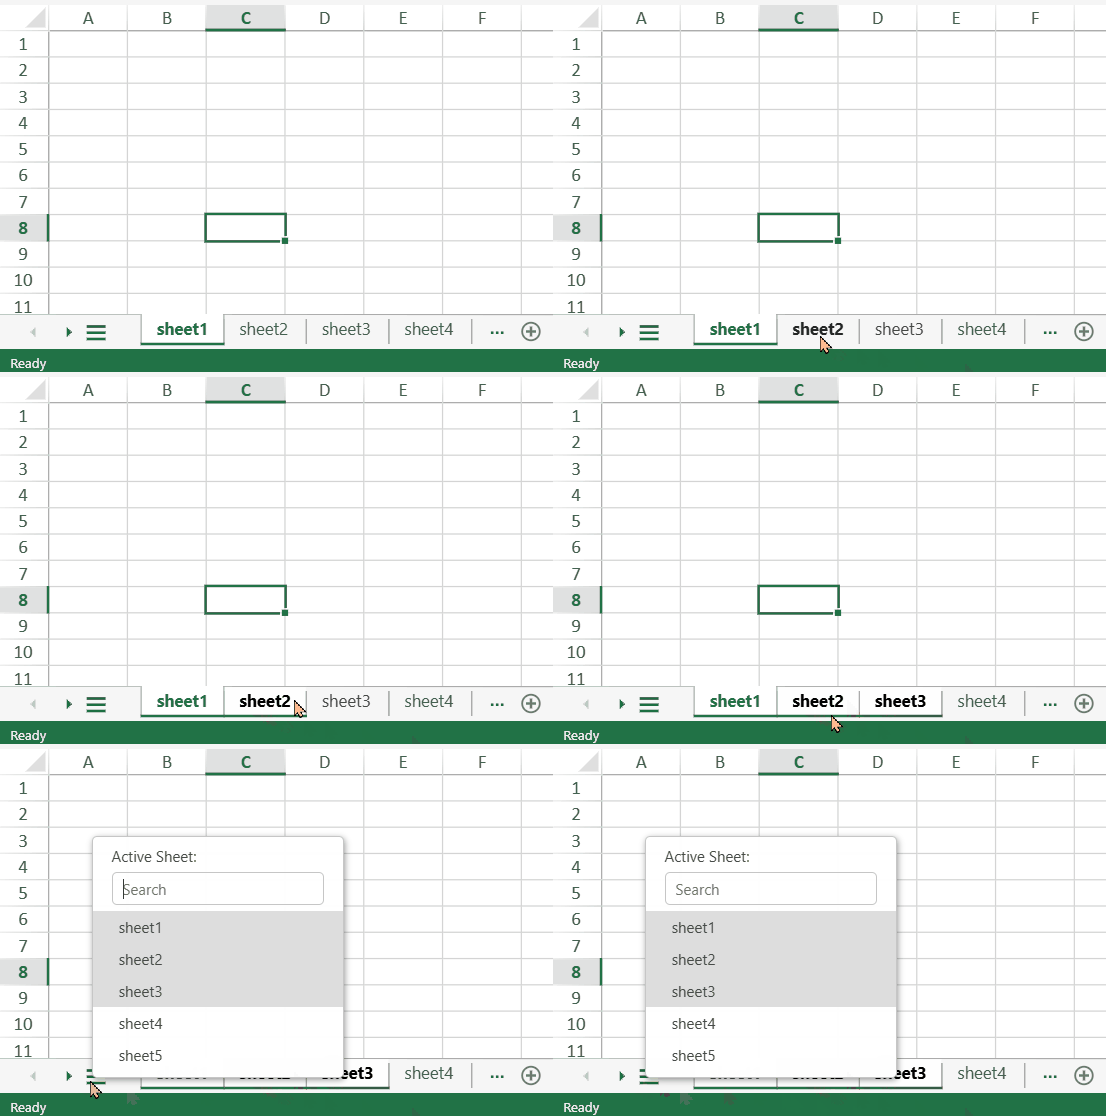
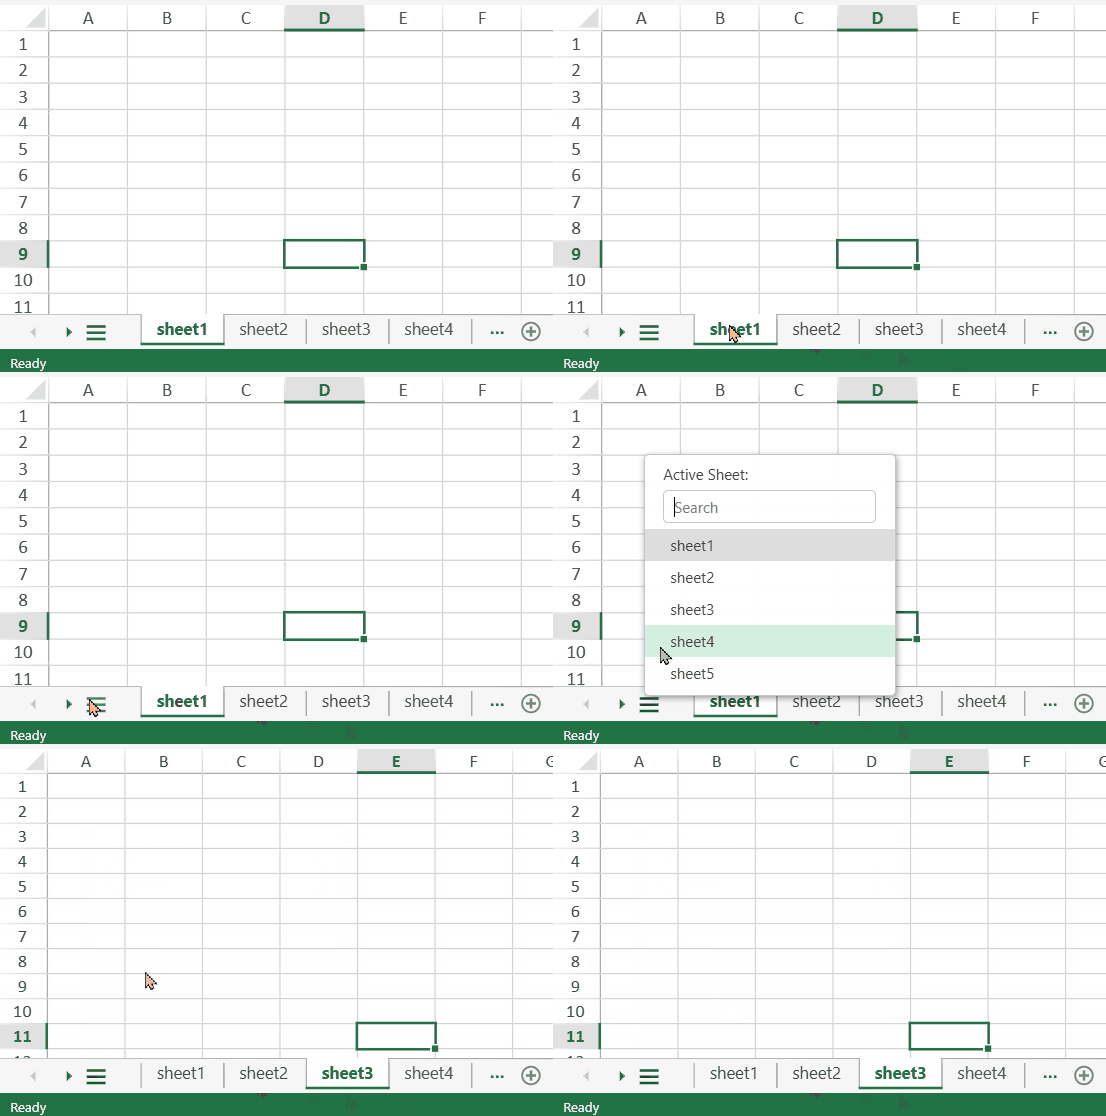
Notes:
The search feature also supports keyboard operation.
Up & Down Arrow: Move selection up or down.
Enter: Set the selected worksheet as the active one.
ESC: Close the “All Sheets” dialog.
Using SpreadJS Designer
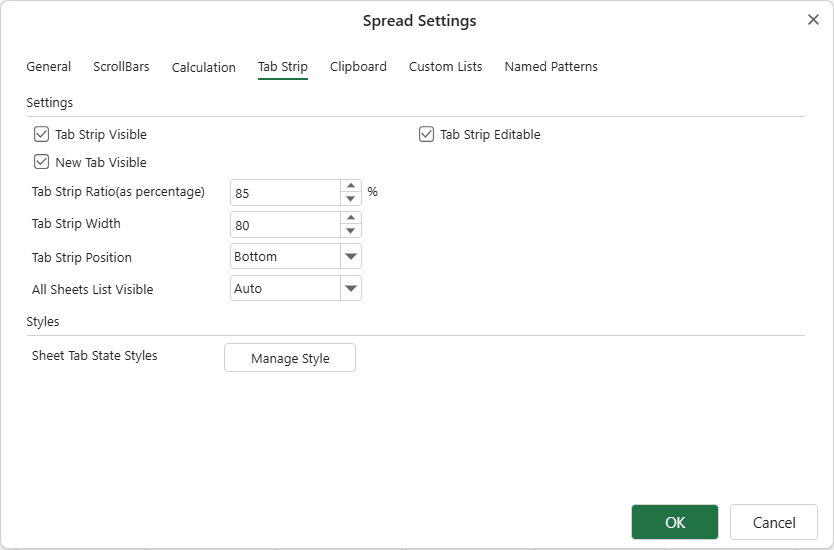
You can also set the tab strip options using SpreadJS Designer by accessing the TabStrip settings in the SETTINGS ribbon tab as shown below: