
Quick Start
This quick start will guide you through the steps of adding FlexViewer control to the application, binding it with a document source, i.e., GcPdf, and loading the PDF in the FlexViewer control.
Note: To use GcPdf as the document source for your application, you need to install GcPdf NuGet package to add the GcPdf references to your application.
To achieve it, follow these steps:
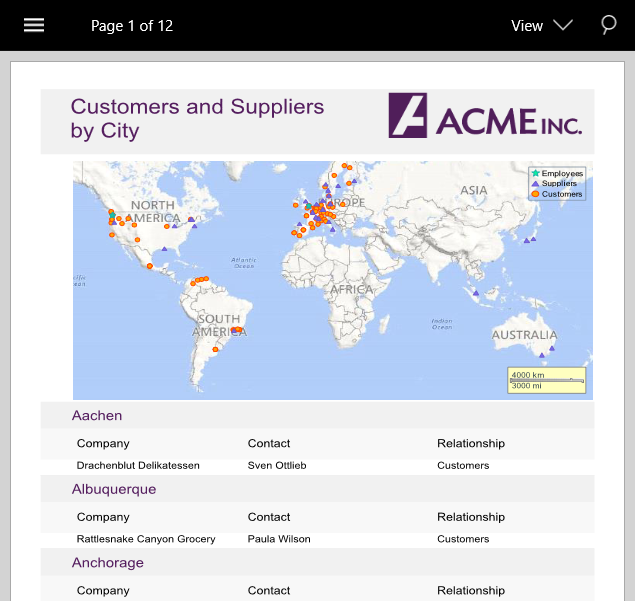
The following image shows how the FlexViewer control appears after completing the steps above.
Step 1: Add FlexViewer control
Add a new content page (Name:
QuickStart.xaml) to your Mobile App (Xamerin.Forms) and include references as shown below.<?xml version="1.0" encoding="utf-8" ?> <ContentPage xmlns="http://xamarin.com/schemas/2014/forms" xmlns:x="http://schemas.microsoft.com/winfx/2009/xaml" xmlns:local="clr-namespace:FlexViewerXamarin" xmlns:c1="http://schemas.grapecity.com/xf/2019/xaml" x:Class="FlexViewerXamarin.QuickStart"> </ContentPage>
2. Initialize the FlexViewer control by adding the following markup for the control between the <ContentPage> </ContentPage> tags.
```xml
<c1:FlexViewer x:Name="flexViewer"/>
```
Step 2: Bind FlexViewer with document source
Add the following references in the QuickStart.xaml.cs file.
using Xamarin.Forms;
using Xamarin.Forms.Viewer;
2. Add the following code to bind the FlexViewer control with the document source. In this sample, we have used GcPdf as the document source.
```csharp
Assembly assembly;
//Bind FlexViewer control to the PDF
assembly = IntrospectionExtensions.GetTypeInfo(typeof(MainPage)).Assembly;
Stream stream = assembly.GetManifestResourceStream("App4.Resources.DefaultDocument.pdf");
```
Step 3: Load the PDF document
Load the PDF document in the FlexViewer control using the following code. In this example, we have added a PDF document to the Resources folder to load it in the viewer.
//Load PDF document to the viewer
flexViewer.LoadDocument(stream);
Step 4: Run the Project
In the Solution Explorer, double click App.xaml.cs to open it.
Complete the following steps to display the FlexGrid control.
To return a Content Page: In the class constructor App(), set the Forms XAML Page QuickStart as the MainPage.
The following code shows the class constructor App() after completing this step.
public App()
{
    // The root page of your application
    MainPage = new QuickStart();
}
Some additional steps are required to run the iOS and UWP apps:
iOS App:
In the Solution Explorer, double click AppDelegate.cs inside YourAppName.iOS project, to open it.
Add the following code to the FinishedLaunching() method.
C1.Xamarin.Forms.Viewer.Platform.iOS.FlexViewerRenderer.Init();
UWP App:
In the Solution Explorer, expand MainPage.xaml.
Double click MainPage.xaml.cs to open it.
Add the following code to the class constructor.
C1.Xamarin.Forms.Viewer.Platform.UWP.FlexViewerRenderer.Init();(Optional) In case you compile your UWP application in Release mode, you need to explicitly add the following code to the OnLaunched method in your App.xaml.cs to include the correct assemblies within your application.
var assembliesToInclude = new List<Assembly>();
assembliesToInclude.Add(typeof(
   C1.Xamarin.Forms.Viewer.Platform.UWP.FlexViewerRenderer).GetTypeInfo().Assembly);
assembliesToInclude.Add(typeof(C1.UWP.Viewer.FlexViewer).GetTypeInfo().Assembly);
Xamarin.Forms.Forms.Init(e, assembliesToInclude);
Press F5 to run the project.