
Linear Gauge QuickStart
The following quick start guide is intended to get you up and running with Linear Gauges for WPF. You will begin in Visual Studio, create a new project, add a Linear Gauge to your application, and add the gauge value.
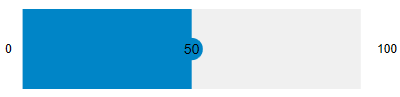
The following image depicts a Linear Gauge that displays the value property set at 50.
Set up the Application
To set up your project and add the Linear Gauge control to your application, complete the following steps:
Create a new WPF Application project in Visual Studio.
Right-click your project in the Solution Explorer and select Manage Nuget Packages option.
Install the latest version of C1.WPF.Gauge package.
The C1.WPF.Gauge package installs the following DLLs:
C1.WPF.Gauge
C1.WPF.Core
C1.WPF.DX
C1.WPF.Rendering
Add the Control. Navigate to the Toolbox and drag and drop the Linear Gauge control on the XAML designer. When the Linear Gauge control is dropped on the form, it displays a default pointer value of 25.
Set Gauge Value
Set the Value property of Linear Gauge to 50.
xml
<c1:C1LinearGauge Name="linearGauge" Value="50" HorizontalAlignment="Center" Margin="0,117,0,0" VerticalAlignment="Top" Width="404"/>csharp
linearGauge.Value = 50;For more information about Value, see Values.
Display the values on the Linear Gauge control as text. For this purpose, set the TextVisibility property.
xml
<c1:C1LinearGauge Name="linearGauge" Value="50" TextVisibility="All" HorizontalAlignment="Center" Margin="0,117,0,0" VerticalAlignment="Top" Width="404"/>
<TextBlock Text="Percentage of Work Completed" HorizontalAlignment="Center" Foreground="Black"/>
csharp
linearGauge.TextVisibility = C1.WPF.Gauge.GaugeTextVisibility.All;For more information about Text Visibility, see Face and Cover.
Run Application
Build and run to view the final Linear Gauge application.