- FlexSheet for WPF Overview
- FlexSheet Key Features
- Quick Start: FlexSheet for WPF
- Customizing Appearance
-
Working with C1FlexSheet
- Inserting Worksheets in FlexSheet
-
Sheet Operations
- Inserting and Deleting Rows and Columns
- Filtering Columns
- Using Find and Replace
- Keyboard Navigation
- Tab Navigation
- Drag and Drop Rows or Columns
- Data Binding
- Data Validation
- Freezing and Unfreezing Rows and Columns
- Grouping and Ungrouping Rows
- Removing Duplicate Rows
- Protect Sheets and Cell Locking
- Sheet Renaming
- Sheet Reordering
- Sorting Columns
- Undo Redo Operations
- Cell Operations
- Importing and Exporting
- Using Formulas
- Printing Data
Drag and Drop Rows or Columns
C1FlexSheet allows you to drag and drop rows or columns in a sheet. AllowDragging method is used in C1FlexSheet to drag and drop rows and column. Sometimes, you need to reorder the columns or rows to view their data side-by-side. This reordering can be performed using the Drag and Drop in C1FlexSheet.
In XAML
You can implement dragging and dropping of columns in XAML View using the following code:
<c1:C1FlexSheet x:Name="flexsheet" AllowDragging="Columns" AllowSorting="True" Margin="0,25,0,0"/>
Rows can also be dragged and dropped in a worksheet.
When AllowDragging property is used to drag and drop rows in XAML View, sorting is disabled automatically. Following code implements dragging and dropping of rows in C1FlexSheet control.
<c1:C1FlexSheet x:Name="flexsheet" AllowDragging="Rows" />
In Code
Following lines of code implement the dragging and dropping of columns in a worksheet:
vbnet
flexsheet.AllowDragging = AllowDragging.Columns
csharp
flexsheet.AllowDragging = AllowDragging.Columns;
For example, you have a list of customer and their details in a sheet and want to reorder the Age and Address columns. You can drag the Age column and drop it after the Address column.
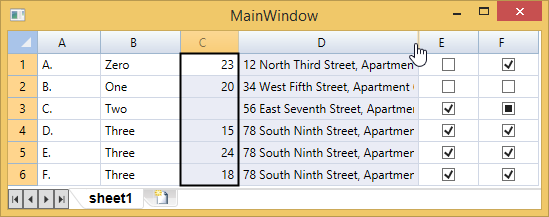
After you drop the Age Column after the Address column, it looks similar to the following:
AllowDragging property can also be applied to the rows in Code view. The following code shows how to implement the drag and drop functionality on rows. However, sorting needs to be disabled to drag and drop rows.
vbnet
flexsheet.AllowDragging = AllowDragging.Rows
csharp
flexsheet.AllowDragging = AllowDragging.Rows;
flexsheet.AllowSorting = false;
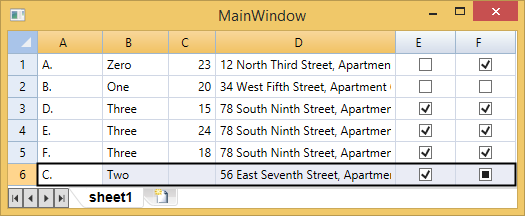
When you drag and drop a row, it will look similar to the image given below. In our case, we dragged the third row and dropped it after the sixth row.