Setting the Dock Mode
You can set the dock mode at design time using the C1DockTabControl.DockMode property.
To set the dock mode, follow these steps:
Open the .xaml page in Visual Studio.
Place your cursor between the <Grid></Grid> tags.
In the Toolbox, double-click the C1DockControl icon to add the control to the project.
Place your cursor between the <c1:C1DockControl> and </c1:C1DockControl> tags.
In the Toolbox, double-click the C1DockTabControl icon to add the control to the project.
Set the DockMode property to Sliding. Your XAML markup will now look similar to this:
<c1:C1DockControl>
        <c1:C1DockTabControl DockMode="Sliding"></c1:C1DockTabControl>
</c1:C1DockControl>
Place your cursor between the <c1:C1DockTabControl> and </c1:C1DockTabControl> tags.
In the Toolbox, double-click the C1DockTabItem icon to add the control to the project and set the C1DockTabItem.Header property to Toolbox. Your XAML should look similar to the following:
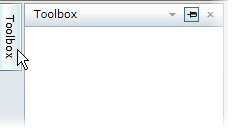
<c1:C1DockControl>
            <c1:C1DockTabControl DockMode="Sliding">
                 <c1:C1DockTabItem Header="Toolbox"></c1:C1DockTabItem>
            </c1:C1DockTabControl>
     </c1:C1DockControl>
Run your project. The C1DockControl will resemble the following image:

Click the Toolbox tab to slide the window into view.