


UniformGrid Quick Start
The following quick start guide is intended to get you up and running with UniformGrid. In this quick start, you'll create a new project in Visual Studio, add a C1UniformGrid to your application, set the Columns and FirstColumn properties, and then run the application.
Step 1
To set up your project, complete the following steps:
In Visual Studio, select File | New Project.
In the New Project dialog box, select Windows Desktop from the Templates in the left-hand pane.
New Project Dialog
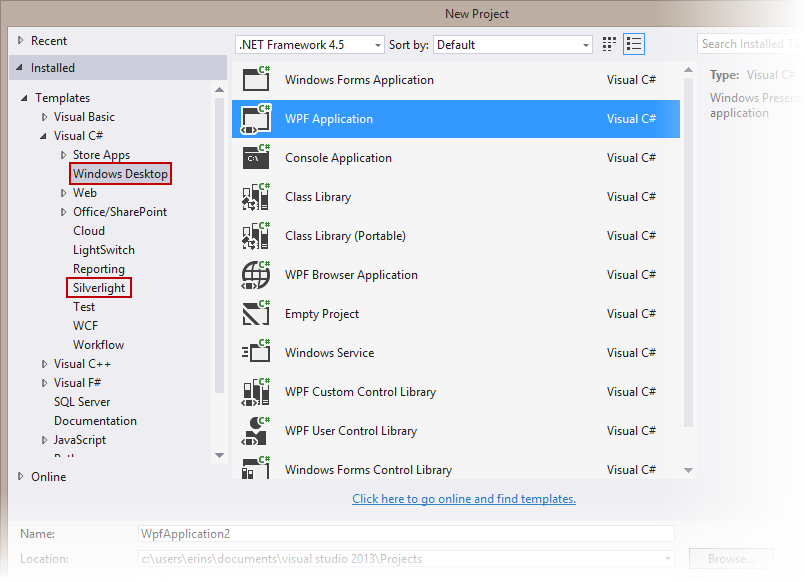
Select WPF Application.
Enter a Name for your project, for example "QuickStart", and click OK. In a WPF Application, the MainWindow.xaml file will open.
Add the following assemblies to your application by right-clicking the References folder and selecting Add Reference:
In the next step, you'll add a UniformGrid control.
Step 2
Remove the Grid tags from your project.
In the Visual Studio Toolbox, drag a C1UniformGrid control to the page.
Place your cursor in between the <c1:C1UniformGrid> tags and enter the following XAML to add the grid's child elements, or numbered cells in this case:
<Border Background="#FF005B84" >
    <TextBlock Text="0" />
</Border>
<Border Background="#FF008B9C" >
    <TextBlock Text="1" />
</Border>
<Border Background="#FF00ADD6" >
    <TextBlock Text="2" />
</Border>
<Border Background="#FF497331" >
    <TextBlock Text="3" />
</Border>
<Border Background="#FF0094D6" >
    <TextBlock Text="4" />
</Border>
<Border Background="#FF9DCFC3" >
    <TextBlock Text="5" />
</Border>
<Border Background="#FFA5DDFE" >
    <TextBlock Text="6" />
</Border>
<Border Background="#FFE0EEEF" >
    <TextBlock Text="7" />
</Border>
<Border Background="CornflowerBlue" >
    <TextBlock Text="8" />
</Border>
<Border Background="LightYellow" >
    <TextBlock Text="9" />
</Border>
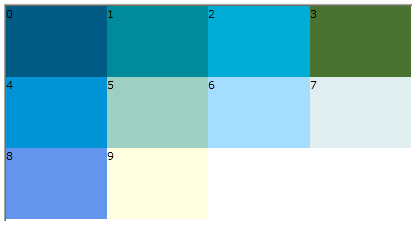
If you run the application at this point, it looks like the following image:
Step 3
In this step, we'll set the set the Columns, FirstColumn, and Width properties. The Columns will set the number of columns in the grid, and the FirstColumn property will determine how many empty cells will appear in the first row.
Place your cursor within the opening <c1:C1UniformGrid> grid tag.
Set the Columns, FirstColumn, and Width properties using the following XAML:
<c1:C1UniformGrid Columns="3" FirstColumn="2" Width="300">There will be two empty cells in the first row of the grid, as specified with the FirstColumn property.
In the next step, you will run the application to see the results.
Step 4
Now you're ready to run the application. From the Debug menu, select Start Debugging. Your application will look similar to the following:
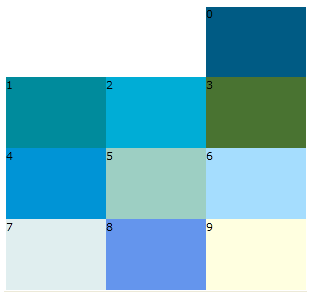
Notice the two empty cells in the first row.
Congratulations! You have successfully completed the UniformGrid quick start.